Application Settings View
|
In this article |
Display this company name in reports
The Export to PDF functionality uses this text in the header of each PDF page. The company name that is entered here displays in the upper left of the exported report, just above the report name, when exported in PDF format.
The default company name is "Spirion".

Enable Password Strength
The Enable Password Strength setting forces all passwords entered within the Spirion application to adhere to the selected setting. When disabled, passwords can be any length and contain any characters.
Password strength is disabled by default.
The following settings are available:
- Use Strong: Passwords must be at least six characters and contain at least one letter and one non-letter.
- Use Stronger: Passwords must be at least eight characters and contain at least three of the following four types of characters:
- Lowercase letters
- Uppercase letters
- Numbers
- Symbols (i.e., !@#$%^&*:,./, etc.)

Restrict allowed email address domains (separate by semicolon)
This setting gives the ability to restrict the email address users are able to enter to only the specified domains. Enter each domain you wish to allow, separated by a semicolon. If a user attempts to enter an email address using a domain that is not designated here, a warning message displays that the domain is not allowed. If this field is left blank, users are allowed to enter any domain they wish.
There are no restrictions by default (the field is blank).

The setting affects the entry of an email address domain in the following places:
- In the Edit Endpoint dialog
- When exporting results
- When exporting a report
- In Workflow Notifications
- When exporting Agent logs
- In the edit user dialog
Delayed policy confirm
When this setting is disabled, which is the default setting, policies are processed, made available to the endpoint, and then applied by the endpoint. The endpoint then reports the policy state to the Console and the endpoint can then request additional policies.
Policy confirmation is a resource intensive process and may lock endpoints or other service tasks, causing a negative performance impact. If that happens, this setting should be enabled and the confirmation is executed by the Update Policy States service task at a later time instead of when an endpoint reports it. Enabling this setting lowers the pressure on resources, but it does not prevent endpoints from checking for new policies.
If this setting is enabled, policies are still processed, made available to the endpoint and then applied by the endpoint. However, there is no confirmation that the policy has been applied by the endpoint. The Policies State on the Status tab shows as 'Pending Confirm'. The Update Policy State service job needs to be executed to update this state. When Delayed Policy Confirm is enabled, the Pending Confirm state is set for an endpoint after the endpoint confirms it policies. The state clears after the service job has executed.
The setting should be enabled if the Console is experiencing problems with deadlocks or timeouts.

Minimum load when using distributed searching (GB)
When using Discovery Teams to search a target, this is the minimum amount of data, in gigabytes, that is assigned to each team member. The amount of data from all targets is calculated and split into data sets, with no data set being less than the value of the minimum load unless the size of a data set is less than the value in the minimum load and it cannot be grouped with any other data sets, in which case a team member is assigned a data set smaller than the minimum load. This setting is only used when load balancing is enabled. Valid values are 0-999,998. A value of 0 disables this setting. The default value is 2.
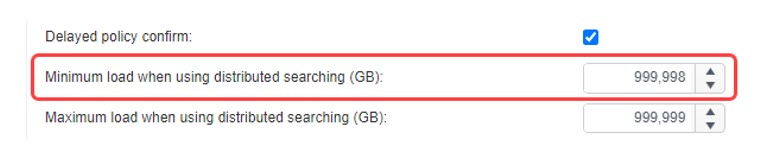
Maximum load when using distributed searching (GB)
When using Discovery Teams to search a target, this is the maximum amount of data, in gigabytes, that a team member searches. The amount of data from all targets is calculated and split into data sets, with no data set exceeding the value in the maximum load unless a single folder exceeds the value in the maximum load, that folder is not divided and is searched by a single team member. Valid values are 1-999,999. The default value is 5.

Minimum number of items when using distributed searching
When using the minimum number of items while using distributed searching, this is the minimum amount of items that can be assigned. Valid values are 0-999,999. The default value is 20,000.

Maximum number of items when using distributed searching
When using the maximum number of items while using distributed searching, this is the maximum amount of items that can be assigned. Valid values are 0-999,999,999. The default value is 100,000.

Import Results
Import Results is the processing of endpoint data that has been sent to the Console and inserting them into the database.

The following settings are available:
- As they Arrive: This is the default setting and the way all Console versions prior to version 6.1 functioned. As soon as the data is received by the Console, it is processed into the database unless the database is locked for another service job. If the database is locked, the results are queued and imported as soon as possible. An advantage of this setting is the results are processed in 'near real-time.'
- On a Schedule: All the data from endpoints are queued until the importing service job executes. An advantage of this is the database locks much less frequently, typically once per day and provides better overall performance.
Mask matches during import
When enabled, the Console automatically masks matches on import and therefore store only masked matches in the database rather than the matches themselves. Using this mask feature helps ensure that the database never contains the sensitive information seen on endpoints regardless of any settings configured via policy.
Masking matches during import is disabled by default.

Once enabled, use the Manage button to display the Select Match Types dialog and select the specific match types to be masked during import
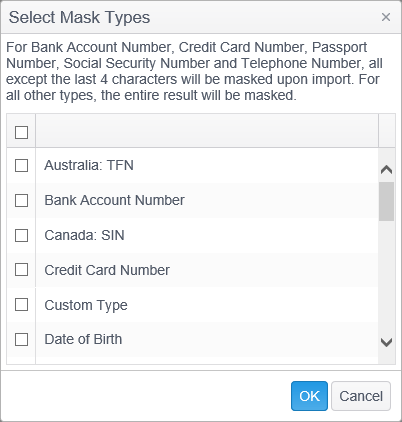
Select each item using a single left click of the mouse, or select a range by holding down the Shift key and left clicking the mouse. When the selection is complete click the OK button.
Apply multiple rows locations during import
If an action (shred, redact, encrypt, quarantine, Restrict Access, recycle, ignore), has been applied to a location on the endpoint, when this action is reported to the Console during importing, the Console searches for all previously imported search results of this location and applies the same action to them. In normal operations it is recommended that this setting remain enabled. If you find that imports are taking an excessively long time to complete or there are timeouts occurring in the ServerService log, including ApplyMultiRowLocationActions in the text of the exception details, then you may disable this setting. Disabling this setting speeds up the importing of results into the Console database by applying the action only to the currently imported results and not to any previously imported results. When disabled, it is recommended that the Actions Clean Up service job be scheduled to run on a regular basis to correct any inconsistencies.
This setting is enabled by default.

Add unmanaged endpoints to the Default Tag(s) of the source endpoint
When this setting is enabled and an unmanaged endpoint has been searched remotely from another endpoint (the Source endpoint) that is in the Default Tag, the unmanaged endpoint is added to that same Default Tag as long as the unmanaged endpoint is not part of any other tag (excluding the All Endpoints tag). If the unmanaged endpoint already belongs to any other tag, then it is not added to the Default Tag. When this setting is disabled, which is the default setting, and the unmanaged endpoint is searched remotely, the unmanaged endpoint is not added to that Default tag.

Display all Endpoint States in Endpoint Status tab
When this setting is enabled, the Endpoint State column of the Endpoint Status view displays the last reported state for the selected endpoint for both task related and interactive states. When disabled, it displays the last reported interactive state only. This setting is disabled by default.

Keep endpoint activity state history
When enabled, the Console records states the endpoints send to the Console. The maximum states to keep determines how many of those states are kept per endpoint. Endpoint states are statuses such as when the endpoint was opened or closed or when a search was started, paused, canceled or completed interactively. They do not include states related to tasks, which are initiated from the Console or via a scheduled task policy.

Click the Manage button and the Mange Endpoint Activity States dialog opens, displaying maximum states to keep and the states to include.
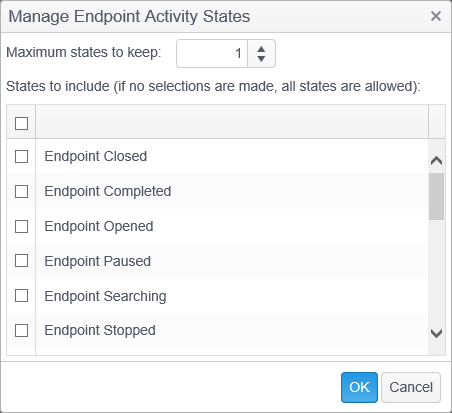
Maximum states to keep: Valid values are 0-999999. A value of 0 means keep all states. The default value is 1 which keeps only the most recent state. It is recommended to keep this value at 1 except during troubleshooting.
States to include (if no selections are made, all states are allowed): To include an activity state from the list, click the checkbox to the left of the activity state you wish to include and a check mark appears. To exclude an activity state from the list, click the checkbox to the left of the activity state to remove the check mark. When you have finished, click the OK button to save your changes. Click the Cancel button to discard your changes. Click the checkbox on the top left of activity states header and it selects all states unless all are already selected in which case it deselects all. If none are checked all states are included. If some are checked only the checked states are included.
You can view the State History of an endpoint by viewing the State History tab of the Status tab in the Endpoint Status Detail.
Endpoints search progress update interval (s)
When this settings is enabled, endpoints send search progress updates to the Console. The value entered is the time, in seconds, between each update. The search progress for an endpoint can be viewed on the Searches in Progress tab on the Endpoint Status Detail page. The minimum value is 60. If you enter a value less than 60 it automatically changes to 60 upon clicking elsewhere on the page or selecting another page. This setting is enabled by default and the default value is 300.

Days to keep completed search progress information
By default, search progress information for completed searches is kept for 7 days. Valid values are 0-9,999. A value of 0 means the search progress information of a completed search is deleted the next time the Importing service job executes.
The default value is 7 which causes search progress information to be deleted 7 days after the search has completed.

Days to keep uploaded files after importing succeeds
By default, search results sent by the endpoints to the Console are deleted from the disk after being successfully imported into the database. In normal operations, this field should be set to 0 to ensure the default behavior. During troubleshooting, the support team may request that you put a value in this field to save those files for analysis. Valid values are 0-9999.
The default value is 1 which causes uploaded files to be deleted 1 day after successful import.
Days to keep uploaded files after importing fails
By default, search results sent by the endpoints to the Console are saved on the disk if importation into the database fails. In normal operations, this field should be set to 7 to ensure the default behavior. During troubleshooting, the support team may request that you change the value in this field to save those files for a longer period of time for analysis. Valid values are 0-9999.
The default value is 7 which causes uploaded files to be deleted 7 days after a failed import.

Days to keep unfinished uploaded files
By default, diagnostic information, log data, search results and location actions sent by the endpoint to the Console are saved on the disk during uploading. In normal operations, if uploading fails to complete, the unfinished uploads are deleted after 30 days. Unfinished uploads have a status of Uploading in the State column of the Uploads tab on the Endpoint Status Detail.
The default value is 30 which causes unfinished uploaded files to be deleted after 30 days. Valid values are 1-9999.

Days to keep uploaded endpoint diagnostic information (Gather Data)
By default, diagnostic information sent by the endpoints to the Console is kept on the disk for 7 days. In normal operations, this field should be set to 7 to ensure the default behavior. During troubleshooting, the support team may request that you change the value in this field to save those files for a longer period of time for analysis. Valid values are 0-9999.
The default value is 7 which causes Gather Data information to be deleted 7 days after upload.

Days to keep completed remote searches
This setting is the number of days the remote search results are kept. This default is set to 7 days.
Days to keep successful, but not imported remote search parts
This setting is the number of days to keep successful, but not imported remote search parts. When a not imported group of search parts is present, the whole search is kept active until it is imported or until it is removed according to the option selected. The default is 15 days.
The failed column now displays Total/Permanently information. The permanently failed and historically failed groups count towards the total number of groups.
Days to keep export links
This setting is the number of days until an exported link is marked for deletion. Exported links are created when you export results, reports or logs to an email recipient using the 'Send as Link' option. When the link is created, the value in the "Days to keep export link" field determines the number of days until the link is marked for deletion. So even though the link may have expired, you can still access it because it has not actually been deleted. The process of deleting a link happens the next time an export, either manual or scheduled, has been run after a link has expired.
For example, if this value is set to 2 when a link is exported, then that link is marked for deletion 48 hours after it was created. You can still access the link after the 48 hours if no other export processes have run since then. Once another export process has been run, the link is deleted and can no longer be accessed.
The default value is 3 days.

Ask for the reason when ignoring results
The setting determines whether or not a Console user is prompted for a reason when using the Ignore action on a result when working on the Results tab.
When this setting is enabled and a Console user ignores a result, they are presented with a list of pre-defined reasons as to why the result is being ignored. Reasons are defined in the Manage Ignore Reasons setting.
This setting is disabled by default.

Update Data Cache
The Update Data Cache Service Task can either run on a schedule or right after the relevant Service Tasks complete. The default is to run After relevant data update.

The Update Data Cache Service Task is used to improve performance of Spyglass calculations for more efficient data retrieval. The Console uses two types of caches. Both can be used and generated independently. They contain pre-calculated data used by Spyglass widgets.
The possible values for this setting are as follows:
- After Relevant Data Update - When set to After Relevant Data Update, The Update Data Cache Service Task is executed immediately after the Importing, Endpoints Merging, Purge Endpoint Activity, Purge Logs, Purge Match Previews, Purge Matches, Purge Messages, Purge Results or Prune Endpoints Service Tasks. This is the default setting.
- On a Schedule - If you prefer not to have the Update Data Cache service task executed each time a relevant service completes, you may instead select On a Schedule and specify when it executes. Select 'On a schedule' and then click the Manage button to define the schedule.
Allow entering a custom reason when ignoring results
When this setting is enabled, users have the ability to enter a custom reason when ignoring a result from the Console or the endpoint.
This setting is checked by default.
Manage Ignore Reasons
This provides the ability to add, modify and remove ignore reasons. The ignore reasons are the reasons from which a user may select when a result is ignored from the Console or the endpoint.
The default reasons are False Positive, Acceptable Risk and Manager Approval though they are unused by default as the setting "Allow entering a custom reason when ignoring results" is disabled by default.

Click the Manage button and the Mange Ignore Reasons dialog opens, displaying the list of ignore reasons.
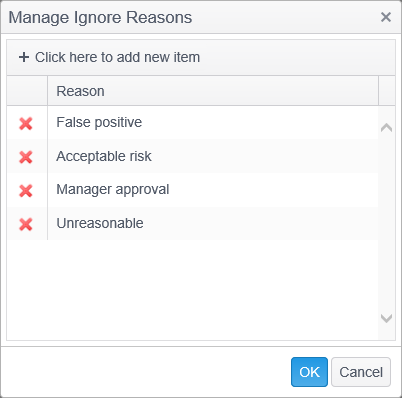
To remove an ignore reason from the list, click on the red 'X' to the left of the reason you wish to remove and the reason is deleted.
To add an ignore reason to the list, click on the green + button where it reads, "Click here to add new item." Type the name of the ignore reason, press the enter key and the ignore reason is added to the list.
To modify an existing ignore reason, double-click on the reason, make your changes and press the enter key.
When you have finished, click the OK button to save your changes. If you have entered a duplicate ignore reason you see the following error message:"The ignore reasons are not unique".
Click the Cancel button to discard your changes.
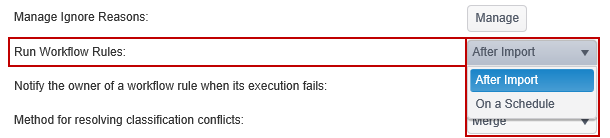
Run Workflow Rules
Workflow Rules can either run on a schedule or right after the Importing service job completes.
The default is to run After Import.
Classifications are assigned through the execution of workflow rules in the Run Workflow Rules service job. This task takes all newly imported searches since the last task execution, processes them one at a time, executes the rules, sets classifications and assignment and sends out notifications. A location may match multiple rules, each with a different classification. If that happens, the location is assigned multiple classifications.
For example, if a document contains SSNs and telephone numbers, and there is one rule which classifies SSNs as high and another rule which classifies telephone numbers as low, the entire location is assigned both classifications. The order of precedence is the order in which the Classifications are listed in the Workflow Rules List (when not sorted by name) with the top-most classification (other than None) having the highest precedence and the bottom-most classification having the lowest precedence.
The task executes rules search-by-search, and may assign an additional classification from each execution. This means that there could be a situation where running rules against the first search assigned a rule with a higher classification than the rules that were run against a more recent search. In this case, the location retains both classifications. If no rules matched a location in the most recent search, it retains the classification and rules that were previously assigned.
- After Import: When set to After Import, the workflow rules are executed immediately after the Importing service job. Classifications, assignments and notifications occur as the results are imported. This is the default setting.
- On a Schedule: If you prefer not to have the workflow rules executed each time results are imported, you may instead select On a Schedule and specify when the rules execute. Select 'On a schedule' and then click the Manage button to define the schedule.
Notify the owner of a workflow rule when its execution fails
If this setting is enabled and one of the workflow rules fails to execute during the Run Workflow Rules service job, an email is generated and sent to the workflow rule owner notifying them of the failure. The owner of a rule is the user who created or most recently edited the rule. The email has a subject of 'Classification rule(s) execution errors encountered.' The body of the email contains the name of the rule which failed to execute along with details of the failure.
This setting is disabled by default.

Include manual classifications when removing classifications via workflow rule
When enabled workflow rules that are configured to remove persistent classifications also remove manual classifications applied by end users.

Windows endpoint classification settings
These settings provide the ability to configure the default position of the classification icon overlay within Windows Explorer, to configure an alternate icon position for files with specified extensions, and to specify the action when a user attempts to attach a file to a Microsoft Outlook email message on an endpoint. This feature is only available on endpoints that have the Classification email add-in enabled.

Click the Manage UI button and the Windows Endpoint Classification UI Configuration dialog opens, displaying the available settings. This setting is also configurable on the Workflow Rules Ribbon Group.

- Default Icon Position: The default position of the classification icon within Windows Explorer. The default value is Bottom Left. The following selections are available:
- Top Left
- Top Center
- Top Right
- Center Left
- Center Center
- Center Right
- Bottom Left
- Bottom Center
- Bottom Right
- Alternate Icon Position: The alternate position is always used for files with extensions listed in the Alternate Positions Extensions list. The default value is Top Left. The following selections are available:
- Top left
- Top Center
- Top Right
- Center Left
- Center Center
- Center Right
- Bottom Left
- Bottom Center
- Bottom Right
- Alternate Position Extensions: Specify which file extensions will use the Alternate Icon Position setting by entering each extension separated by a comma. The default value is avi,mov,flv,wmv,mpg,mp4.
Click the Manage Outlook button and the Windows Endpoint Classification Outlook Settings dialog opens. These settings allow you to specify the action when a user attempts to attach a file to a Microsoft Outlook email message on an endpoint. The action is based on the classification, or lack thereof, of the file being attached.
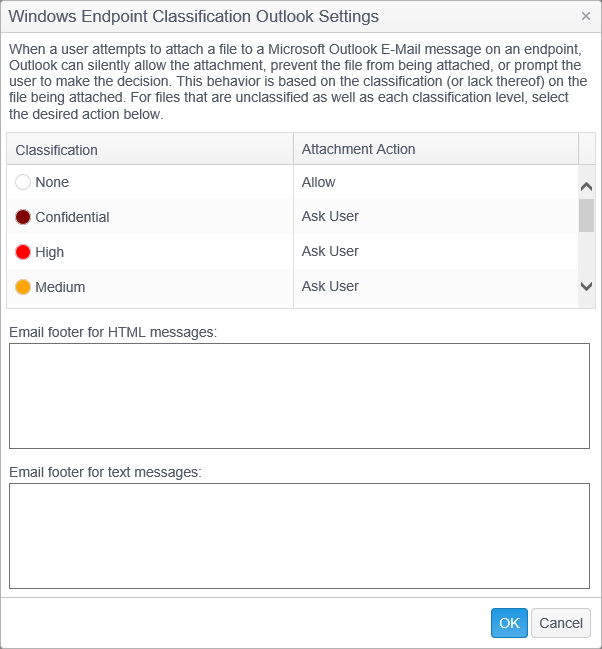
The dialog has the following columns:
- Classification: Displays the list of classifications and None. Classifications are created in Workflows.
- Attachment Action: Specify the desired action for a file with each classification level as well as for files that are unclassified (None). Clicking the mouse in this column displays a drop-down with three values. The default value is Ask User.
- Block: This prevents users from attaching the file to an email on the endpoint in Microsoft Outlook. If a user tries to attach a file which has an attachment action of Block, they are presented with a "File Blocked" dialog telling them that the attachment has been blocked.
- Allow: This silently allows the user to attach the file to an email on the endpoint in Microsoft Outlook.
- Ask User: This prompts users to make the decision whether to attach the file to an email on the endpoint in Microsoft Outlook. If a user tries to attach file which has an attachment action of Ask User, they are presented with a "Confirmation" dialog telling them that they must provide confirmation prior to attaching the file.
Spirion provides you with the ability to add a custom message which is inserted into the footer of every email that you mark with a classification. The message in the footer is not visible when you are composing the email, but is added when it is sent and is visible to the recipients, and when viewing the message in your Sent items.
- Email footer for HTML messages: Enter the message as HTML markup to be added to the footer of an email. This is used for email messages that are sent in HTML or Rich Text format.
- Email footer for text messages: Enter the message in plain text to be added to the footer of an email. This is used for email messages that are sent in Plain Text format.
Synchronize classification changes with endpoints
Classification Sync ensures that any changes in a file's classification made within the Console UI are sent to and applied to the file.

Multiple email notifications subject
If multiple email notifications are due to be sent to a single recipient as a result of multiple workflow rules having been executed and multiple classifications or assignments being made, rather than sending one email for each rule, they are merged together into a single email. You may specify the subject line for the email here by entering the text and clicking Save.
The body of the merged email contains the subject and body of each individual email that has been merged.
The default is "Multiple Notifications"

Default SNMP Enterprise OID
This is the OID that is used as a default Enterprise OID value when creating an SNMP Trap notification for a Workflow rule.
The default value is 1.3.6.1.

SNMP MIB
If you are using an SNMP Trap notification, you may optionally select a MIB file to upload. Once a MIB file has been uploaded, clicking the Upload button gives you the opportunity to remove it and the following dialog displays: "There is no MIB file selected. Do you want to delete the currently uploaded MIB file?"
There is no default MIB file.

Check this URL for policy definitions updates
This URL is used to check the Spirion website for any updates to the Policy Definitions. If you attempt to set this value to empty text, the default value is automatically populated.
The default value is http://www.spirion.com/software/policydefinitions.xml

Check this URL for application updates
This URL is used to check the Spirion website for any updates to the Console. If you attempt to set this value to empty text, the default value is automatically populated.
The default value is http://www.spirion.com/version7.info

Read online help from this URL
This URL is used to launch the help documentation throughout the Console. If you attempt to set this value to empty text, the default value is automatically populated.
The default value is http://www.spirion.com/help/enterpriseConsole

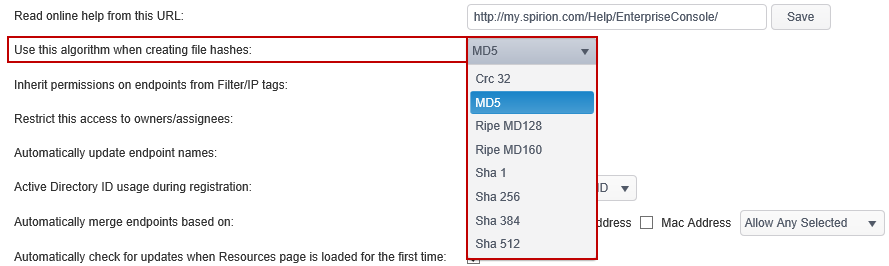
Use this algorithm when creating file hashes
When using file hashes for Global Ignore Lists or adding file hashes to search locations in a policy, it is possible to specify the algorithm to be used for the hashing. Changing this setting after hashes have been created invalidates any existing hashes. The Console and all endpoints must be configured, in unison, to use the same file hashing algorithm. The hash algorithm can be specified for endpoints with the following policy setting:
Settings\Actions\Ignore\FileHashType
The default algorithm is MD5.
Inherit permissions on endpoints from Filter/IP tags
When this setting is enabled, if you create a role that only has permissions to a filtered/IP tag that role also has permissions to the endpoints within that filtered/IP tag.
This setting is enabled by default.

When this setting is disabled and you create a role that only has permissions to a filtered/IP tag, the role does not have permissions to the endpoints within that filtered/IP tag. To allow the role have permissions to the endpoints within the filtered/IP tag when the setting is disabled you would also need to grant permissions for the role to a simple tag that contains the same endpoint within the filtered/IP tag or grant permission to the endpoint explicitly.
Restrict this access to owners/assignees
When enabled, this setting allows you to restrict a user's ability to view results on the results tab and in reports and to restrict the shred, quarantine and ignore actions to only those users who are the owner or assignee by name or role. This setting only applies restrictions to users not assigned to the admin role. The default value is None.
The following settings are available:
- None: When set to None, the Console results and reports tabs do not have any additional restrictions applied.
- Actions: When set to Actions, on the results tab, remediation actions (shred, quarantine and ignore) are restricted to only those users who are the owner or an assignee by name or role.
- Views and Actions: In addition to the above, this setting also filters the results to display only those items where the logged in user is the owner or an assignee by name or role. Reports that include match or match location information only display rows where the logged in user is the owner or an assignee by name or role.

Restrict this access to assignees only
When enabled, this setting allows you to restrict a user's ability to view results on the results tab and in reports, and to restrict the shred, quarantine and ignore actions to only those users who are the assignees by name or role.

Automatically update endpoint names
When enabled, the Console automatically updates the endpoint display name and host name when an endpoint's computer name changes.
This setting is disabled by default.

Computer name is communicated to the Console during initial endpoint registration and when search results are sent to the Console. When the Console processes the results for an endpoint, if the name provided with the endpoint GUID is different than the name stored in the database, the endpoint name is updated to the new name, if this setting is enabled.
Active Directory ID usage during registration
When using Active Directory and an endpoint registers with the Console, the AD domain name is sent to the Console and the Console uses it to query AD for the GUID and resolves the endpoint.

The following settings are available:
- None: Active Directory is not accessed during endpoint registration.
- Store ID: Stores Active Directory ID during endpoint registration with the endpoint in db.
- Store ID and Merge by ID: Stores Active Directory ID during endpoint registration with the endpoint in db and additionally attempts to merge the endpoint with the known endpoint. If successful, other merge modes are ignored, even if enabled. If unsuccessful, other merge modes are taken into account. This is the default setting.
Automatically merge endpoints based on
When enabled, the Console automatically merges endpoints that have any or all of the specified criteria in common.
By default, all of the check boxes are cleared and automatic endpoint merging is disabled.

The following criteria are available:
- Hostname: The hostname is generally the computer name assigned by the OS to an endpoint.
- IP Address: The Console tracks all IPv4 addresses for endpoints. This includes all physical and virtual network adapters.
- MAC Address: The Console tracks all MAC addresses for endpoints. As with IP addresses this also includes MAC addresses from all physical and virtual network adapters.
Requirements:
- Require All Selected: The Console uses a logical AND operation when evaluating if endpoints should be merged, meaning only when all of the selected criteria are met the endpoints are merged.
- Allow Any Selected: The Console uses a logical OR operation when evaluating if endpoints should be merged, meaning if any of the selected criteria are met the endpoints are merged.
When any of the criteria above have multiple data points, a match of any of those data points results in the criteria being satisfied. For example, many systems have multiple IP addresses. If two endpoints have one common IP address then the IP Address criteria is satisfied and the endpoints are merged.
IP addresses may be assigned dynamically using DHCP. When this happens and merging is based solely on IP address, merges may not occur as intended if the IP addresses assigned to the endpoint in question by the DHCP server are different.
Automatically check for updates when Resources page is loaded for the first time
When this setting is enabled and you open the Resources page on the Admin tab, the Console automatically checks for updates to the following:
- Console
- Policy Definitions
- AnyFind Definitions
- Windows Endpoint
- Mac Endpoint
- Linux Endpoint
If there are any newer versions available, the Resources page displays the version number and the Download Update button displays.
If there are no newer versions available it reads, "No update available" and the Download Update button does not display.
If this setting is not enabled, the Console does not automatically check for updates when loading the Resources page and you need to click the Refresh button on the Resources page to manually check for updates.
This setting is enabled by default.

Include field separator indicator line in exported CSV files
Enabling this setting adds the sep=, directive at the beginning of an exported CSV file, as used in an exported Global Ignore List or in exported results. The command allows opening of CSV files in non-US versions of Excel.
This setting is disabled by default.

Show advanced report settings
Enabling this setting displays additional fields on the Report tab of the report wizard. These fields allow you to select among multiple methods to optimize a report to make it run more efficiently. This setting is disabled by default.

Display Classification Icons
When this setting is enabled, any classification icons that you have loaded are displayed when assigning or viewing classifications, or viewing the workflow rules list. When no icon is present, the selected overlay shape displays with the appropriate classification color. Disabling this setting uses the selected overlay shape as specified in the Classification Overlay Shape setting.
Classification icons display in the following locations:
- The classification column on the results grid.
- The workflow rules list.
- The classify results dialog.
- The result details dialog.
The classification drop-down for adding a classification from within the result details always displays the classification overlay shape regardless of this setting.
This setting is enabled by default.
Note: In order for classifications icons to display you must first load classification icons via the Workflows Rules ribbon group.

Classification Overlay Shape
This is the shape of the classification overlay that displays when the Display Classification Icons setting is disabled or when there are no icons loaded for a classification. The default value is Circle.
The following settings are available:
- Circle
- Square
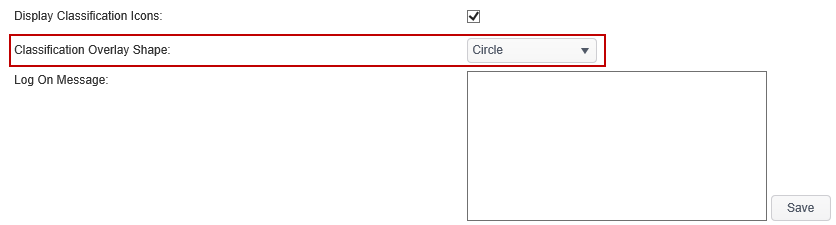
Log On Message
The Log On Message provides you with the ability to create a custom message unique to your organization, such as an EULA, that displays on the Console log on screen above the User Name. Enter your text in the message box and click Save when done. You can include a URL, which opens in a new browser window when holding CTRL and clicking the link. e.g. https://www.company.com. Basic HTML formatting is also supported.

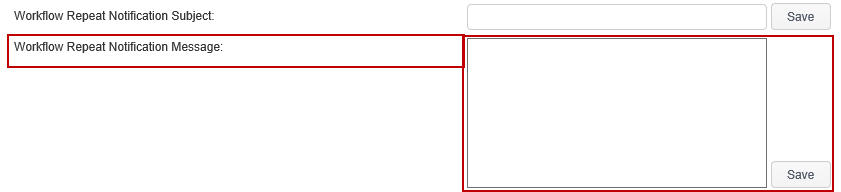
Workflow Repeat Notification Subject
The Workflow Repeat Notification Subject provides you with the ability to enter a custom subject unique to your organization for the repeat email notification that can be sent when assigned locations remain unresolved. Repeat notifications do not contain the same subject as the email notification setup in the workflow rule. If this setting is blank, the repeat notification subject uses the following: "Spirion Workflow Reminder." The repeat notification can be enabled on the workflow Notifications Group.
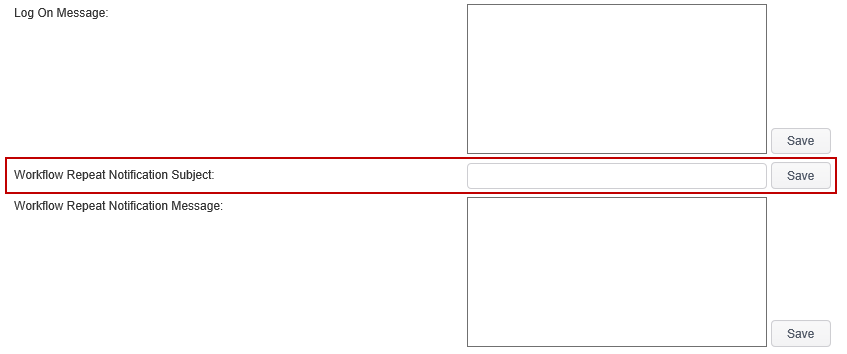
Workflow Repeat Notification Message
The Workflow Repeat Notification Message provides you with the ability to enter a custom message unique to your organization for the repeat email notification that can be sent when assigned locations remain unresolved. Repeat notifications do not contain the same message as the email notification setup in the workflow rule. If this setting is blank, the repeat notification message uses the following: "This is an automated reminder that you have assigned results that need your attention." The repeat notification can be enabled on the workflow Notifications Group.