Report List Group
The Report List group provides the functions that operate on the report list or the report specifically highlighted in the report list. These functions include creating, editing, and otherwise managing the reports.
|
In this article |
Report Button
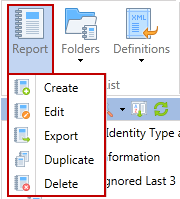
The Report button provides the ability to create, edit, export, duplicate or delete a report.
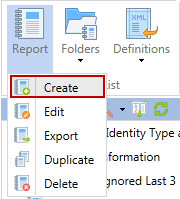
Create
To create a new report, click the Report button and then Create. Clicking Create displays the report wizard set to the Report tab. This tab includes a field for the Report Title (any unique, alphanumeric label), a checkbox to indicate if this report is used in combination with another report , a space for a Description and a space for Design Notes.
Click the Finish button to save the changes.
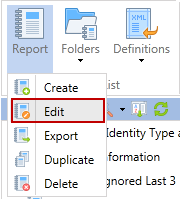
Edit
To edit an existing report, click the Edit button. Clicking Edit displays the report wizard set to the Report tab.
Holding down the Ctrl key while right-clicking on a report name in the Report List also opens the report for editing rather than viewing.
Click the Finish button to save the changes.
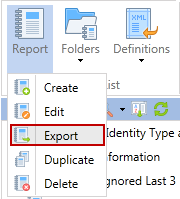
Export
To export (or save) the data from a report, click the Export button.
Clicking the button displays the Export dialog which provides several options for the export process including format, location, and schedule.
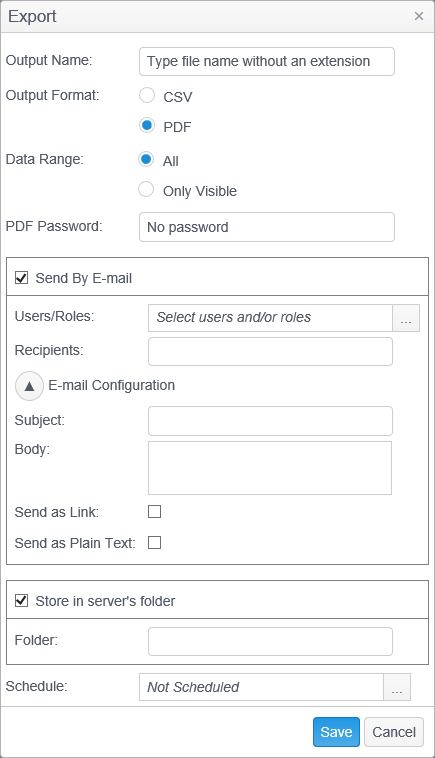
- Output Name: The name to use when saving the file or creating the e-mail attachment. Do not provide a file extension.
- Output Format: The format of the report, as follows:
- CSV: A plain text file in Comma Separated Values format that can be easily imported into Microsoft Excel or any text editor. The information in the file is not protected in any way and should be handled with care.
- PDF: An Adobe Portable Document Format file that can be opened with Acrobat or any application designed to read PDF files. PDF files can be encrypted by providing a password in the PDF Password field. If no password is provided, the information in the file is not protected in any way and should be handled with care.
- Data Range: Specify whether to save all of the report data or only the data on the current page of the Report View. When there are greater than 500 rows, a page navigator appears at the bottom of the Report View and allows you to navigate between pages of 500 rows (the page size can be modified).
- All: Save all of the rows for the report.
- Only Visible: Save only those rows on the current, visible page of the report.
- Mask Matches: If the report being exported contains the Identity Match column, this checkbox will be displayed. By checking this box, the matches will be replaced with 8 asterisk (*) characters or 4 asterisk's and the last 4 digits of the identity match. If the identity match type is a social security number, credit card number, bank account number, telephone number, or passport number the last 4 characters will be shows. If the identity match type is one listed previous and is less than 4 characters, the entire match will be shown.
- PDF Password: Specify the password to use when creating an encrypted PDF. This field is only visible when the Output Format is PDF.
- Send by E-mail: Specify that the report should be created as an e-mail attachment (in the format specified in Output Format) and sent to the specified recipients. In order to e-mail a report, you will first need to configure SMTP settings in the CAT.
- Users/Roles: When Users and Roles is selected, you can specify recipients by clicking the "..." button to the right of Users / Roles and clicking the Add User button or the Add Role button. When selecting by user, it will use the e-mail that is associated to the selected user in the Users section of the Admin tab. When selecting by roles, it will add each user that is assigned to the selected role.
- Recipients: Allows you to select the recipients of the e-mail. You may enter multiple e-mail addresses separated by a comma. If you leave select "Send by E-mail" but do not enter any e-mail recipients, when you click on the save button a message will display that reads, "The Recipients field is required."
- Subject: This is the subject line of the e-mail notification. If you leave the subject field blank, the value that was entered for the Output Name will be used as the subject.
- Body: This is the message body of the e-mail containing the report. The body may contain plain text and/or HTML markup.
- Send as Link: If you prefer not to send the output as an attachment to the e-mail, click "Send as Link", and the e-mail will include a link that the user can click on to view the report. The report will be available as a link on the Console server for the number of days specified in the Application Settings tab under "Days to keep export links".
- Send as Plain Text: If entering only text in the message body, then select this option to preserve the formatting of the message body so that it displays in the e-mail just as you entered it. If you have entered any HTML in the message body, do not select option.
- Store in server's folder: Specify that the report should be saved to a folder on the Console application server. The Console application must have write permissions to the specified folder.
- Folder: The full path to the folder (without a file name) in which the report should be saved.
- Schedule: Create and save the report on a recurring schedule using the options specified above. For example, you can specify that the report will be created each Sunday and e-mailed as an encrypted PDF to 5 different people.
Edit Export Schedule: The Edit Export Schedule dialog allows you to specify the recurring schedule:

- Frequency: Specify how often, and when specifically, the task should recur.
- One time: The task should only execute one time.
- Daily: The task should execute on a recurring schedule every X days, where X is a user specified number.
- Recur every: X days - Specify the recurrence interval. For example, specifying 2 will run the task every other day, specifying 90 will run the task every 90 days.
- Weekly: The task should execute on a recurring schedule every X weeks, where X is a user specified number. Additionally, the task should only execute on the specified days.
- Recur every: X weeks on: Sunday, Monday, Tuesday, Wednesday, Thursday, Friday, Saturday - Specify the recurrence interval. For example, specifying 2 will run the task every other week, specifying 4 will run the task every 4 weeks. Specifying 2 and Monday only will run the task every other Monday. Specifying 4, Tuesday and Saturday will run the task every 4th Tuesday and Saturday.
- Monthly: The task should execute on a recurring schedule every month or during the specified months. Additionally, the task should execute every day, or only on the selected days.
- Months: Every Month, Only Selected, Jan-Dec - Specify the recurrence interval. For example, leaving this blank will run the task every month. Checking Only Selected and then checking individual months will run the task only during those months. For example, selecting January, April, July, and October will run the task quarterly.
- Days: Every Day, Only Selected, 1-31, Last - Specify the recurrence interval. For example, leaving this blank will run the task every day during the selected month(s). Checking Only Selected and then checking individual days will run the task only on those days. For example, using the quarterly schedule above, checking 15 will run the task on Jan 15, Apr 15, Jul 15 and Oct 15. Checking Last will run the task on the last day of the specified month(s).
- Start: Date/Time: Specify the earliest time and date that the task can execute. The time is local to the client (unless "Synchronize across time zones" is selected). If the time is 12:00 PM, the task will execute at noon locally on every associated endpoint - that is, the task will execute at noon for an endpoint in New York and at noon (3PM EST) for an endpoint in San Francisco.
- Synchronize across time zones: Specifies that the Start Date/Time is GMT time. When this option is enabled, the time entered is universal across all time zones. This means that three endpoints in three different time zones will all start the task at the same time, regardless of time zone. For example if the time is 12:00 PM and this option is selected, the endpoints will all execute the task simultaneously at noon in London, 7AM (EST) in New York and 4AM (PST) in San Francisco.
- Repetition: This can be used to repeat the export and is generally only necessary when testing and it is desirable to export the task more than once per day:
- Repeat task every: X minutes/hours/days: Specify the repetition interval.
- for the duration of: Y indefinitely/minutes/hours/days: Specify a window within which to repeat.
- Maximum task run time: This determines how long the task is allowed to run.
- Indefinitely: The task will run to completion.
- minutes: Set the number of minutes that the service job has to complete. If the service job has not completed within the allotted time it will abort and its status will indicate Aborted.
- hours: Set the number of hours that the service job has to complete. If the service job has not completed within the allotted time it will abort and its status will indicate Aborted.
- days: Select the number of days that the service job has to complete. If the service job has not completed within the allotted time it will abort.and its status will indicate Aborted.
- Frequency: Specify how often, and when specifically, the task should recur.
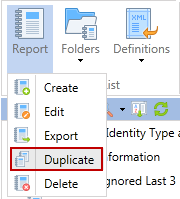
Duplicate
To duplicate a report, click the Duplicate button.
The easiest way to create a new report is to start with a similar, existing report, copy it with the Duplicate button, and make any necessary changes.
The Duplicate button makes a copy of the selected report and names it with the same name of the original report with an appended GUID. For example, copying "SSN Matches by Action" would result in a copy of that report with the name "SSN Matches by Action F649C74C-D507-4E98-A185-78D52EC70E0F." To rename and/or edit the new report, select it in the Report List and click the Edit button or Ctrl-Right click the report in the Report List.
Reports that have relationships to the selected report are not duplicated. To duplicate a report and all of its joined reports, it is necessary to duplicate each report and then edit the reports to change the relationships to point to the new, duplicated reports.
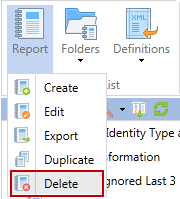
Delete
To delete a report, click the Delete button.
The Delete button permanently deletes a report and cannot be reversed. A prompt is displayed to confirm that you would like to delete the selected report (including the report name). If the report is specified in the Relationships tab of another report, you are unable to delete the report without first removing the relationship. The error, "The report could not be removed because it is used in other reports." is displayed. This ensures that a report is not accidentally broken because a supporting report was deleted.
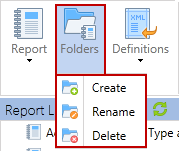
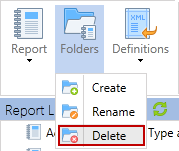
Folders Button
To make finding reports easier, they can be organized within folders through the use of the Folders button. The Folders button provides the ability to create, rename and delete report folders. Report folders are only for visual organization purposes and do not have any effect on permissions, relationships, or any other function of the reports themselves.
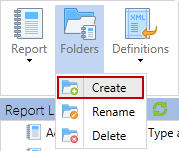
Create
To create a new top-level folder, click on any top level report (not folder), click the Folders button and select Create.
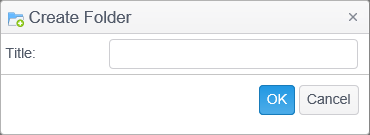
Then provide a unique name for the folder and click OK. The Report List is automatically updated and the new folder is displayed. To create a subfolder of an existing folder, click on the desired folder and then follow the steps noted above.
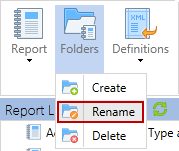
Rename
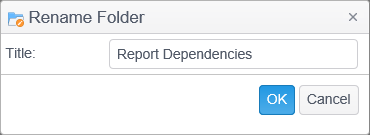
To rename an existing folder, click on the folder, click the Folders button and select Rename.
Then provide a unique name for the folder and click OK. None of the reports or sub-folders are affected. Because folders are only for visual organization, renaming folders does not affect any relationships established within reports themselves.
Delete
To delete an existing folder, click on the folder, click the Folders button and select Delete. All subfolders are also deleted, but any reports within those folders are not deleted. The reports from within a deleted folder are moved to the root level. Because folders are only for visual organization, deleting folders does not affect any relationships established within reports themselves.
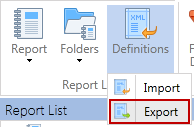
Definitions Button
Report definitions are a description of a report (for example the columns, relationships and filters) but do not contain any data from the Console database. These descriptions can be exported as xml definitions files to be imported into another Console server. The most common scenarios for exporting and importing report definitions are to share reports with other organizations via the Spirion forums or to move reports from staging/test Consoles into production.
When a report definition is exported, any reports defined in the Relationship tab are also exported. A single xml definitions file containing the report and all joined reports is created.
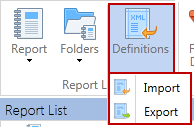
Import
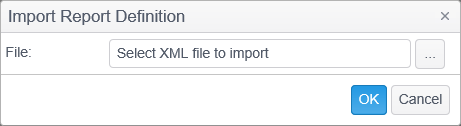
To import report definitions from an xml file and add the specified reports to the Report List, select Import.

Then use the file selection dialog to locate the report definitions xml file on disk.
During import, the report GUIDs (unique identifier for each report) specified in the xml file are compared to the GUIDs for each existing report. The following special cases are possible:
- The new GUID does not exist in the Console, but the name of the imported report is the same as an existing report. In this case, the new report is imported and two reports with identical names are displayed. Either report can then be renamed.
- The new GUID already exists in the Console. In this case, the columns specified in the reports are compared. If the columns all match, the report is not imported even if the names are different. If the columns do not all match, a new GUID is assigned to the report and it is imported. If the report is imported and the names are the same, two reports with identical names are displayed. Either report can then be renamed.
Export
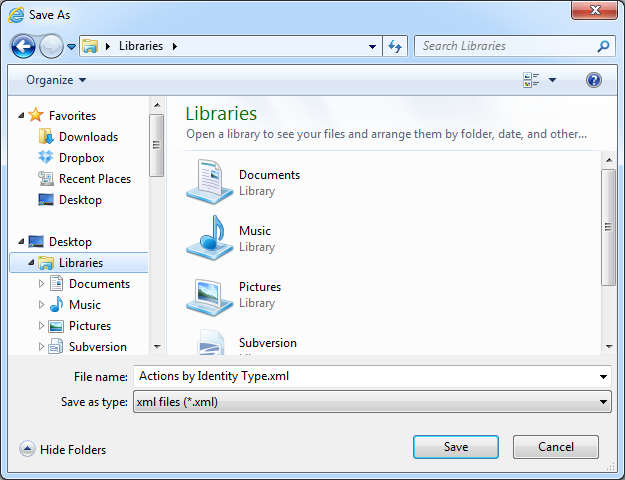
To export report definitions to an xml file, highlight the report name of the report to be exported and then select Export.
The following dialog displays ensuring that you want to export the report definitions.
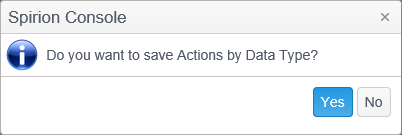
Click OK and then specify the desired location and file name and click Save.