Workflows Overview
Workflows provides the ability to assign results to users, send notifications when automatic or manual assignment occurs, track the status of the assignments and assign classifications to results through user defined rules. With Workflows, you can assign results to end users and track the Workflows process from identification through remediation. This is very useful for any business that would like to have the ability to determine their overall risk, the source of the greatest risk, and hold users accountable to remediate unprotected sensitive information. Workflows allows customers to Assign results through the Workflow process, notify users, track cleanup, and report on who should be held accountable.
One of the most powerful capabilities with this feature is automatic Assignment based on granular, robust criteria. For example, if a spreadsheet contains SSNs and is stored on a specific file server, Spirion can be configured to automatically assign those results to a specific user. Notifications can then be created to automatically notify and alert individuals via email or SNMP Trap Notification.
Creating a Worflow Rule
Note: For detailed information on Creating a Workflow Rule, please refer to Workflow Wizard.
In this example, we create a workflow rule that is triggered whenever there are locations discovered that have more than 5 credit card numbers. The trigger automatically assigns a “High” classification to the results and assign those results to the owner of the endpoint on which the results were found and then send them an email notification. The email contains a link that, when clicked, allows the user to log into the Console and see a filtered view of the matching results and allows them to take action on those results, for example, to Shred them. When the user schedules a shred, the status changes from Assigned to In Progress. Once successfully shredded, the status of the result changes to Resolved. We next create a report to view a count of all unassigned, in progress, and assigned results by endpoint.
The first step in our example is to define the classification. There are three built in classifications provided, High, Medium and Low, but you can create your own classification or rename an existing one. Since one of the built in classifications is already called 'high', we'll go ahead and use that one for our rule.
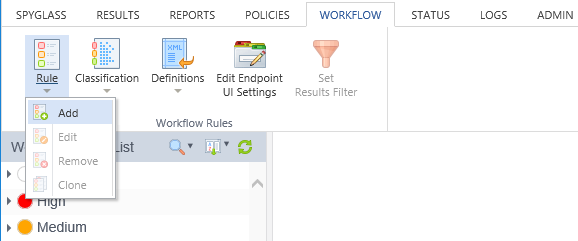
Click on the Workflows tab and then click the classification labeled 'High' in the Workflow Rules List. Click the button labeled Rule on the Workflow Rules ribbon and then click Add to create our rule.
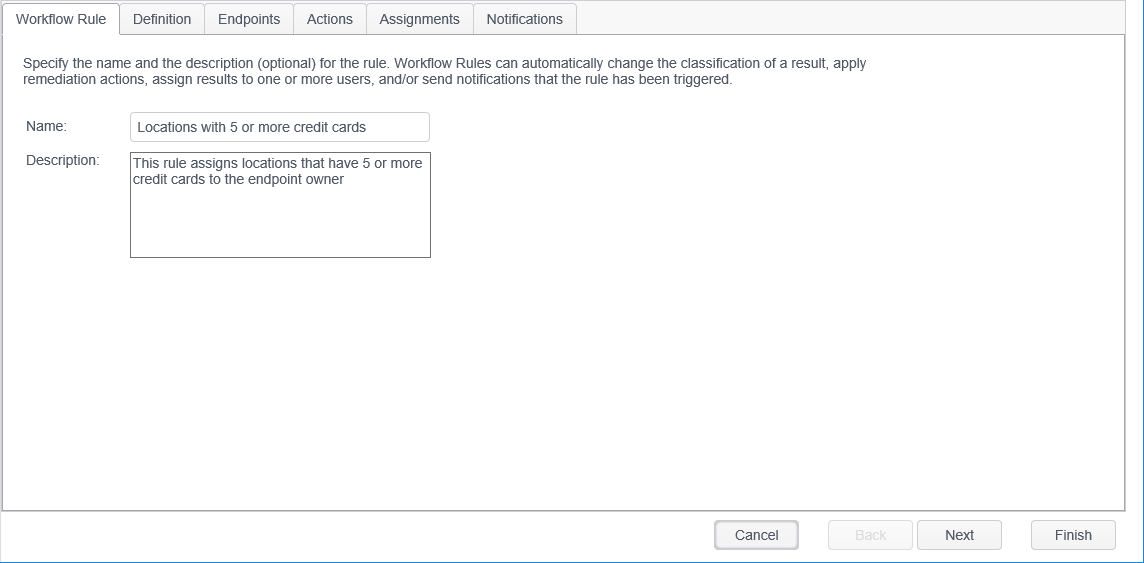
This opens the Workflow Rule wizard. Enter the name for the rule, 'Locations with 5 or more credit cards' and a description of the rule and then click Next.
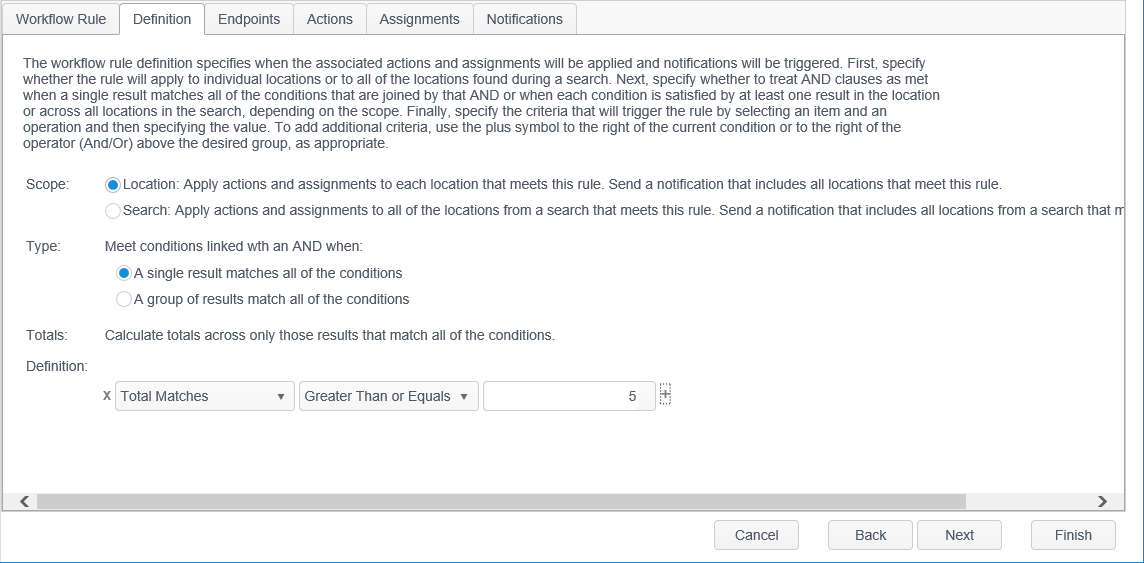
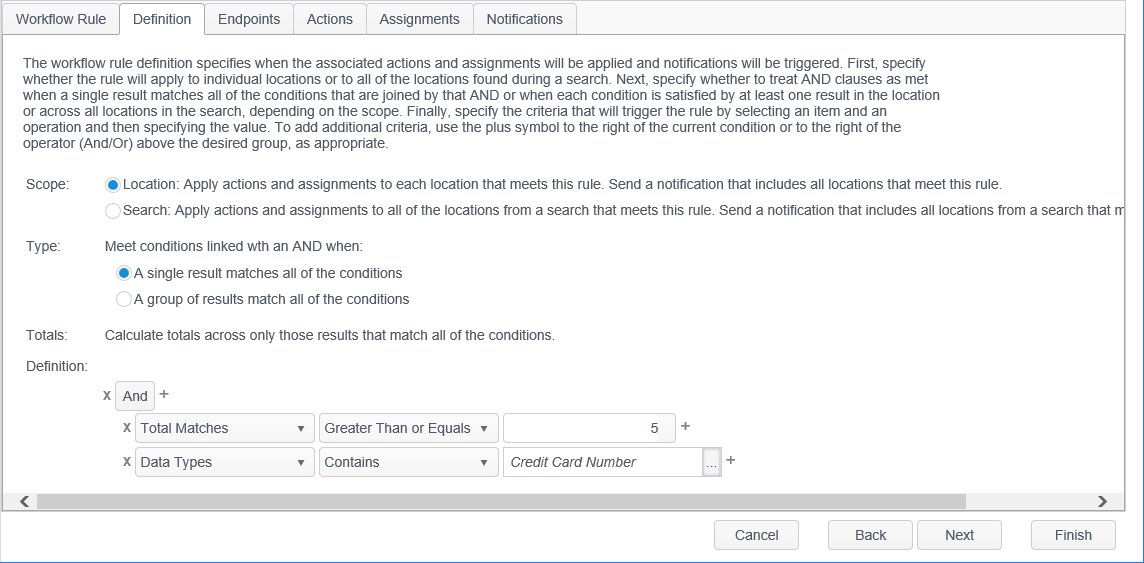
To create the definition so that the rule matches any location that contains 5 or more credit cards, set the Scope as 'Location: Apply classifications and assignments to each location that meets this rule. Send a notification that includes all locations that meet this rule.' and leave Type as 'A single result matches all of the conditions' and then click the filter drop-down under the Definition section and select Total Matches. In the Operator drop-down select 'Greater Than or Equals' and finally in the value field enter '5'.
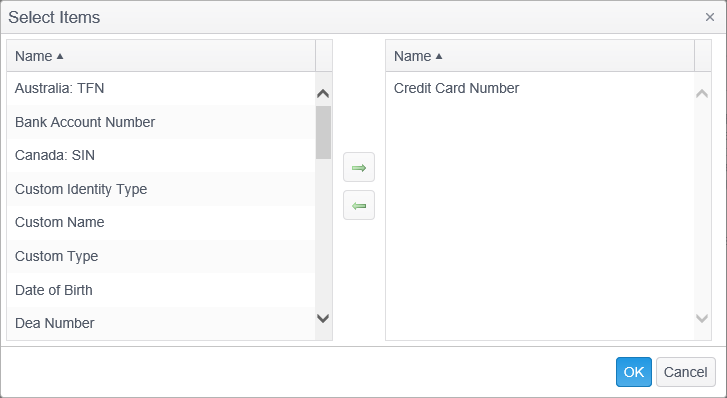
To complete the definition we'll have to add a second qualifier so click the + button on the right and another row displays. For this second qualifier select 'Data Types' from the filter drop-down, 'Contains' from the Operator drop-down and click on the ellipses to open a dialog which contains all of the available data types. Select Credit Card Number from the column on the left and click the green right arrow to add it to the column on the right.
Click OK and the definition is complete. So in our example we have just created a definition which matches on locations which contain 5 or more credit card numbers. So the rule definition now looks like the one below.
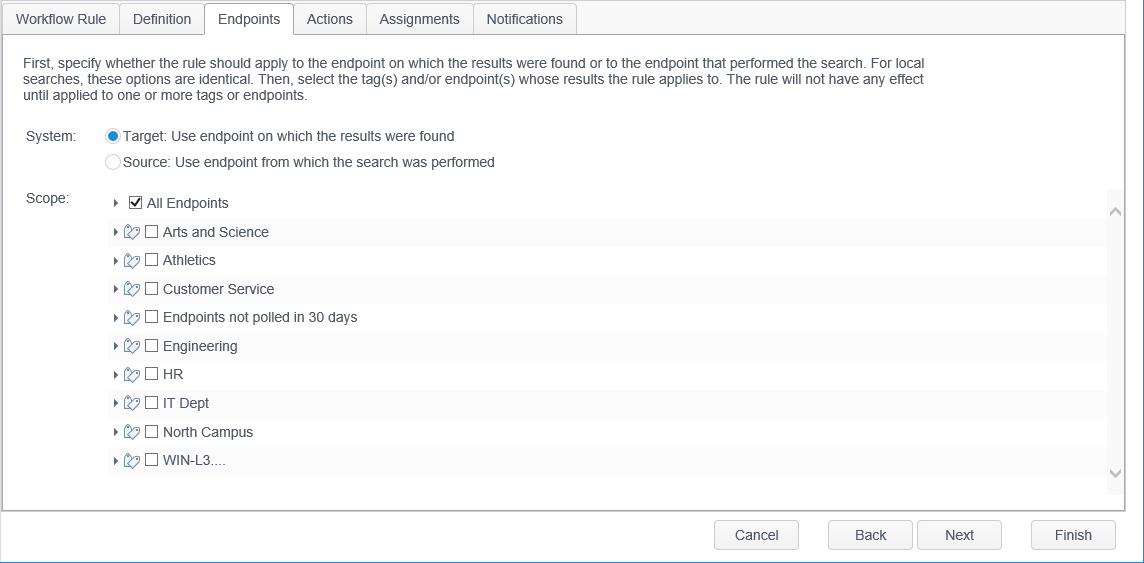
The next step is to specify which endpoints or tags to which the rule applies. Click on the Endpoints tab and under System select 'Target: Use endpoint on which the results were found' to specify that the rule should apply to the endpoints on which the results were actually found, as opposed to Source which would apply to the endpoint which performed the search. For our example we have chosen to apply the rule to All Endpoints.
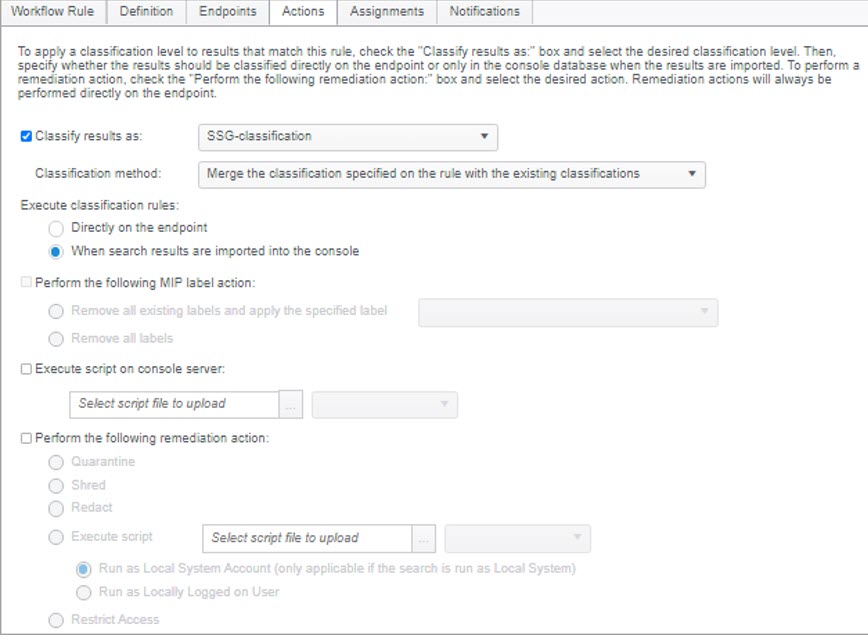
The next step in our example is to assign the classification, which we do by clicking on the Actions tab. Since we created this rule under the High classification, that is what displays in the drop-down. However, if we decided that we wanted this to be only a medium classification we could select Medium from the classification drop-down and when we complete the rule it would automatically move to the medium classification and would display under the Medium classification in the workflow rules list. Leave 'Perform the following remediation action' unchecked as we do not wish to automatically perform a remediation action on the results that match this rule. Leave 'Execute classification rules:' set to 'When search results are imported into the Console' to have the classification rules run on the Console after the results have been imported and the Run Workflow Rules service job has executed.
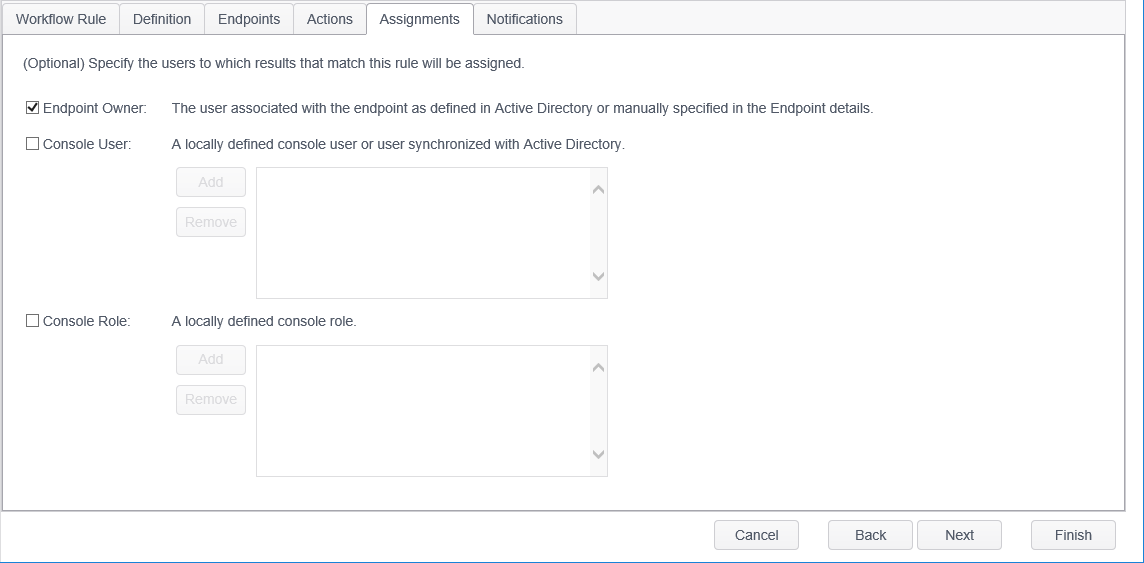
Next we need to specify a user to assign to the results that match this rule. Click on the Assignments tab and place a check mark in the box next to Endpoint Owner. The Endpoint Owner is the user or users associated with the endpoint as manually specified in the Endpoint Details or defined in Active Directory.
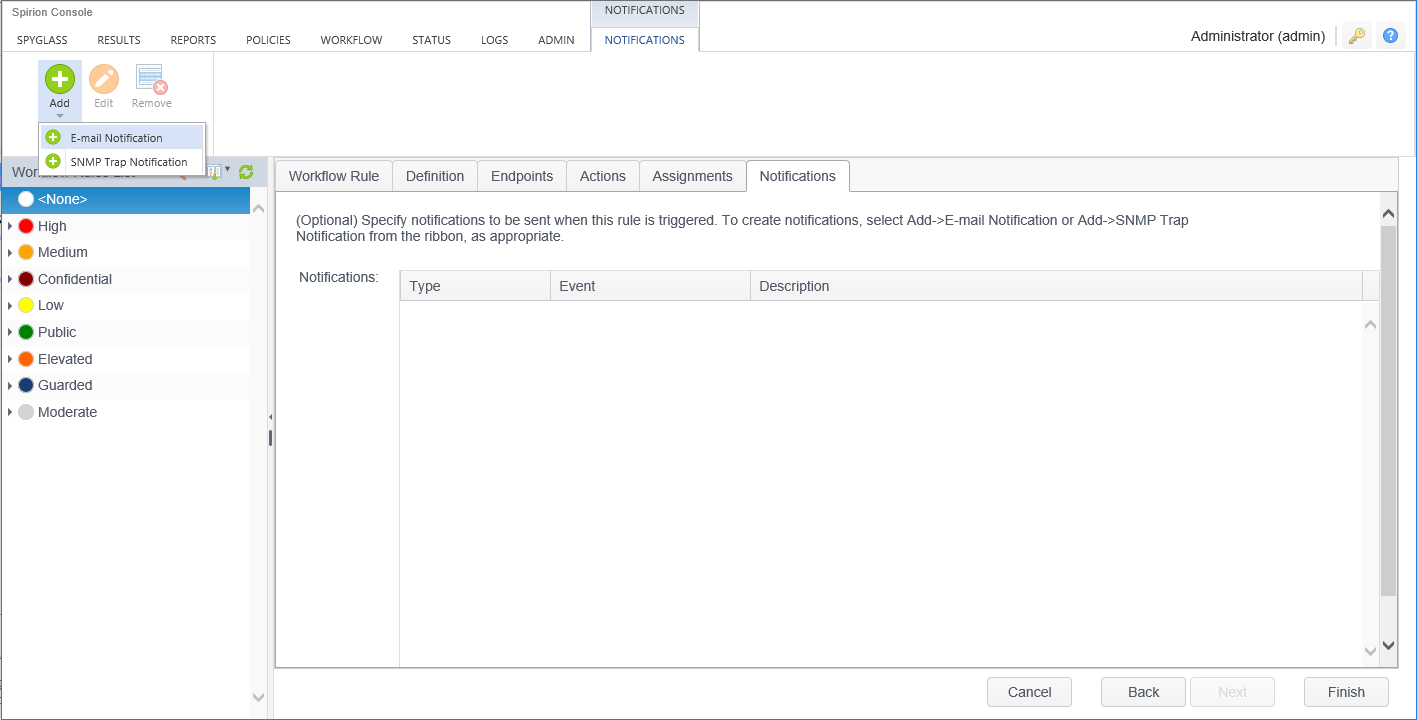
When the rule executes and the results are assigned we want to have a notification sent to the assignee so that they are aware that they have some work to do. To create the notification click on the Notifications tab and then click the Add button located on the Notifications ribbon and select email Notification from the drop-down.
This displays the Add email Notification dialog. Under Send On Select 'Assignment' to have the email sent when the results are assigned and place a check mark next to Assignee to have the email sent to the assignee that we selected in the previous step. In the Subject field enter a subject for the email. You can enter text or use a variable as described in the Notifications page. For our example we'll use both. In the subject field enter the following:
%TotalMatches% %DataType% have been assigned to you.
%TotalMatches% returns a numerical value representing the total number of matches found during the search and %DataType% returns the type of data that was found. So if 10 credit card numbers were found during the search, when the email is sent, the subject field would display as follows: 10 Credit Card Numbers have been assigned to you.
Just as with the Subject, you can enter text or use a variable in the Body field of the email. Since we want to include a link which the user can click on to log into Console and see a filtered view of the matching results, we'll use another variable. So enter the following in the body field:
You can view your current assignments by clicking on the following link: %AssignmentsLink%.

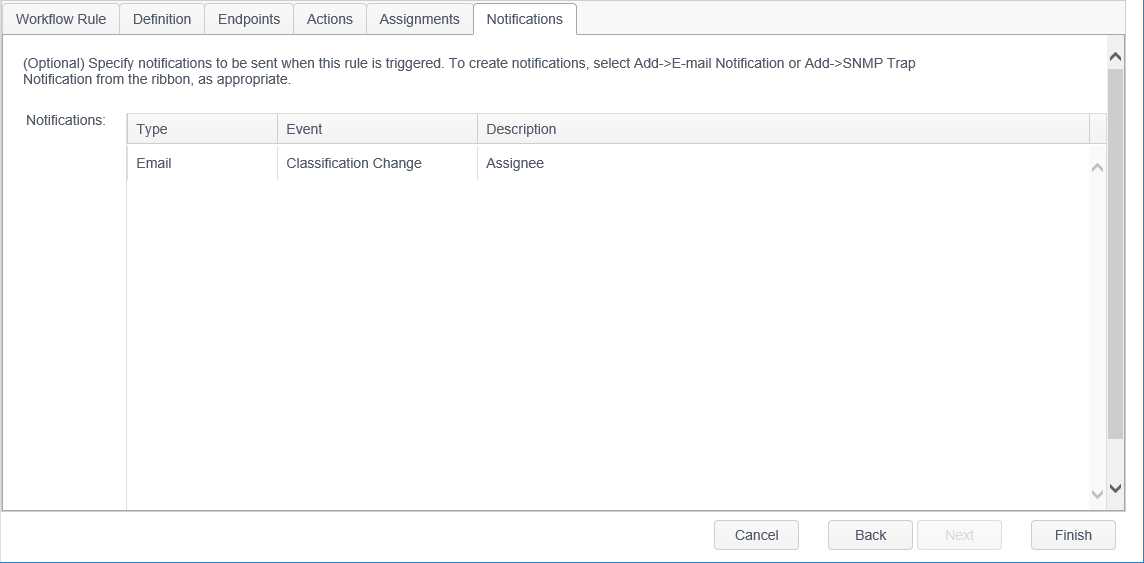
Click OK to save the notification and see it added to the Notifications grid.
Click the Finish button and our rule is created.
When a scheduled search runs and there are results that meet the criteria in the workflow rule, a notification is sent when the Run Workflow Rules service job runs.
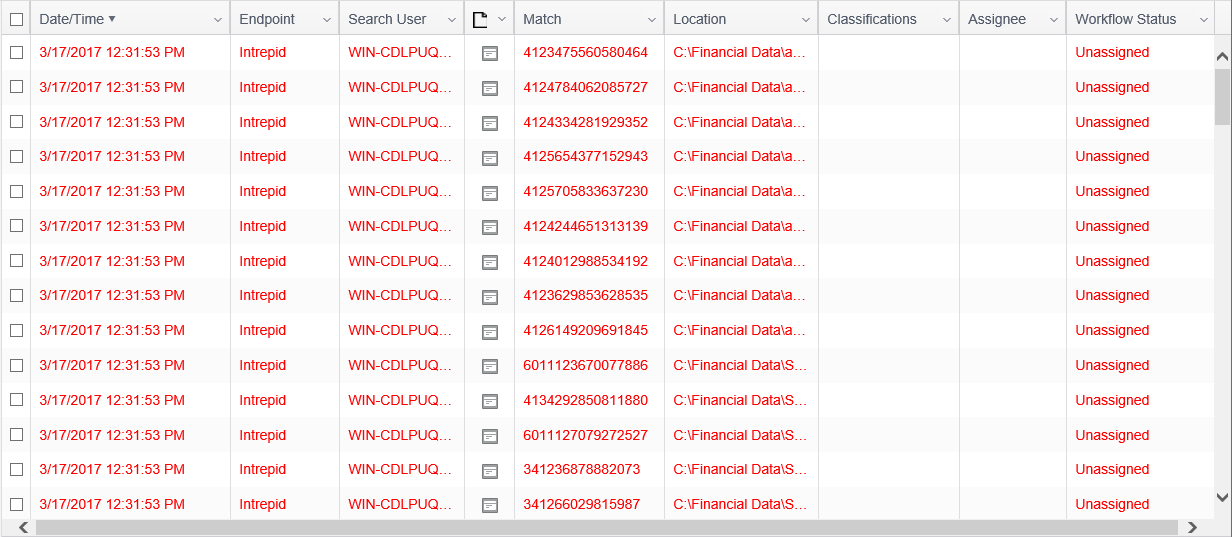
Therefore, before the rules run, you can see in the results that there is no classification, there is no assignee and the status is unassigned.
Receiving E-Mail Notifications
After the rules have run, the user gets an email with a link.

The user clicks on the link and logs into the Console with their user name and password and is taken to the results view where they see all of the results which have been assigned to them.

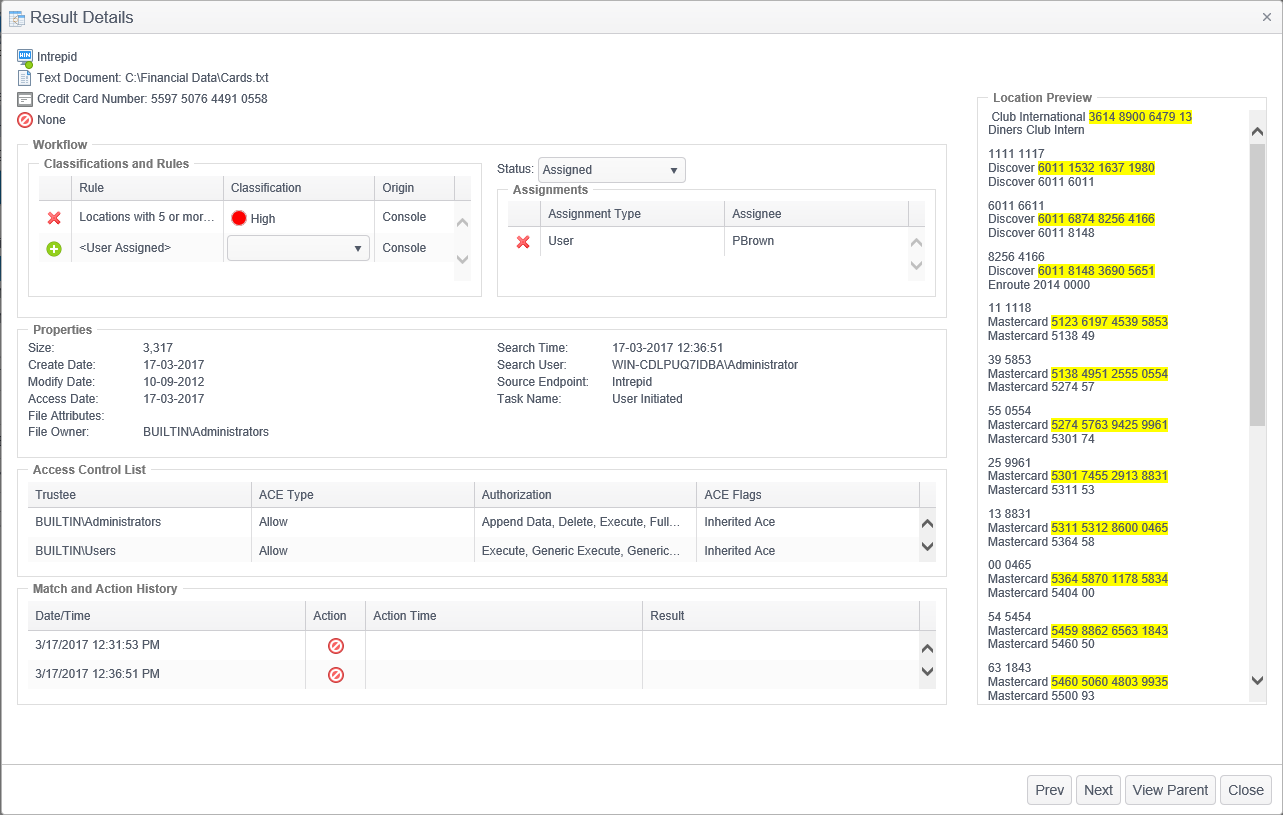
In the Results Details window you can see where the match was found, the history of each time that match was found, any actions performed on the location, the current status, classification, assignment, matching rules and a preview of the result in context.
Performing Actions on Results
The user can then perform actions on the results. For example, the user could choose to ignore one of the results. This prevents that information from being displayed or searched in the future. To ignore a result, select it and click the Ignore button and then select This Location or This Match. Additionally, you may choose to require a reason as to why the selected location is being ignored. See Ask for the reason when ignoring results to enable this feature.
The user could also choose to shred one of the results. To shred a result, select it and click the Shred button.
Performing the ignore or shred actions schedules the action for the appropriate endpoint. Once the action is scheduled, the endpoint obtains the ignore or shred instructions the next time it polls, and executes the action and then transmit success or failure information back to the Console. The results of the action can be viewed in the Match and Action History.

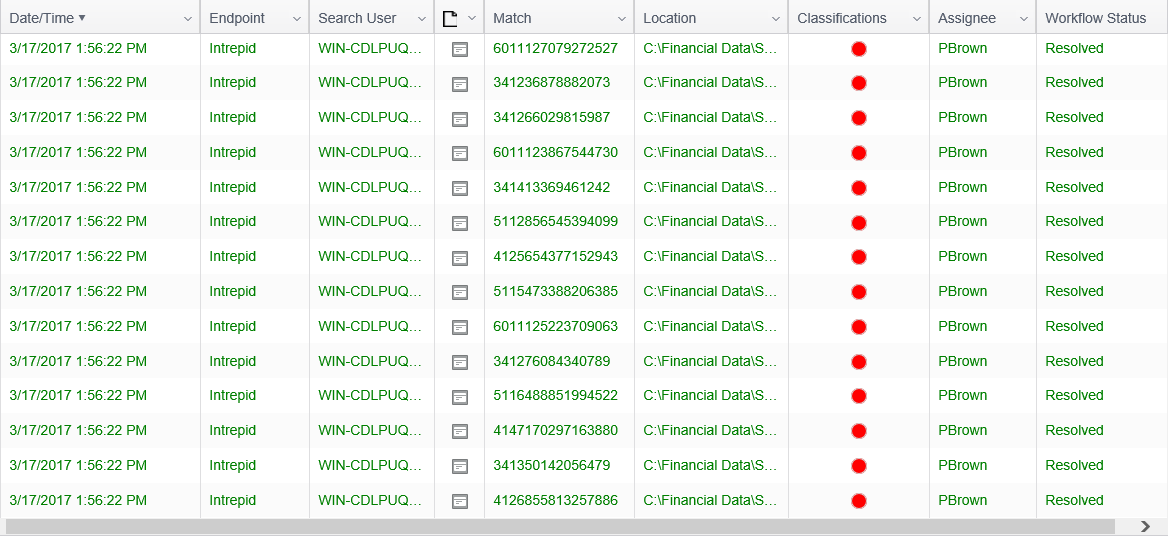
Once the action has been successfully executed, the Workflow Status is updated. In our example, the workflow status has been updated to Resolved since the results have been shredded by the endpoint.
Creating Reports
To create a report to view a count of all assigned, resolved in progress and unassigned results by endpoints we need to create four reports and then join them in a master report to get the data that we need. Click on the Reports tab, click on the Report button and then click Create. When the report wizard opens enter a report title and then click Next.
For the first report enter a name of Workflow Assigned and place a check mark next to 'This report is either joined to another report or used for secondary analytics'. In the Columns tab select the following columns:
- Locations: Endpoint Identifier.
- Locations: Location Identifier. For this column only, in the Columns Properties section set Aggregate to 'Count'.
- Locations: Workflow Status.

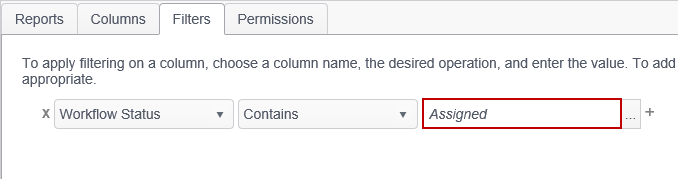
In the Filter tab select Workflow Status from the column name drop-down list, select Contains from the operation drop-down list and add 'Assigned' to the value field.
Click Finish and the first report is complete.
Then we need to create three more reports and name them 'Workflow In Progress', 'Workflow Resolved' and 'Workflow Unassigned'. These three reports are identical to the 'Workflow Assigned' report that we just created except they each filter on a different workflow status. For the 'Workflow In Progress' report set the filter to 'In Progress'. For the 'Workflow Resolved' report set the filter to 'Resolved'. For the 'Workflow Unassigned' report set the filter to 'Unassigned'.
Now we'll create one more report and join each of the four reports we just created to this new report.
Name this new report 'Workflow Status' and place a check mark next to 'This report will either be joined to another report or used for secondary analytics.'
In the Columns tab we need to add the following two columns:
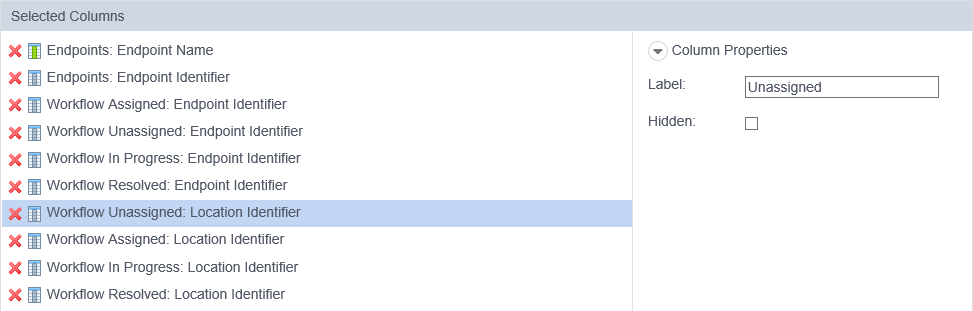
- Endpoints: Endpoint Name.
- Endpoints: Endpoint Identifier. In the Columns Properties section set Aggregate to 'Count' and place a check mark next to 'Hidden'.
The next eight columns come from the reports that we just created.
- Workflow Assigned: Endpoint Identifier. Make this column hidden.
- Workflow Unassigned: Endpoint Identifier. Make this column hidden.
- Workflow In Progress: Endpoint Identifier. Make this column hidden.
- Workflow Resolved: Endpoint Identifier. Make this column hidden.
- Workflow Unassigned: Location Identifier. In the Columns section change the label to 'Unassigned'.
- Workflow Assigned: Location Identifier. In the Columns section change the label to 'Assigned'.
- Workflow In Progress: Location Identifier. In the Columns section change the label to 'in Progress'.
- Workflow Resolved: Location Identifier. In the Columns section change the label to 'Resolved'.
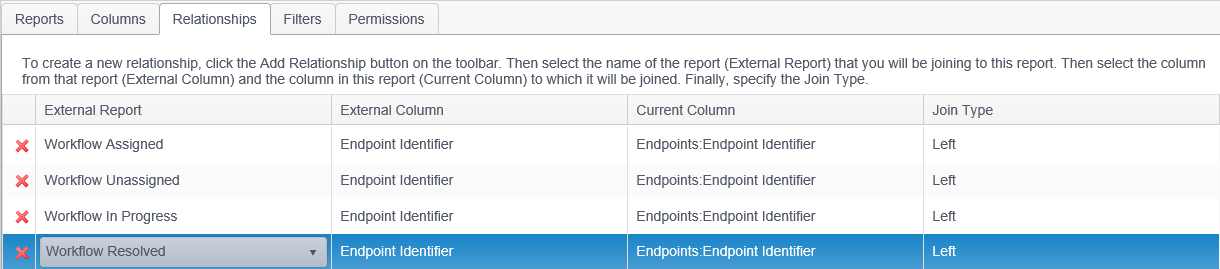
Now we need to define the relationship between this report and the four reports we previously created. In the Relationships tab select Add and select Workflow Assigned in the External Report column, select Endpoint Identifier under External Column, select Endpoint Identifier under Current Column and set the Join Type as Left. Then add three more relationships selecting each of the remaining columns of Workflow Unassigned, Workflow In Progress and Workflow Resolved,just for Workflow. The relationships now looks like this:
Click Finish and the report is complete and looks like this:
