Right Click Operations
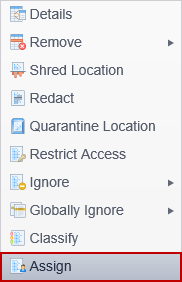
Most of the functions available in the Results ribbon group and Actions ribbon group are available by right-clicking on a result. These functions allow the viewing of details about an individual search result, the exclusion or deletion of results, the scheduling of a Shred, Quarantine or Ignore action on an endpoint as well as the creation of and addition to Global Ignore Lists, the classification of a result and the ability to assign results to a user or role.
|
In this article |
Details
The Details right-click menu item allows you to view additional detail about each result including where it was found, the history of each time that match was found, any actions performed on the location, Workflow information and a preview of the result in context. The preview displays the result(s) highlighted within the surrounding text where it was found. Additional detail about the location in which a result was found as well the history of each time that match was found and any actions performed on the location.
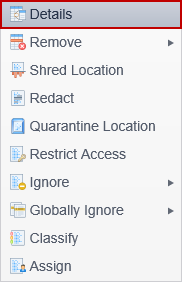
To view the details, right click on a result and click the Details menu item.
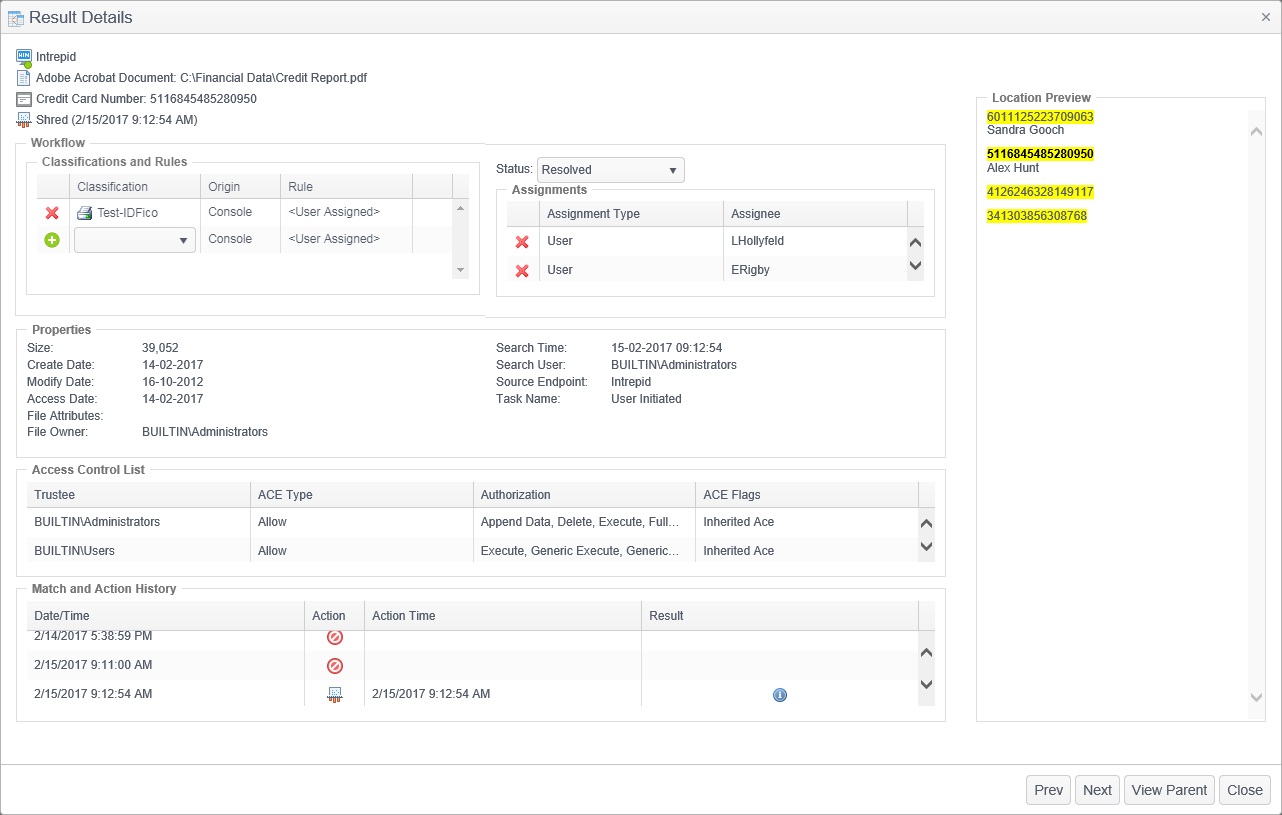
The Result Details dialog contains the following information:
Result Summary Information
The Result Summary Information section of the Results Details dialog provides a quick overview of the selected result with key information that shows the endpoint on which the result was found, the type of file in which it was found and the location of that file on the endpoint. You also see the column name if the result was found in a database. It also provides you with the data type and whether or not an action was taken to protect that information. If action was taken it displays the action. If no action was taken it displays, "None."

Workflow
The Workflow section of the Result Details dialog provides information about the classification, status, matching rules and assignments.

Classifications and Rules: This section shows the classifications and rules which have been assigned to the result. If the result matched multiple rules they are each displayed here along with their corresponding classification. You can select classification of your choice and then click the plus icon to the left of the Rule column to save the classification. A classification assigned manually displays "<User Assigned>" in the Rule column. You can remove a classification by clicking on the x icon to the left of the classification. The changes to the classification gets updated when you visit the page next the next time. If you see a classification named "Unknown Classification (GUID)", please see the Unknown Classifications knowledge base article. The value in the Origin column can be either Agent or Console, depending on the source of the classification assignment.
Status: This shows the status of the result. You may manually change the status by selecting one from the drop-down list.
| Field | Description |
|---|---|
| Unassigned | The result has not been assigned to any users. |
| Assigned | The result has been assigned. The assignees is listed below in the Assignments area. |
| In Progress | This status is manually set by the user to show that they are in the process of remediating the result. |
| Pending Ignore | The selected result has been scheduled to be ignored but the action has not yet been performed by the endpoint. |
| Pending Shred | The selected result has been scheduled to be shredded but the action has not yet been performed by the endpoint. |
| Pending Quarantine | The selected result has been scheduled to be quarantined but the action has not yet been performed by the endpoint. |
| Resolved | The selected result has had an action of Ignore, Encrypt, Shred, Quarantine or Redact performed on it. |
Assignments: This section shows the user, role or endpoint owner to whom the selected result has been assigned. If the selected result has been assigned to multiple users, each user is listed here. If the result is not assigned to anyone, then it reads, "No assignments". To remove an assignment from the result, click the red x to the left of the assignee name. To manually add an assignee, close the Results Details dialog and click on the Assign button located on the Actions group of the ribbon.
| Field | Descriptiion |
|---|---|
| Assignment Type | This value can be User, Role or Endpoint owner. |
| Assignee | The name of the assignee. |
Properties: This section provides additional information about a location that is not displayed in the Results Grid. Not all of the information is available for all location types and an N/A, blank or Not sent is displayed if the information was not available at the time of the search or was configured to not be sent to the Console. All of the property information is provided by the Agent software and is included when the results are sent to the Console.

![]()

Some or all of the following properties will be displayed depending on the location type:
- Size (bytes): The file size in bytes.
- Create Date: The date and time the file was created.
- Modify Date: The date and time the file was last modified.
- Access Date: The date and time the file was last accessed.
- File Attributes: The attributes of the file. This item only applies to data from Windows clients. The file attributes are listed below and described in more detail at: http://msdn.microsoft.com/en-us/library/ee332330(v=VS.85).aspx
- R: FILE_ATTRIBUTE_READONLY
- H: FILE_ATTRIBUTE_HIDDEN
- S: FILE_ATTRIBUTE_SYSTEM
- A: FILE_ATTRIBUTE_ARCHIVE
- C: FILE_ATTRIBUTE_COMPRESSED
- E: FILE_ATTRIBUTE_ENCRYPTED
- File Owner: For data from Windows clients, the NTFS owner of the file. For data from Mac clients, the file system owner of the file.
- Search Time: The timestamp, local to the client, of the start of the search during which the result was found. By default, this will be the timestamp for the first time the identity match was found. The "Display the timestamp of the first time the identity match was found" checkbox in Personal Settings can be cleared to display the timestamp for the most recent search where the match was found.
- Search User: The user account context under which the search was executed. For User scheduled tasks, this will be the user name with which the user logged onto the system. For System scheduled tasks this will be SYSTEM for Windows and root for Mac OS and Linux.
- Source Endpoint: The display name of the endpoint which ran the search. When this value extends beyond the perimeter of the Properties box, hovering over the source endpoint with the mouse will reveal a tooltip that displays the entire source endpoint.
- Task Name: The name as entered in the Add New Task dialog in the Scheduled Tasks section of a policy, or "Search Now" for a task executed via the Search button on the ribbon or "User Initiated" for a search that was executed interactively on the client.
Access Control List
The Access Control List section of the Result Details dialog displays the permissions attached to a file and the users and system processes to which those permissions have been granted. This information is not sent by the Agent unless enabled via policy in the following setting: Settings\Locations\Files\RetrieveFileACLDuringSearch.
Access Control List from a Windows machine:

Access Control List from a Linux machine:

Access Control List from a Mac:

Trustee: The individual user or group to which the access rights apply.
ACE Type:The ACE (Access Control Entry) Type. When this is "Allow", the authorizations specify rights that the trustee has. When this is "Deny", the authorizations specify rights that the trustee does not have.
Authorization: The specific rights granted to the trustee such as the ability to read, write or delete the file.
ACE Flags: (Windows Only) The inheritance type of the access control entry noting whether child containers or objects can inherit the ACE from the primary object to which the ACL is attached.
Each of the columns is resizable by clicking and dragging on the column separator in the column header.
Note: Access Control List information is available for Windows and Linux clients only.
Match and Action History


The Match and Action History section of the Result Details dialog displays information about when the result was found and what actions, if any, have been performed on that result.
- Date/Time: The date and time of the start of the search during which the result was found. All of the results from a particular search has the same time stamp. This time is the local time on the client that initiated the search.
- Action: An icon representing the action that was performed on the result. This action may have been initiated on the client or via the Console. If no action was taken, a gray circle with a line through it displays. The available actions Shred, Encrypt, Redact, Quarantine, Restrict Access, Recycle, Ignore, and No Longer Exists. Hovering over the icon with the mouse will reveal a tooltip that describes the icon. For detailed information, please refer to the Actions page.
- Action Time: The date and time, if any, that an action was performed on the result. If no action has been taken, this column is blank. This time is the local time on the client that performed the action.
- If the action was performed on the endpoint in the first session where it was found, there is no entry in the Match and Action History. The action time displays in the summary section at the top of the window.
- If the action was performed on the endpoint on saved results that were opened in the client after the search was complete and the client was closed and re-opened, there is an entry in the Match and Action History where the Date/Time indicates when the saved results were opened and the Action Time indicates when the action was performed.
- If a result was found multiple times and an action was performed on the endpoint in the session during which it was most recently found, there will be an entry in the Match and Action History for each time the result was found, and the most recent entry includes the Action Time indicating when the action was performed.
- If the action was performed from the Console, there is an entry in the Match and Action History where the Date/Time and the Action Time are the same. This is the time when the endpoint service performed the action on the endpoint.
- Result: The Result column may contain multiple icons:
- The first icon
 , represents the result of an action that was scheduled via the Console or performed directly on the client. Hovering over the icon with the mouse reveals a tooltip that displays the result of the action or, if additional detail such as an Ignore reason was provided when performing the action, that detail displays. If the action has a red background, indicating failure, hovering over the icon with the mouse reveals a tooltip that describes the failure.
 - The second icon
 , if present, indicates any critical messages produced during the related search. Hovering over the icon with the mouse reveals a tooltip titled Endpoint Messages that displays the critical messages for that search. The messages can be any of the following:
- User stopped search: The user stopped the search prior to its completion.
- Outlook timed out: Outlook timed out while waiting for an Outlook operation to complete while the search was in progress.
- Outlook closed: Outlook was closed normally while the search was in progress.
- Outlook closed unexpectedly: Outlook was closed unexpectedly while the search was in progress.
- The first icon
The Date/Time, Action Time and Action columns can be sorted by clicking on the column header to toggle between ascending, descending and no sort. Any column which has sorting on it displays an up arrow or a down arrow in the center of the column header indicating ascending or descending, respectively. No arrow indicates that column is not sorted. When you click on a column header to set a sort it removes any previous sorting from all other columns. You can sort multiple columns at the same time by holding down the shift key while selecting a sort. The Result column is not sortable. Each of the columns is resizable by clicking and dragging on the column separator in the column header.
For versions 10.0.2 and earlier, if there has been only one search run for a location, the Match and Action History section isnot displayed because the information is available in other areas in the Results Details dialog. The action of "None" is available in the Result Summary Information section and the time that the result was found is in the Properties section.
Location Preview
The Location Preview section of the Result Dialog displays an unformatted version of the result you have selected. The main body of the Location Preview contains the full content where your result was located with all the Matches highlighted in yellow. You also see the column name if the result was found in a database.

At the bottom of the Result Details dialog there are four buttons:
Prev: Clicking this button displays the result previous to the one that is currently displayed in the Result Details. This button is enabled only when viewing a child. It is disabled when viewing the parent.
Next: Clicking this button displays the result following the one that is currently displayed in the Result Details. This button is enabled only when viewing a child. It is disabled when viewing the parent.
View Parent or View Child: Clicking this button toggles the Result Details between the child view and the parent view.
Close: Closes the Result Details dialog and saves any changes that you have made to the Workflow section of the Result Details.
Remove
The Remove menu item allows you to delete result rows from the database and prevent future rows matching specific criteria from being stored in the database.
Exclude Rows
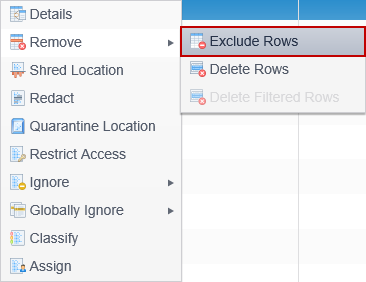
The Exclude Rows menu item (formerly called Never Display Data or Never Display Results) provides the ability to prevent the Console from storing certain information that is provided by the Agents after a search. The Agents continue to provide this information but the Console ignores it when storing information in the database. This feature allows you to reduce the amount of information stored in the Console database (to maximize performance) without affecting the operation on the Agent, such as what results the end user sees.
For example, if you are running searches as the locally logged on user (and therefore end users can interact with the Agent UI), and are searching for Personal Addresses and you want the user to be able to see their home address in results in the Agent (along with all other address results), but don't want to store their address in the database - you can use this function to tell the Console to exclude (essentially "ignore") those rows when updating the database. If you wanted to prevent all personal address results from being sent from the Agent to the Console, you could use the policy setting Console\sendMatchTypes.
The dialog provides the option to remove any rows from the database that match the specified criteria. When Exclude Rows is selected, the information in the Exclude Rows dialog is pre-populated based on the selected row.
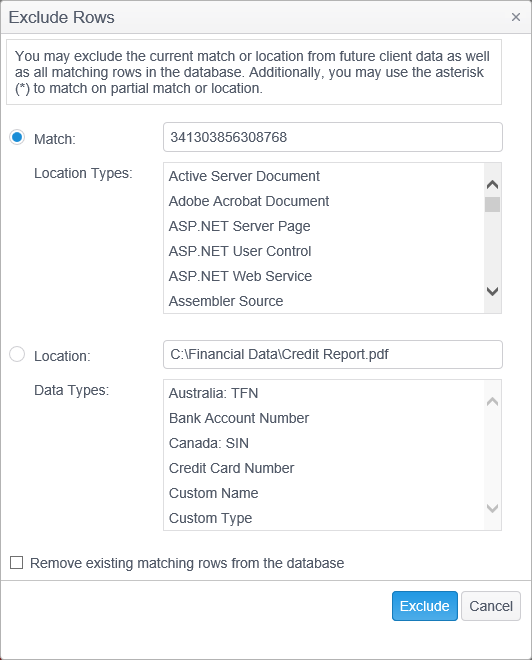
The Exclude Rows dialog notes that "You may exclude the current match or location from future Agent data as well as all matching rows in the database. Additionally, you may use the asterisk (*) to match on partial match or location." Meaning that you can prevent future matching rows from being added to the database as well as delete any matching rows that are already in the database.
To use this feature:
- Select the Match (the specific result) radio button to exclude data with a combination of the match text and location type. To select multiple location types, ctrl-click or shift-click on the location types.
- Select the Location radio button to exclude data with a combination of the location path and the match type. The "Use post-processed location" option specifies whether the location string provided should match on results before or after any processing occurs on that string. For remote locations, the Console modifies the location string to be more informative. For example, if an Agent searches a remote machine and obtains the location \\servername\c$\foldername, the Console creates a new endpoint (if one does not exist) for servername and then add a result at location c:\foldername. This option controls whether the match on location string is performed before or after that processing. To select multiple match types, ctrl-click or shift-click on the match types.
By default, only future rows matching the specified criteria are excluded. To remove existing rows from the database, check the box "Remove existing match rows from the database."
You can also manually exclude rows on the Excluded Rows settings page.
Note: The Exclude Rows option is not available when selecting multiple rows. It is enabled only when a single row is selected.
Delete Rows
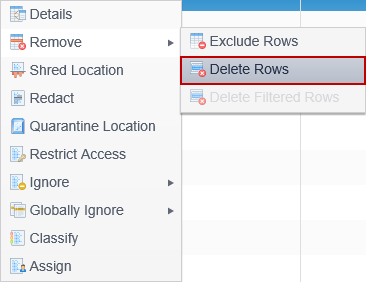
If there are results in the database that are no longer useful, they can be deleted by selecting one or more rows and selecting Delete Rows. To select multiple rows, ctrl-click or shift-click on the results. When unused or unnecessary information is included in the database, it can decrease overall performance.
The Delete Rows confirmation dialog ensures that you want to delete the information from the database. This operation is permanent and cannot be undone. The dialog asks, "The selected row will be permanently deleted. Would you like to delete the row?"
You can also schedule a Purge Results service job to delete data that matches specific criteria. Service jobs can be run once or on a recurring schedule.
Delete Filtered Rows
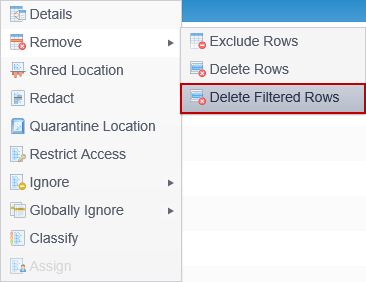
If there are results in the database that are no longer useful, they can be deleted by applying one or more filters to display the data to be deleted and then selecting Delete Filtered Rows. All of the rows that match the filter are deleted. When unused or unnecessary information is included in the database, it can decrease overall performance.
This button is only enabled when a filter has been applied.
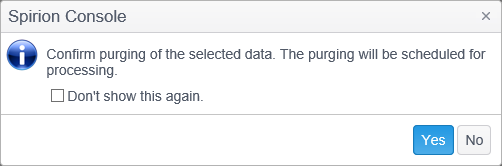
The Delete Filtered Rows confirmation dialog ensures that you want to delete the information from the database and indicates that the deletion/purging is scheduled. This operation shows up as a Service Job until it has been executed, at which time it is deleted. The dialog asks you to "Confirm purging of the selected data. The purging will be scheduled for processing."
You can also schedule a Purge Results service job to delete data that matches specific criteria. Service jobs can be run once or on a recurring schedule.
Shred Location
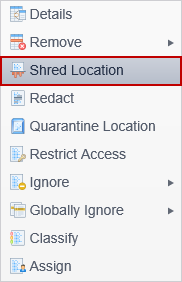
When using Agent software, version 5.0 or later, it is possible to shred files containing matches that reside on managed endpoints. Please refer to the Shred Location button on the Actions ribbon group for full details.
Redact
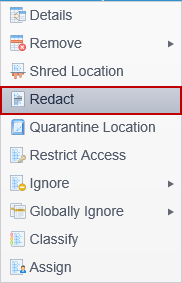
When using Agent software, it is possible to Redact files containing matches that reside on managed endpoints. Please refer to the Redact button on the Actions ribbon group for full details.
Quarantine Location
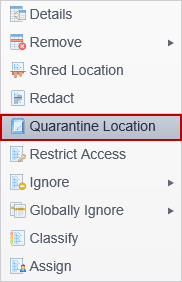
When using Agent software, version 5.0 or later, it is possible to quarantine files containing matches that reside on managed endpoints. Please refer to the Quarantine Location button on the Actions ribbon group for full details.
Restrict Access
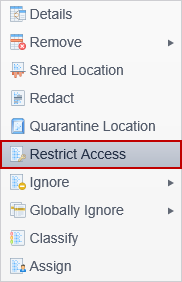
When using Agent software, it is possible to Restrict Access to files containing matches that reside on managed endpoints. Please refer to the Restrict Access button on the Actions ribbon group for full details.
Ignore
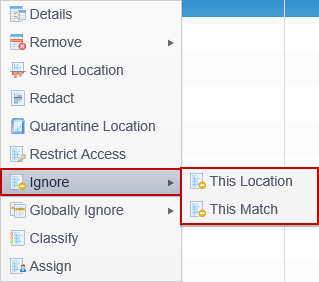
When a search locates a match or finds matches in a location that you do not care about, you may wish to use the Ignore feature to prevent that information from being displayed or searched in the future. Selecting one or more results, right clicking and selecting the Ignore option and then selecting This Location or This Match, schedules that action for the appropriate endpoint. Please refer to the Ignore button on the Actions ribbon group for full details.
Globally Ignore
The Globally Ignore right click menu allows you to create Global Ignore Lists which specifies information that Agents ignore during their searches. The specified information is always ignored regardless of other settings on the Agent.
Global Ignore Lists can include matches (for example a sample social security number of 123-12-1234), locations (such as c:\sample files\hr form.doc), or file hashes (a representation of the contents of a file which allow it to be ignored regardless of its file name or location). Global Ignore Lists are assigned to policies and only affect the endpoints to which the policy containing the list is applied.
Global Ignore Lists can be created with data from existing results or by directly entering information via the Global Ignore Lists settings page.
File Hashes are not created by default and must be explicitly enabled.
A Globally Ignored item updates the Results View with the results of the Ignore. Double-click on the location line to display the Results Detail box. The Match and Action History section at the bottom of the screen show the Ignore Action occurred. The ignored items display grayed out and the Action Column displays the Ignored Item icons.
This Location
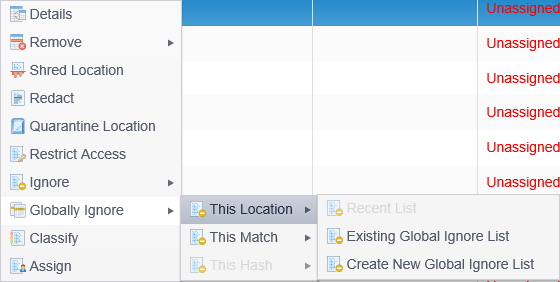
Select This Location to add the location (for example, the full path to a file) of the selected result to a Global Ignore List.
Note:, the Global Ignore List must be assigned to a policy in order to have an effect on any searches.
Recent List: <listname>
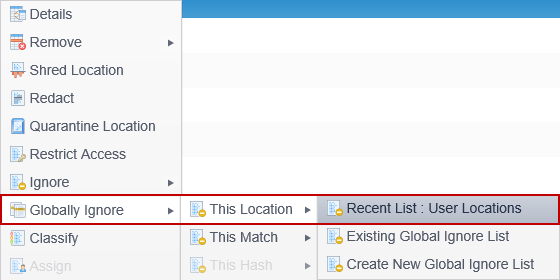
The name of the most recently used Global Ignore List will be displayed, allowing you to quickly add multiple items to that list without having to use the Existing Global Ignore list dialog every time. If you have not yet added any locations to a Global Ignore List, this item will not be enabled.
Existing Global Ignore List
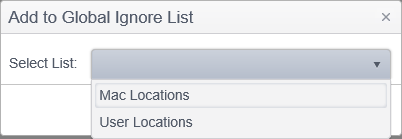
Select this item to select an existing Global Ignore List. The Add to Global Ignore List dialog will be displayed and a list of all available Global Ignore Lists will be displayed in a drop down box next to Select List. The list will be empty if you have not yet created any Global Ignore Lists.
Create New Global Ignore List
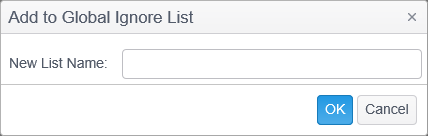
Select this item to create a new Global Ignore List and automatically add this location to that list. The Add to Global Ignore List dialog will be displayed. Next to New List name is a text box in which to type the name of the list to create. If a list by that name exists, an error will be displayed "This list name is already in use." Use the Global Ignore Lists page to see the full list of Global Ignore Lists.
This Match
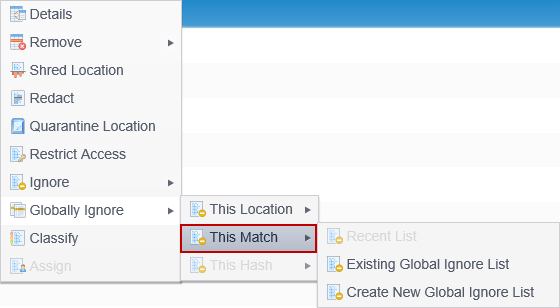
Select This Match to add the match (for example, 123-12-1234 (as an example social security number)) of the selected result to a Global Ignore List.
Note:, the Global Ignore List must be assigned to a policy in order to have an effect on any searches.
Recent List: <listname>
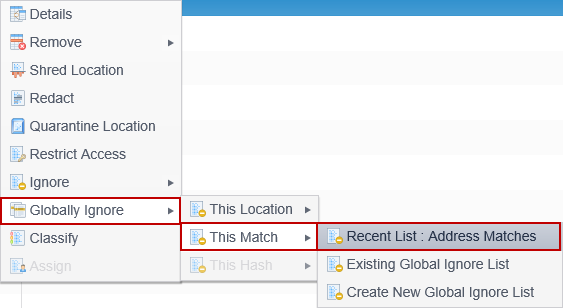
The name of the most recently used Global Ignore List will be displayed, allowing you to quickly add multiple items to that list without having to use the Existing Global Ignore list dialog every time. If you have not yet added any locations to a Global Ignore List, this item will not be enabled.
Existing Global Ignore List

Select this item to select an existing Global Ignore List. The Add to Global Ignore List dialog will be displayed and a list of all available Global Ignore Lists will be displayed in a drop down box next to Select List. The list will be empty if you have not yet created any Global Ignore Lists.
Create New Global Ignore List
Select this item to create a new Global Ignore List and automatically add this match to that list. The Add to Global Ignore List dialog will be displayed. Next to New List name is a text box in which to type the name of the list to create. If a list by that name exists, an error will be displayed "This list name is already in use." Use the Global Ignore Lists page to see the full list of Global Ignore Lists.
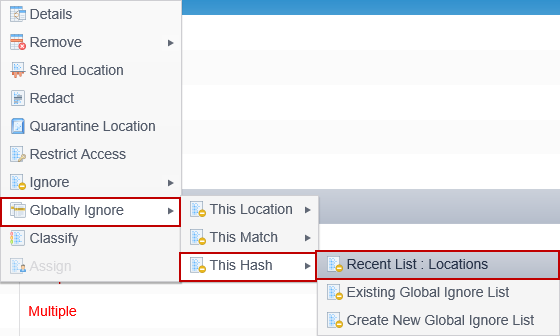
This Hash
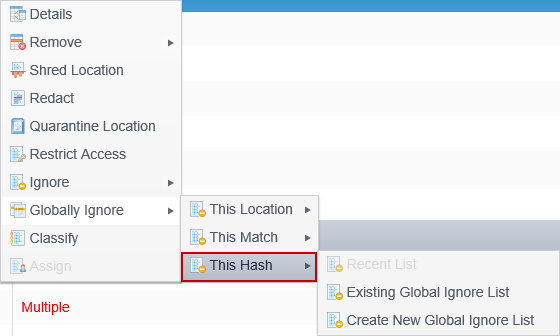
Select This Hash to add the file hash of the selected result to a Global Ignore List. This menu item is only enabled when the selected location contains a file hash. File hashes are created by Agents and sent to the Console when configured to do so. By default, however, the Agent does not create hashes.
To use file hashes in a Global Ignore List, the Agent must first be configured appropriately. The policy setting, Settings\Actions\Ignore\StorageMethod, must be set to 2 (Use Administrator Databases/Ignore Files By Hash). There are other implications to changing this setting, so it is important to review the setting detail before modifying it.
Agents that are configured to Use Administrator Databases/Ignore Files by Hash do not persist any ignored locations across user sessions. When users perform Ignore actions, that information is sent to the Console. Before this file will be ignored on a subsequent search, a Console administrator must "approve" the ignore. This "approval" is a loose term and is accomplished simply by adding an ignored match to a Global Ignore List and adding that Global Ignore List to a policy.
Match information is kept encrypted on the endpoint with a machine key.
Note:, the Global Ignore List must be assigned to a policy in order to have an effect on any searches.
Recent List: <listname>
The name of the most recently used Global Ignore List will be displayed, allowing you to quickly add multiple items to that list without having to use the Existing Global Ignore list dialog every time. If you have not yet added any locations to a Global Ignore List, this item will not be enabled.
Existing Global Ignore List
Select this item to select an existing Global Ignore List. The Add to Global Ignore List dialog will be displayed and a list of all available Global Ignore Lists will be displayed in a drop down box next to Select List. The list will be empty if you have not yet created any Global Ignore Lists.
Create New Global Ignore List
Select this item to create a new Global Ignore List and automatically add this file hash to that list. The Add to Global Ignore List dialog will be displayed. Next to New List name is a text box in which to type the name of the list to create. If a list by that name exists, an error will be displayed "This list name is already in use." Use the Global Ignore Lists page to see the full list of Global Ignore Lists.
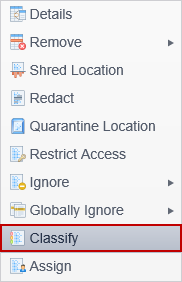
Classify
The Classify right-click menu item allows you to assign a classification to the selected result. Please refer to the Classify button on the Actions ribbon group for full details.
Assign
The Assign right-click menu item allows you to assign users to a result. Please refer to the Assign button on the Actions ribbon group for full details.