Personal Settings View
|
In this article |
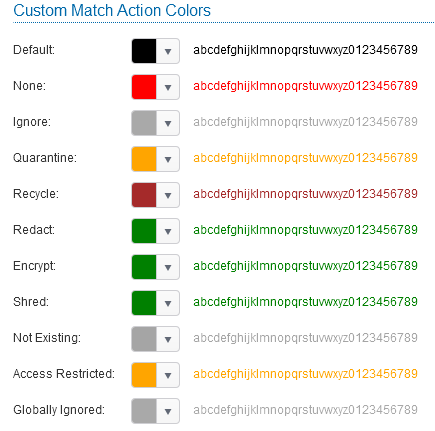
Custom Match Action Colors
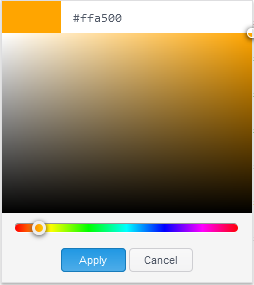
The Console uses a color-coded scheme to indicate the last action performed on specific identity matches. This enables a Console user to quickly identify which identity matches are not secured. These colors can be customized to each user's personal preference.


Search Results Settings
The following options are available:
- In Results Details, and Data Filters, display the action and search properties of the first time the match was found: By default, the Console displays the action and search properties information for the first date and time that the match was found. For example, when viewing the Results Details right-click menu item, both the action in the Result Summary Information section and the right side of the Properties section notes the first time the result was found and that information is not updated each subsequent time that the result is found. To modify this behavior to always display the most recent time that the result was found, clear this check box.
- Precalculate summaries on the results tree: This option affects the results view on the results tab when tree view is enabled. When selected, the match quantity counts for parent rows are calculated when parent rows are loaded. When you clear the checkbox, the match quantity counts for parent rows are calculated when a parent row is first expanded and child rows are loaded. Clearingthis option speeds up loading of parent rows.

General Settings
By default, all time stamps in the Console display in the local time relative to the server's time zone.
The available options are:
- Greenwich Mean Time (GMT/UTC)
- Local Time (relative to the server's time zone)

This setting does not affect timestamps displayed outside of the Console web application. Trace log messages always use the UTC timestamps.
Dashboard Chart Settings
Note: Dashboard chart settings does not exist in Console version 10 and greater.
The Dashboard Chart Settings allows you to set the number of top matches that three of the charts on the Dashboard tab displays by entering a value in the Display Top field. (for example, if you enter five for Matches by User then the Matches by User chart displays the top 5 users that have the most matches; if you enter 20 for Matches by Endpoint then the Matches by Endpoint chart displays the top 20 endpoints that have the most matches.) Valid values are 1-20. The default value for each one is 10.
You can set the value for the following charts:
- Matches by Endpoint
- Matches by User
- Unprotected Matches by Endpoint

UI Settings
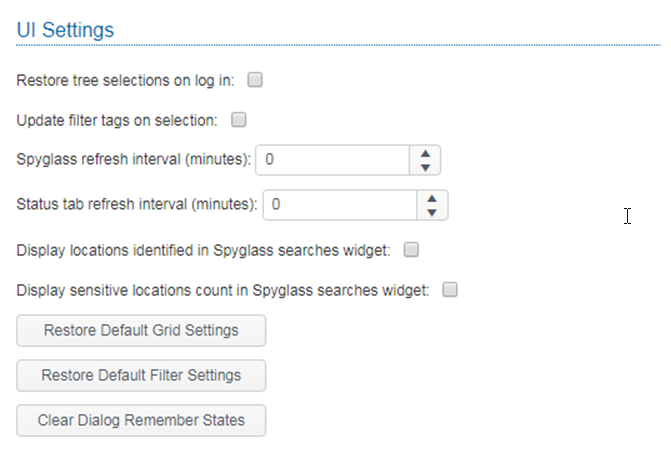
The UI Settings allows you to restore certain user interface settings used for viewing and filtering results to their default state.
The available settings are:
| Field | Description |
|---|---|
| Restore tree selections on log in | By default, the Console does not remember your tree selections and resets them each time that you log in. To modify this to always remember any nodes that you have selected, place a checkmark in this check box. |
| Update filter tags on selection | When this setting is enabled and you select a Filter Tag from the Endpoint List, the list of endpoints within that tag are updated ensuring that you see the current list of endpoints tied to the tag. If this setting is disabled, which is the default setting, the list of endpoints within the tag are not updated when you select a Filter Tag. By default, the list of endpoints is updated by the "Synchronize Tags" Service Job and can be updated manually by right clicking on the filter tag and selecting Tag -> Update Now. |
| Spyglass refresh interval | The value entered is the time, in minutes, between each auto refresh of the Spyglass. A value of 0 means the Spyglass does not auto refresh. The default value for this setting is 0. |
| Status tab refresh interval | The value entered is the time in minutes between each auto refresh of the Status tab/page. The default value for this setting is 0. |
| Display locations identified in spyglass searches widget | By default, the Searches Widget located on the on the Spyglass, displays the number of locations searched containing matches. To enable an additional counter called Locations Identified place a check mark in this option. Locations Identified is the total number of locations seen a during search which includes both searchable and non-searchable locations. The default value for this setting is disabled. |
| Display sensitive locations count in Spyglass searches widget | When this setting is disabled, the Spyglass Searches Widget shows the percentage of sensitive data found. When this setting is enabled, the Spyglass Searches Widget shows the number of sensitive data locations found. The default value for this setting is disabled. |
| Restore Default Grid Settings | By default, the Console remembers any changes you make to the Results Grid, the Logs Grid, the Audit Logging List, the Status View and the Sensitive Data Types View so that you do not need to set them each time that you log in. These include sorting, column order and column selection. Clicking this button displays a confirmation dialog that reads "Restoring default grid settings will force the Console to log out after the process is complete. Do you want to continue?" |
| Restore Default Filter Settings | By default, the Console remembers any changes you make to the filters so that you do not need to set them each time that you log in. Clicking this button clears all of the filters and displays a confirmation dialog that reads "Default settings were restored." |
| Clear Dialogs Remember States | You can select to disable specific dialog boxes throughout the Console by placing a checkmark in the 'Don't show this again' check box when a dialog appears. Clicking this button clears the dialogs remember states so they once again appear and displays a confirmation dialog that reads "Default settings were restored." |

Defaults
The Defaults allow you to specify the Personal Settings to be used for current users and future users.
Note: This option only displays for users who are assigned to the Administrator role.
- Set Settings as Defaults for Users: Clicking this button sets your current settings as the default settings for future users and for existing users who have not configured their personal settings. When a new user is created or an existing user who has never made any changes to their personal settings logs into the Console, these are the settings they see on their personal settings page. The user is free to change their personal settings. This button has no effect on users who have modified their personal settings.
- Clear Default Settings for User: Clears the default settings. After an administrator clicks this button, future users and existing users who have not made any changes to their personal settings use the application defaults for their personal settings. Clicking this button does not affect the personal settings for current users.

Personal Data
The Personal Data settings gives users the ability to change their password and email address.
Note: This section does not appear for AD users.
| Field | Description |
|---|---|
| Password | Users can reset their own password by entering the desired value in the New Password field and again in the Confirm Password field and clicking Change. |
| Users can change their email address by entering their email address in the email field and clicking Change. |
