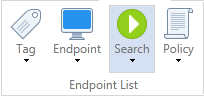
Endpoint List Group
The Endpoint List ribbon group allows the creation, editing, and management of endpoints and tags, the ability to execute or cancel a search, and the ability to reapply a policy to an endpoint or tag.
|
In this article |
Tag Button
A tag is a logical grouping used to organize endpoints for reporting, policy management, Roles Based Access Control, and other operations within the Console. Tags and endpoints can be automatically created based on Active Directory or LDAP information or from an IP address range. An endpoint can exist in any number of tags.
The Tag button allows you to create new top level or nested tags, edit, update or remove existing tags, and move a nested tag to the root of the Endpoint List.

You can assign one endpoint per tag or conveniently group multiple endpoints under a single tag. Grouping multiple endpoints under a single tag can be useful when you want to perform the same operations on multiple endpoints because you'll only have to perform it one time on the tag instead of individually for each endpoint. For example, if you have 10 endpoints in your finance department and want to apply the same policy to all 10 endpoints, creating a Finance tag will allow you to apply the policy to a single location - the tag - rather than to all 10 individual endpoints.
A listing of operations that can be performed on a tag that will in turn perform those operations on all of the endpoints in that tag include:
- Granting user permissions
- Applying or reapplying a policy
- Executing or canceling a search
- Gathering diagnostic data for support purposes
- Add a tag to a policy.
- Viewing search results
- Viewing endpoint status
- Reporting
- Applying updates
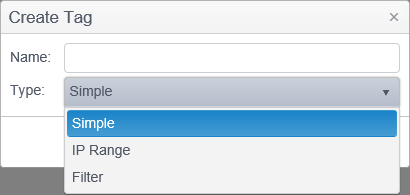
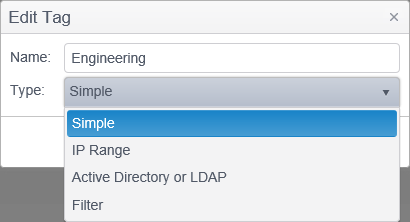
Create Tag
The Create Tag dialog allows you to create new tags to organize your endpoints. Each tag has a type that controls the method for how endpoints are added to and removed from the tag. Endpoints can be manually added to simple tags, automatically and dynamically populated with endpoints from an IP Range or an Active Directory/LDAP query, or be added to or restricted from Filter tags by defining specific criteria.

Endpoints are manually added to a Simple tag via drag and drop, the right-click menu or via the Endpoint ribbon button. Simple tags are grouped under the Simple tags panel.
-
An endpoint must report at least one IP address to be includ
Endpoints are automatically added to an IP Range tag using the IP addresses reported by the endpoints to the Console. As new endpoints report to the Console with an IP address in the specified range, they will be automatically added to the tag. The query for the IP Range can be specified in an IP range format (e.g., 192.168.100.0-192.168.250.250) or a CIDR notation format (e.g. 10.0.0.0/8). IP range tags cannot contain nested tags.
An endpoint must report at least one IP address to be included in an IP Range tag. Typically, unmanaged endpoints (e.g., those that have been searched remotely) will not report an IP address. IP range tags are grouped under the Dynamic Tags panel.

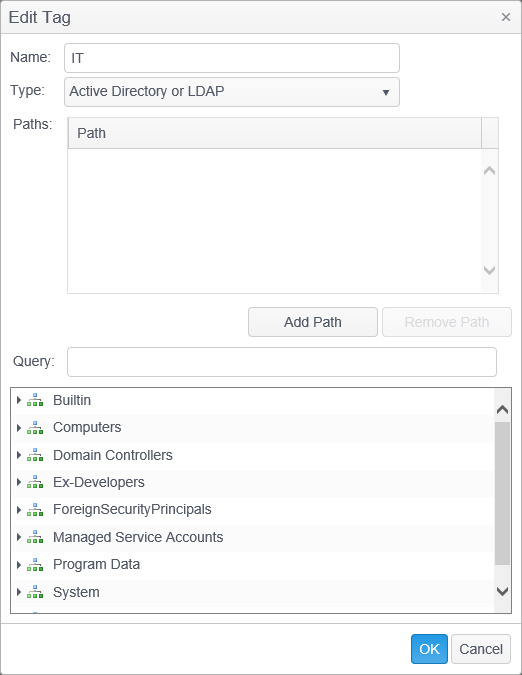
Endpoints are automatically added to an Active Directory or LDAP tag based on the results of the specified query. As systems are added or removed from the directory, the tag will be automatically updated to add or remove endpoints. The query for the Active Directory or LDAP tag can be any valid LDAP query. Any LDAP object returned where "objectClass=computer" will be automatically added to the tag. Active Directory / LDAP tags are grouped under the Dynamic Tags panel.
When an endpoint is in an AD tag and that system is removed from the AD or it is in an IP Address tag and its IP address is changed to no longer match the tag specifications, it will be automatically removed from the tag. The endpoint will continue to exist in the All Endpoints tag.


Endpoints are added to Filter tags based upon the type of filter or filters selected and the results of the specified criteria. A single Filter tag can contain multiple filters. Filter tags are grouped under the Filter Tags panel. For example, filter tags can be used to group endpoints by platform, by last poll time, or by result information.
To create a Filter Tag which will display only those endpoints running on a Windows platform and that have not polled within the past 30 days, follow the steps below.
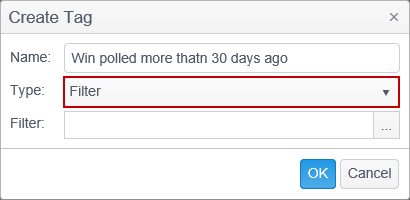
- Select Create Tag, enter a name, select Filter as the tag type and then click on the ‘…’ button to the right of the Filter selection to open the Filter dialog.
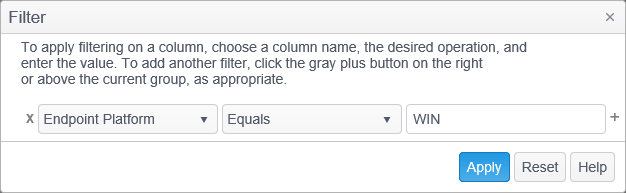
- Select Endpoint Platform from the column name drop down list, Equals from the operation drop down list and enter ‘WIN’ in the value field.
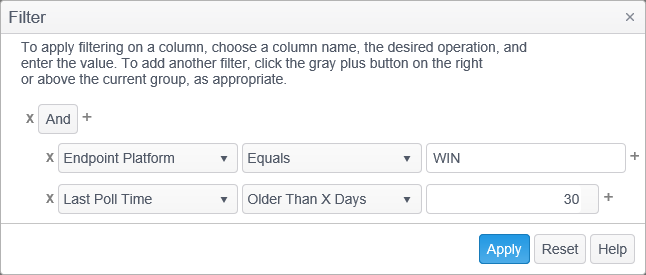
- Next, add a second column filter to limit the results to those endpoints that have not been polled within the past 30 days. Click the gray split button on the right and a new column filter will appear.
- For the second filter, select Last Poll Time from the column name drop down list, select Older Than X Days from the operation drop down list and enter 30 in the value field.
- Above the column filters will be an operator which can be set to either ‘And’ or ‘Or. Make sure the operator is set to ‘And’. If you choose ‘Or’, your results would show you all endpoints running Win as well as all endpoints that have not been polled within the past 30 days.
- Click Apply when you have finished.
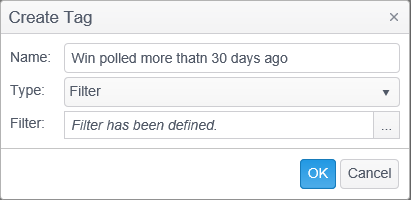
- Click OK to save the tag. Your newly created tag will be listed in the Filter Tags panel.
The following types of filters are available:
- ACL: ACE Type
- ACL: Authorization
- ACL: Trustee
- Endpoint GUID
- Endpoint Name
- Endpoint Platform
- Endpoint Version
- Last Poll Time
- MAC Addresses
- Match Quantity
- Number of Searches
- Platform Type
- Policies
- Protected Quantity
- Search Date/Time
- Search in Progress
- State
- Tag Name
- Tags
- Unprotected Quantity
Note: If you have a filter tag which is defined as "Client Platform Equals Win+anything" or "Client Platform Equals Mac+anything" (e.g. "Client Platform Equals Win32" or Client Platform Equals MacIntel") in version 8 of the Console, when you upgrade to Console version 9, the filter will change to ““Client Platform Equals Win" or "Client Platform Equals Mac". This is because the Console does not display an endpoint platform with a value appended to "Win" or "Mac" (e.g. "Win32", or "MacIntel"), it displays only "Win" or "Mac". So a filter defined with any value appended to "Win" or "Mac" such as "Win32" or "MacIntel" would not return anything. The same logic applies to other "Endpoint Platform" filter operators (Does Not Equal, Contains, Does Not Contain, Begins With, Does Not Begin With, Ends With, Does Not End With.)
For example: If you have an existing filter tag which says “Endpoint Platform Begins With Win64”, after you upgrade from Console version 8 to version 9, the filter will change to “Endpoint Platform Begins With Win".
Restricted endpoints and tags.
If a user does not have permission to a tag or tags, then that is considered a restriction. Spirion Console uses Roles Based Access Control (RBAC) to authorize users to various Console functions. The permissions to perform certain operations or view certain tags and endpoints are assigned to a role. Users are assigned roles and through those role assignments the users acquire permissions for their Console activities.
If a user is restricted from certain endpoints and that user then creates an IP tag for a range of IP’s, then the restricted endpoint will not be included in the search results, even if it falls within the IP range.
The same is true for Filter tags. If a user creates a filter tag by Endpoint name, and the restricted endpoint matches the filter for that tag, then search results for the restricted endpoint will not be included.
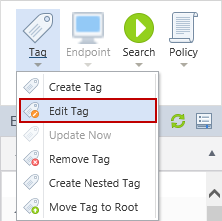
Edit Tag
The Edit Tag dialog allows you to change the name of the tag as well as its type. If the type of a tag is changed, all of the endpoints assigned to that tag will be removed from the tag and all nested tags will be deleted.
Update Now
The Update Now option applies only to Dynamic and Filter tags. Because endpoints in Dynamic and Filter tags are automatically included or excluded based on the specified criteria, selecting Update Now ensures that you see the current list of endpoints tied to the tag. By default, the list of endpoints is updated hourly by the "Synchronize Tags" Service Task.

Below is a list of other ways that Filter and Dynamic tags get updated:
- When a filter or a dynamic tag is created.
- When the query is changed.
- When an endpoint is edited and its IP is changed, then all IP tags are updated.
- When the "Synchronize Tags" Service task is executed manually.
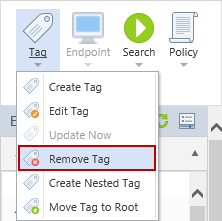
Remove Tag
The Remove Tag option provides a way to permanently remove a tag and cannot be undone. When selected, a confirmation dialog prompts you to ensure that you would like to delete the selected tag and all of its nested tags.
Create Nested Tag
The Create Nested Tag dialog allows you to create a new tag under the selected tag. The options are exactly the same as for a new tag. Tags can also be created at any level and moved later via drag and drop.
A nested tag is a grouping of tags and provides a way to further organize Endpoints. Your environment may have hundreds or thousands of endpoints and you may want to group all of these endpoints under one main tag and then further divide the endpoints under nested tags.
For example, you could create a tag called West Region and under that tag you could create two additional tags, which would be the nested tags. One called Finance Department containing all of the endpoints in the Finance department and one called HR Department containing all of the endpoints in the HR Department. This way you can see results for the entire West Region and individually for each department.


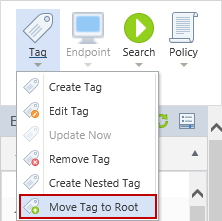
Move Tag to Root
The Move Tag to Root confirmation dialog prompts you to ensure that you would like to move the selected tag to the top level of the Endpoint List. Tags can be moved at any time via drag and drop.
Endpoint Button
An endpoint is any system or other logical location that can be searched. The most common endpoints are Windows and Mac computers with the Spirion endpoint software installed. Additionally, any remote machine, website, or storage device that is searched will also appear as an endpoint. Finally, with an Active Directory, LDAP or IP Range tag, any object returned where "objectClass=computer" will appear as an endpoint regardless of whether or not it has been searched. An endpoint can exist in any number of tags.
The Endpoint button allows you to edit or remove endpoints, add and remove endpoints from tags, move endpoints from one tag to another, merge multiple endpoints into a single endpoint, and create a Purge Logs or Purge Results service task.

The Console Administrator Tool (CAT) can be used for assigning Endpoints to an existing tag via the importation of a CSV file containing Endpoints, MAC addresses or IP addresses. Please see the CAT documentation for further details.
Edit Endpoint
The Edit Endpoint dialog allows you to edit the name of the endpoint as well as the list of associated IP addresses and MAC addresses. IP and MAC address information is reported to the Console during the initial registration process for an endpoint. If the endpoint was searched remotely, these values will likely be blank.
An endpoint's name is stored for display purposes in the Console UI as well as for internal usage. If it is necessary to change the endpoint's name, in most cases, you will only want to modify the display name by leaving the Rename Only the Display Name checkbox checked. The display name is used in the Endpoint List and for filtering, reporting, and everywhere that an endpoint name appears in the UI. The host name changes the identity of the endpoint and is used during the data import process. If both names are changed (the checkbox is cleared) and the Automatically update endpoint names setting is enabled, the display name will revert to the host name and overwrite your change. The host name can be viewed on the Status tab as part of the endpoint Details.
You might use an endpoint name to refer to a computer located in a specific location and as such that particular computer may be replaced or moved to a different network at some point. When it is, the IP address and/or the MAC address can change along with it. In this case you may want to keep the endpoint name the same but you would then need to update the IP and/or the MAC address that the Console associates with it.
Optionally enter an Endpoint Owner E-mail Address that can be used when sending Workflow notifications.
You may optionally specify Endpoint Owners which can be used when assigning results manually or via Workflows. Rather than manually entering the Endpoint Owners and E-mail addresses, you can import them via the CAT. For detailed information, please refer to Import CSV for Emails and Owners in the CAT. When a user synced from AD has been disabled, it will be displayed here in a gray italic font.
To add an IP address or MAC address to the endpoint, enter the address in the IP Addresses field or MAC Addresses field, respectively, and click on the green circular button with the plus in the middle. The new address will then appear in the list of addresses. Click OK when you are finished with all changes.
While IP and MAC addresses are automatically updated during GUID registration and when the endpoint sends search results to the Console, you may wish to manually add them so that offline endpoints appear in reports.
To remove an IP address or MAC address, highlight the desired address(es), click Remove Selected and click OK.
If there is an IP or MAC address that is no longer associated with an endpoint, perhaps because the network card has been remvoed or the IP has changed, you may manually remove it.
If you remove a valid IP or MAC address from the list of addresses, it will reappear in the list the next time the Endpoint sends search results to the Console.
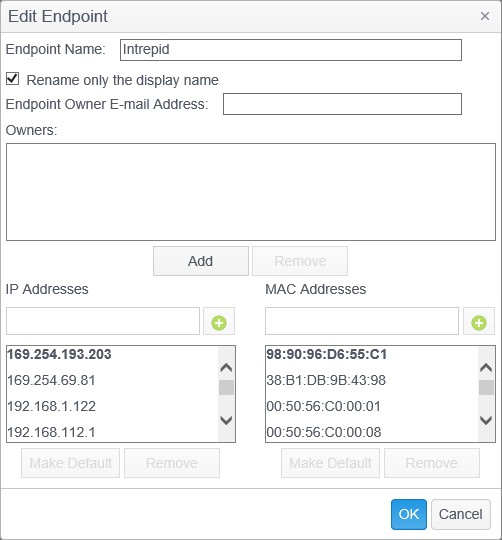
To set an IP address or MAC address as the default address , highlight the desired address and click Make Default and click OK. The default address will appear in bold.
An endpoint can have multiple IP and MAC addresses as a result of having been merged or if the endpoint has multiple network adapters. When using DHCP, a new IP address will automatically be added to the endpoint. All of the IP addresses will be listed when editing the Endpoint, but only one can be the default.
The IP address marked as default will be used in Reporting when the Endpoints->IP Address column is used. The MAC address marked as default will be used in Reporting when the Endpoints->MAC Address column is used.
Remove Endpoints
Remove Endpoints allows you to permanently delete an endpoint from the Console
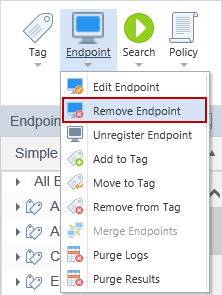
The Remove Endpoints confirmation dialog prompts you to ensure that you would like to remove the selected endpoint(s). You can select multiple endpoints by holding the CTRL key while clicking on endpoints. If the endpoint(s) currently have information associated with them, such as search results, the prompt will display, "The selected endpoint(s) contains data. Remove anyway?" to alert you to this fact.
Rather than removing that data at the time of the request, the Console schedules the removal for a later time. The removal will be created as a Service Task of type "Remove Endpoints" and will be automatically removed after successfully executing.
When an endpoint is in an AD tag and that system is removed from the AD or it is in an IP Address tag and its IP address is changed to no longer match the tag specifications, it will be automatically removed from the tag. The endpoint will continue to exist in the All Endpoints tag.
Once the Remove Endpoints service task has successfully executed, it will be necessary to manually refresh the endpoint list to reflect any changes since the last logon or refresh.
Unregister Endpoints
Unregister Endpoints allows you to remove all registration information for an endpoint.

When you unregister an endpoint, certain information (Endpoint Version, Platform, Platform Type, Policies State, Last Poll and Guid) for that endpoint will be removed from the Endpoint Status Detail tab and the endpoint icon will change to blank. The endpoint and any existing results for that endpoint will not be removed from the Console. The next time that the endpoint polls the Console, the endpoint will re-register and a new endpoint may be created depending upon the Automatically merge endpoints based on setting. You can select multiple endpoints by holding the CTRL key while clicking on endpoints. Note: Users must have the Edit or Remove Endpoint General Permission in order to unregister an endpoint.
Add to Tag
Add to Tag allows you to add the selected endpoint(s) to any existing tag.
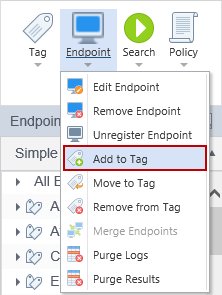
The Select Tags dialog displays all of the tags and nested tags available in which the endpoint(s) can be placed. An endpoint can exist in any number of tags and this operation will not remove the endpoint from any existing tags. If the endpoint already exists in the destination tag, this operation will have no effect. You can select multiple endpoints by holding the CTRL key while clicking on endpoints.
Move to Tag
Move to Tag allows you to move endpoint(s) from one Simple tag to another.
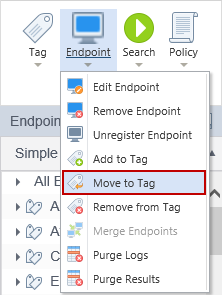
You can move selected endpoint(s) from any existing Simple tag to one or more existing Simple tag(s). (IP, AD and Filter tag endpoints cannot be moved this way as they are all dynamic.) Once moved, the endpoint will no longer exist on the tag from which it was just moved. If the endpoint already exists on the destination tag, this operation will have no effect.
To move an endpoint, click the arrow to the left of a tag or double-click on a tag to show the endpoints associated with that tag. Select the endpoint to move by clicking on it. You can select multiple endpoints by holding the CTRL key while clicking on endpoints. Click on the Endpoint button and select Move to Tag.
The Select Tags dialog displays all of the tags and nested tags available to which the endpoint(s) can be moved. An endpoint can exist in any number of tags. Once you have made your selection click Move to complete the operation or Cancel to cancel the operation.
Remove from Tag
The Remove from Tag confirmation dialog prompts you to ensure that you would like to remove the specified number of endpoints from the specified tag(s). You can select multiple endpoints by holding the CTRL key while clicking on endpoints. The count is provided in the confirmation in the form, "Remove 3 endpoint(s) from the tag(s)?"

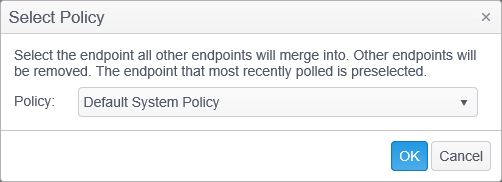
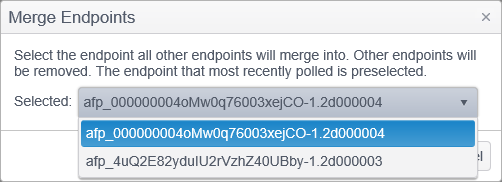
Merge Endpoints
The Merge Endpoints operation allows you to move all of the data from one or more endpoints to a selected endpoint and deletes all of the endpoints other than the selected endpoint. You can select multiple endpoints by holding the CTRL key while clicking on endpoints. The dialog reads, "Select the endpoint all other endpoints will merge into. Other endpoints will be removed."
Endpoints can also be merged automatically. The Endpoints Merging Service Task will merge endpoints based on the criteria set in the "Automatically merge endpoints based on" section of the Application Settings page. See Application Settings and Service Tasks for information on automatic merging of endpoints.

Endpoints are generally merged to consolidate results from a single endpoint that have been reported as multiple endpoints. For example, If the Spirion endpoint software is installed on SYSTEM1 and then that system is later re-imaged with the same name - when it attempts to register as SYSTEM1, the Console may note that there is already a SYSTEM1 and assign this endpoint the name SYSTEM1_<GUID> (where GUID is a unique number assigned to each endpoint). If this happens, it would be desirable to merge the original results into the SYSTEM1_<GUID> endpoint (the selected endpoint and the one that now exists) which will delete SYSTEM1 and then you can rename SYSTEM1_<GUID> to SYSTEM1.
In the dialog, it is important that the endpoint that is currently reporting results is specified as the Selected endpoint (and not to choose the endpoint whose Name you want to use).
Note: It is possible to prevent the scenario described above from occurring by configuring the Console to Automatically merge endpoints based on hostname.
Purge Logs
The Purge Logs operation allows you to create a Service Task which will delete log data from the selected tag(s) or endpoint(s). When the task executes, the specified log(s) will be purged.
For more detailed information, please refer to the Purge Logs article. For information about Service Jobs, please refer to the Service Tasks article.
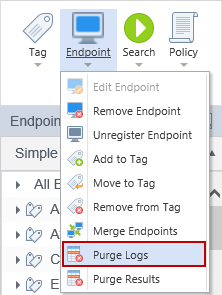
To create a Purge Logs Service Task, click on the Purge Logs selection.
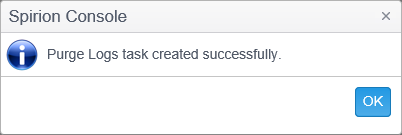
The Purge Logs confirmation dialog confirms that the task was created successfully.
Endpoint logging provides detailed information and it is recommended that logs only be sent to the Console during testing, troubleshooting or initial configuration. By default, endpoints do not send log information to the Console and to do so, this option must first be enabled in a policy. Because the logs are available on the endpoints themselves, it is generally not necessary to have the information in the Console database. Endpoint logs can produce a lot of entries, especially if logging for Locations Searched is enabled, and the database can fill very quickly and degrade performance. For this reason, when collecting logs on the Console, you may want to periodically delete the logs.
Purge Results
The Purge Results operation allows you to create a Purge Results Service Task which will purge results data from the selected tag(s) or endpoint(s). When the task executes, the specified results will be purged.

To create a Purge Results Service Task, click on the Purge Results selection.
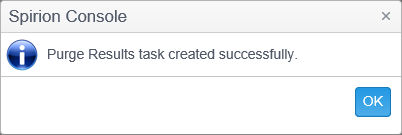
The Purge Results confirmation dialog confirms that the task was created successfully.
The Purge Results Service Task is responsible for deleting results data. It may be desirable to clear out search results on a periodic basis if that data is not needed for reports or analysis.
You can also schedule a Purge Results service task to delete data that matches specific criteria. For detailed information about Purge Results, please refer to the Purge Results article.
For information about Service Tasks, please refer to the Service Tasks article.
Search Button
There are two methods to initiate a search on a managed endpoint. You can create a scheduled task within a policy or you can directly initiate a search on a tag, endpoint, or multiple endpoints via the Search button (or right-click menu).
Initiate Search
When initiating a search via the Search button, the Console will automatically create a policy with a task scheduled to execute immediately after the endpoint applies the policy. The endpoint will not start the search until it successfully downloads and applies the policy.
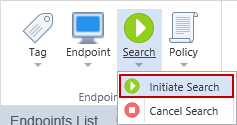
After selecting Initiate Search, the Search Now dialog is displayed.
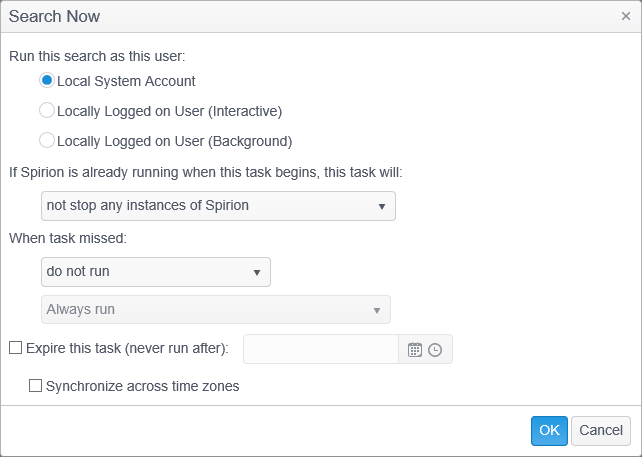
Within this dialog, you can specify the following information:
- Run this search as this user: Specify the user context under which to run the task
- Local System Account: Specify that the search should be run as system or root. No graphical user interface will be available to the end user and the endpoint will run silently in the background. If Run task as soon as possible after a scheduled start is missed is configured when using the Local System Account, the next time the computer is powered on, it will execute the search. Because no user credentials are available, certain locations (such as Browser Data and some E-Mail) cannot be searched.
Using the Local System/Root account allows access to all local files, but will not allow access to E-Mails, Browsers, or remote files such as those on networked drives as those locations require user-specific authentication tokens.
- Locally Logged on User (Interactive): Specify that the search should run with the credentials of the user that is logged in at the endpoint system. The graphical user interface of the endpoint software will be accessible to the user. Only locations to which the user has access (for example NTFS file permissions) can be searched. If no user is logged in at the scheduled start time, the task will not unless Run task as soon as possible or run with randomized start time is selected, in which case the very next time a user logs in, the task will run.
- Locally Logged on User (Background): Specify that the search should run with the credentials of the user that is logged in at the endpoint system. No graphical user interface will be available and the endpoint will run silently in the background. Only locations to which the user has access (for example NTFS file permissions) can be searched. If no user is logged in at the scheduled start time, the task will not unless Run task as soon as possible or run with randomized start time is selected, in which case the very next time a user logs in, the task will run.
Using the Locally Logged On User for a search applies only to the first user account logged on to the physical desktop of the system. It does not apply to any terminal services (RDP) sessions or any users logged on to multiple desktops that occur while the primary desktop session is still active.
- Local System Account: Specify that the search should be run as system or root. No graphical user interface will be available to the end user and the endpoint will run silently in the background. If Run task as soon as possible after a scheduled start is missed is configured when using the Local System Account, the next time the computer is powered on, it will execute the search. Because no user credentials are available, certain locations (such as Browser Data and some E-Mail) cannot be searched.
- If Spirion is already running when this task begins, this task will: Only a single instance of the endpoint can run at a time and therefore, if the endpoint software is running when it is time for the task to execute, one of the following will occur:
- not stop any instances of Spirion: This option will cause the endpoint service on the endpoint (which executes the tasks) to wait for any already running instance of Spirion to finish before executing this task. While this wait occurs, no other scheduled tasks will be processed on the endpoint.
- stop all instances of Spirion and run this search: The endpoint service on the endpoint (which executes the tasks) will stop the current search and run this task. If a user is currently interacting with the application, using this option will cause the endpoint service to stop that search and close the application without prompting the user.
- When task missed: If the task could not be executed at its scheduled time (for example if the system was off or another task was waiting to be launched and the current task was not evaluated before its start time),
- do not run: The task will not be executed. If this task was scheduled to only run once, it will never execute. Otherwise it will execute the next time it is scheduled to do so.
- run as soon as possible: The task will be executed as soon as possible after the reason for it being missed is resolved. For example, if the task is a user task and no user was logged on, it will execute as soon as the user logs on. If the task was system task and the system was off, it will execute as soon as it is powered back on.
- run with randomized start time After (min.): [Minutes] Before (min.): [Minutes]: The task will be executed after a random delay after the reason for it being missed is resolved. For example, if this option is enabled and set to run after 5 minutes and before 30 minutes, and it is a user task but no user was logged on, the task will execute somewhere between 5 and 30 minutes after the user logs on.
- Always Run: Select this option to have the task launch as soon as the Endpoint receives and processes it. This option is only available when choosing run as soon as possible or run with randomized start time.
- Skip if this many hours have passed: Select an expiration time in hours for the task. (i.e. If set to 4 hours, that means that if 4 hours have passed since the scheduled start time, the task will not start.) This option is only available when choosing run as soon as possible or run with randomized start time.
- Skip if not executed on same day as scheduled: Select this option to skip the task if it does not execute on the same day that it was scheduled. (i.e. If the search was scheduled to run on Monday but the endpoint did not receive the task until Tuesday, then the search will not run.) This option is only available when choosing run as soon as possible or run with randomized start time.
- Expire this task (never run after): [Date and Time]: If the task was unable to start between its scheduled time and this time, cancel the task and do not execute it.
- Synchronize across time zones: Specifies that the Start Date/Time is GMT time. When this option is enabled, the time entered is universal across all time zones. This means that three endpoints in three different time zones will all start the task at the same time, regardless of time zone. For example if the time is 12:00 PM and this option is selected, the endpoints will all execute the task simultaneously at noon in London, 7AM (EST) in New York and 4AM (PST) in San Francisco.
The status of the task can be viewed on the Status tab.
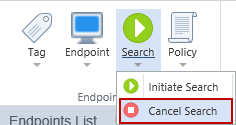
Cancel Search
Cancel Search will not stop a search that is currently running. Cancel Search will remove any pending searches created by using the Initiate Search option. If the endpoint has already downloaded a policy that included the request to perform a search, you cannot cancel the search from the Console. Canceling a search that was initiated on a policy will also cancel a search that was initiated on an endpoint. Likewise, canceling a search that was initiated on an endpoint will also cancel a search that was initiated on a policy.
Policy Button
The Policy button allows you to apply or reapply a policy to an endpoint.

Reapply Policy
An endpoint will apply a policy only when there are changes to the policies to which the endpoint is associated. If the policy is deleted or modified on the endpoint system itself, the Console server will not be aware of the local modification and therefore will not send a policy update to the endpoint. The Reapply Policy operation will force the Console to update the policy for the endpoint. The endpoint will then download this policy at its next polling interval.
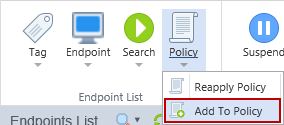
Add To Policy
The Add To Policy operation allows you to add the selected tag or endpoint to an existing policy. When you click on Add To Policy the Select Policy dialog opens and you can choose from one of the existing policies. If you add a tag to a policy then all endpoints in that tag will be added to the policy.