Endpoint List toolbar
The Endpoint List toolbar provides the ability to manage the list of endpoints and restrict the endpoints displayed in the list.
|
In this article |
Filter List Button
The Filter List button allows you to modify the Endpoint List to only display endpoints that match the specified, custom criteria. Neither the All Endpoints tag nor any other tags will be displayed when a filter is applied. The filter list consists of two types of filters:
- Text Filter - When a text filter is applied, only the endpoints whose name matches all or part of the specified text will be displayed in the Endpoint List. This text filter operates only on the endpoint name.
To use this filter:
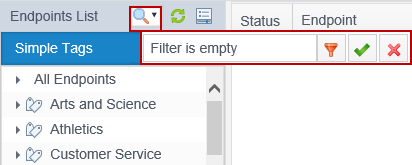
- Click the right part (the down arrow) of the Filter List button to display the filter options.
- Click into the text box.
- Type all or part of an endpoint name into the text box. To clear the current text and close the filter list, click the red X.
- To apply the filter, click the right part (the down arrow) of the Filter List button, click the green check mark button or press the Enter key.
- When the filter is applied, the Filter List button will be highlighted.
- To clear the current filter, click the left part (the magnifying glass) of the Filter Listbutton or the red X next to the text box. The Filter List button will lose its highlight.
- Custom Filter Button
 - The custom filter provides the ability to filter on more information than just the endpoint name. With a custom filter you can restrict the Endpoint List to display only those endpoints that match the specified, custom criteria.
To use this filter:
- Click on the right part (the down arrow) of the Filter List button to display the filter options.
- Click on the filter icon.
- The filter dialog will display. The filterable items include:
- Endpoint Platform - A filter which restricts based upon the platform on which the endpoint is running.
- Endpoint Version - A filter which restricts based upon the version of the endpoint as reported by the endpoint.
- E-mail Address - A filter which restricts based upon the e-mail address associated with an endpoint.
- Endpoint Name - A filter which restricts based upon the Display Name of the endpoint. You may enter the full or partial endpoint name.
- Endpoints - A filter which restricts based upon the display name of the endpoint. You may select the full endpoint name from a list showing all available endpoints.
- IP Addresses - A filter which restricts based upon the IP address reported by the endpoint.
- Last Poll Time - A filter which restricts based upon the date and time (local to the Console server or GMT as defined on the Personal Settings page) that the endpoint last polled the Console.
- MAC Addresses - A filter which restricts based upon the MAC address reported by the endpoint.
- Search in Progress - A filter which restricts based upon the search status of the endpoint.
- State - A filter which restricts based upon the interactive state of the endpoint.
- Tags - A filter which restricts based upon the tag name.
- To apply the filter, click the Apply button.
- When a custom filter has been set the text box will display Custom Filter.
- When the filter is applied, the Filter List button will be highlighted.
- To clear the current filter and close the filter list, click the red X.
When a text filter is applied, only the endpoints whose name matches all or part of the specified text will be displayed in the Endpoint List. Only one filter type can be applied at a time. If the text filter is applied and you open the custom filter dialog and apply a custom filter, the text filter will be cleared. The reverse is also true. Applying a text filter when a custom filter is applied will clear the custom filter.
Refresh Button
If any endpoints have been created or removed since the last logon or refresh, it will be necessary to manually refresh the list to reflect the changes on the database.
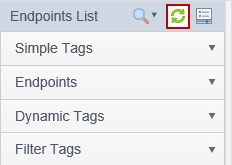
To update the Endpoint List, click the Refresh button. Refreshing the list will reload the Endpoint List and reset the selection (any selected endpoints or tags will no longer be selected).
Configure Button
The configure button allows you to configure the endpoint list panels by selecting the visible panels, their order, and the number of items visible in each panel.
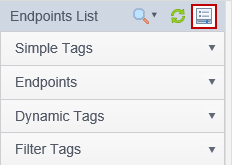
Click on the Configure button and the Configure Panels window will open.
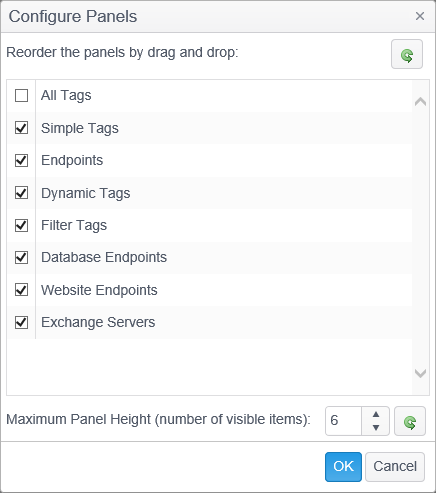
To reorder the panels, left click on a panel and drag and drop it above or below another panel. To reset the panels back to their default order, press the green reset button in the upper right corner of the Configure Panels window.
Uncheck the panels that you wish to remove from the endpoint list or check the panels that you wish to add to the endpoint list.
To set the maximum height of each panel, enter a value in the Maximum Panel Height (number of visible items) box. The default value is 6. To reset the panel height back to its default, press the green reset button to the right of the value.
Collapse/Expand Icon

Clicking on the Collapse/Expand Icon will collapse the Endpoint List and pin it to the left side of the screen. To unpin the Endpoint List, click the Collapse/Expand Icon again.