Filtering
Filtering provides the ability to restrict the information that is displayed in various reports and views throughout the Console, and when creating report and workflow definitions. With filtering, you can select only the information that matches the specified, custom criteria.
|
In this article |
Where Filtering is Used
Filtering is used in the following places:
- When creating a filter tag to organize your endpoints.
- When creating or modifying a report definition using the Filter tab of the Report View.
- To restrict the Results view from the Results ribbon using the Custom Filter button.
- To restrict the data displayed in a report via the Filter Data button.
- When creating or modifying a Workflow Rule Definition.
- To restrict the Logs View via the Filter button.
- When creating or modifying Service Tasks.
- To restrict the Audit Log Messages that are displayed in the Messages View via the Filter button.
- To restrict the Members View on the Discovery Team View via the Column filters and Filter button.
Filter Fields
A filter generally consists of three fields. Though in some cases a fourth field displays. These fields are:
| Field | Description |
|---|---|
| Filter type | The Filter Type specifies the type of data that you are filtering. "Agent Platform" and "Location" are examples of a filter type. |
| Filter type detail | This field only displays in the Workflow Definition tab when the filter type is set to AnyFind Count. |
| Operator | The Operator calculates results based upon the filter type. The list of operators differs depending on the filter that is selected. "Equals" and "Does Not Contain" are examples of an operator. |
| Value field | The Field specifies the value used to qualify the data. This can range from a user specified alphanumeric value to a predetermined list of values from which you can select. In some cases the value field does not display, depending upon the Operator that you selected, as there is no need for it. Some examples of this are if you choose an operator of "Is Empty," "Is Not Empty," "Today," or "Yesterday." |
Plus Button
The plus button is used to add additional filters allowing you to filter on multiple criteria.
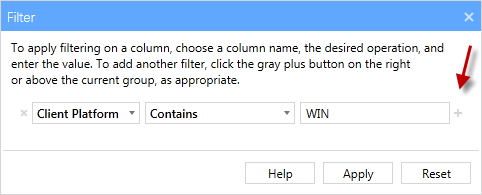
Click the gray plus button  and a new filter appears below the current filter.
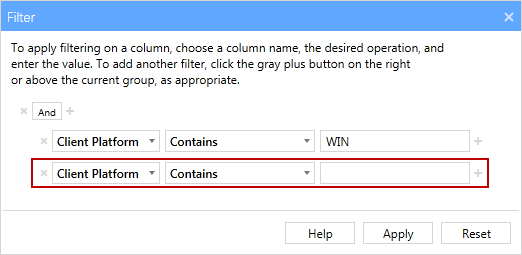
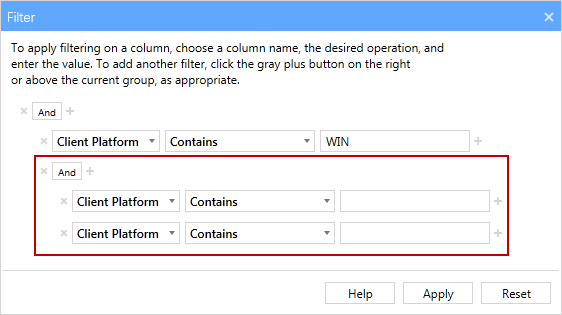
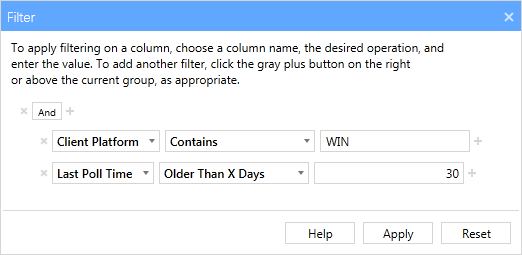
Each time you click the plus button, it adds another filter, but it also adds an Operator. When there are multiple filters there must be at least one operator, either And or Or. When you click a plus button to the right of a filter, an additional operator is added directly above that filter and a new filter is added below it. In the example above, clicking the plus button on the bottom filter adds a new operator directly above that filter and a new filter directly below it forming a new operator group as is shown below.
And/Or Operators
The And/Or operators are used to create complex filters by filtering records based on more than one condition. To toggle the condition from AND to OR (or vice versa), click the word And or Or.
The AND operator displays a record if both the first condition AND the second condition are true.

The OR operator displays a record if either the first condition OR the second condition is true.

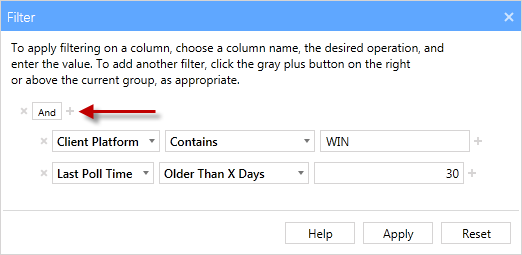
If you want to add additional filters under the same operator click the gray plus button to the right of the operator and a new filter is added at the bottom of that group. To add a third filter to the example below, click the gray plus button to the right of the And operator.
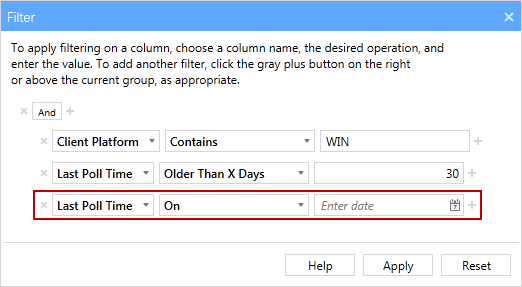
The new filter displays at the bottom of the group.
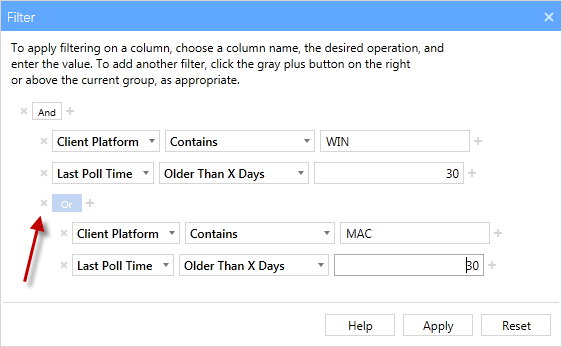
Clicking the gray x button to the left on an operator removes that operator and all filters within that operator group.
Examples
Creating a Filter Tag
To create a Filter Tag which displays only those endpoints running on a 64 bit Windows platform and that have not polled within the past 30 days, follow the steps below.
Endpoints are added to Filter tags based upon the type of filter or filters selected and the results of the specified criteria. A single Filter tag can contain multiple filters. Filter tags are grouped under the Filter Tags panel. For example, filter tags can be used to group endpoints by platform, by last poll time, or by result information.
To create a Filter Tag which displays only those endpoints running on a 64 bit Windows platform and that have not polled within the past 30 days, follow the steps below.
- From the Dashboard tab, click the Tag button on the Endpoint List ribbon and click Create Tag.

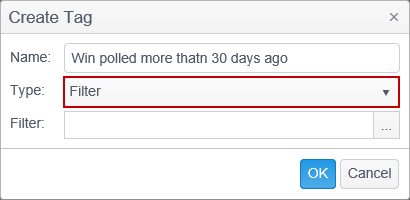
- Enter a name for the tag, select Filter as the tag type and then click on the '...' button to the right of the Filter selection to open the Filter Dialog.
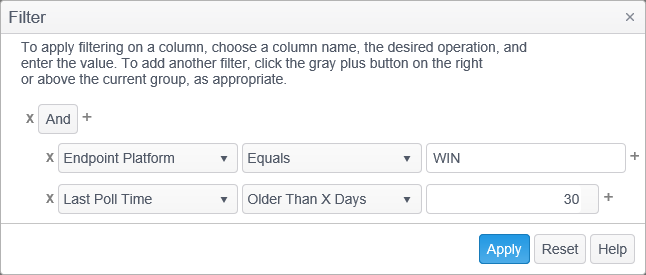
- Select Agent Platform from the column name drop-down list, Equals from the operation drop-down list and enter ‘WIN’ in the value field. (Windows Agents running on a 32 bit OS would be stored as WIN32 and would therefore not be included in these results.) If you wanted to include all Agents running on a Windows platform you would select Begins With from the operation drop-down and enter WIN in the value field.

- Next, add a second column filter to limit the results to those Agents that have not been polled within the past 30 days. Click the gray plus button on the right and a new column filter appears.
- For the second filter, select Last Poll Time from the column name drop-down list, select Older Than X Days from the operation drop-down list and enter 30 in the value field.
- Above the column filters is an operator which can be set to either ‘And’ or ‘Or. Make sure the operator is set to ‘And.’ If you choose ‘Or,’ your results show you all Agents running Windows as well as all Agents that have not been polled within the past 30 days.
- Click Apply when you have finished.
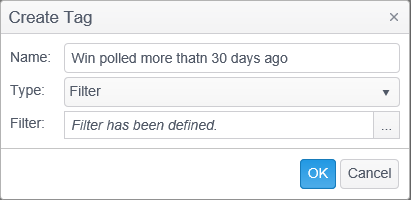
- Click OK to save the tag.
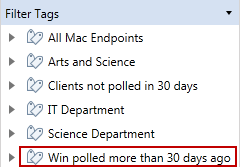
- Your newly created tag is listed in the Filter Tags panel.
Creating a filter for the Logs View
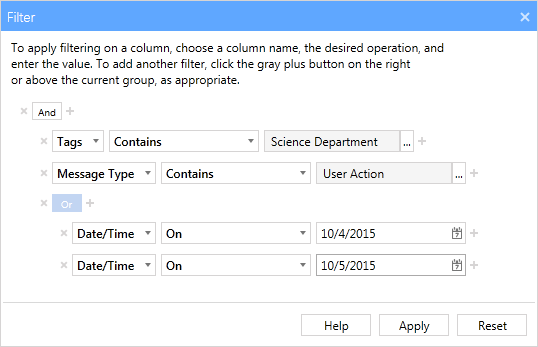
This example creates a filter for the Logs View which shows only the user action logs for a specific tag on selected days.
- Click on the Logs tab and then click the Filter button.

- When the filter dialog opens click the filter type and select Tags from the drop-down.
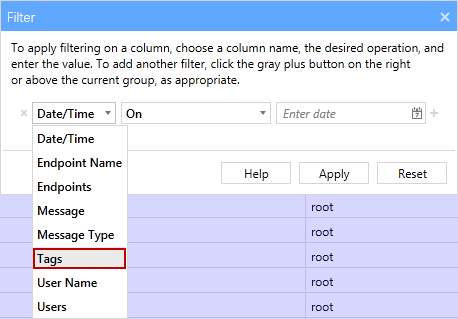
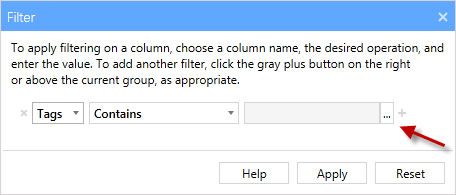
- Leave the operator as Contains and click the '...' button to open the Select Items dialog.
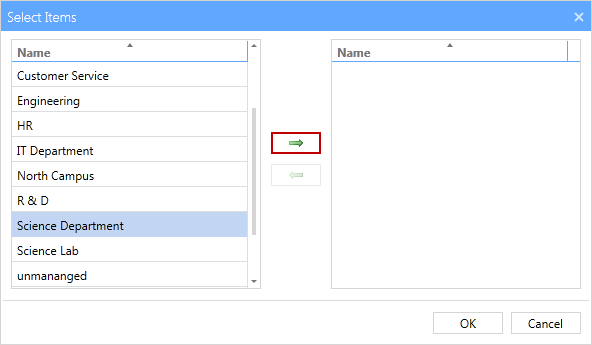
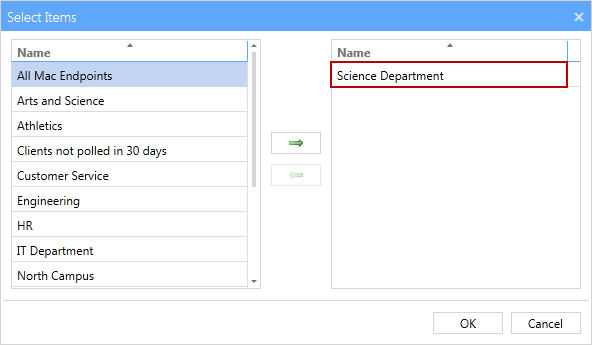
- The left column shows the items that are available but not currently part of the filter. The right column shows items that have been selected for the filter. From the left column select a tag(in our example we have chosen the Science Department' tag), then click the right arrow button to add the selected tag to the filter and the tag name is moved to the include column. You can select multiple tags by holding down the Ctrl button while left clicking the mouse.
- When you have finished adding tags to the include column click the OK button.
- To add a second item to the filter click the gray plus button on the right.
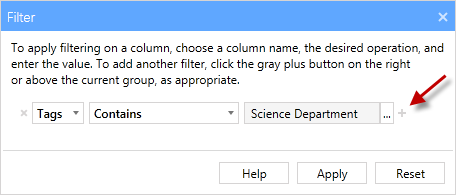
- The filter dialog now has an additional filter.
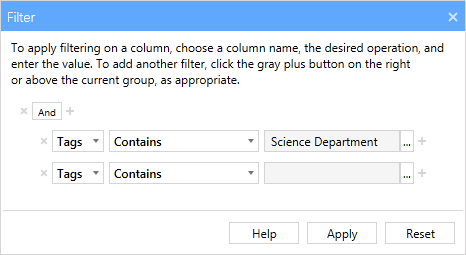
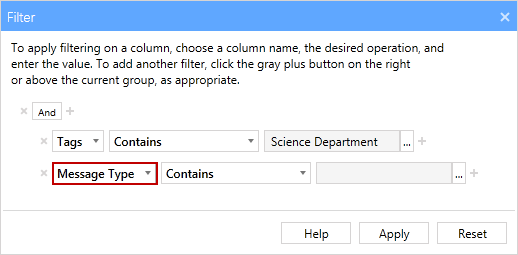
- On the new filter, click on the filter type and select Message Type from the drop-down. Leave the operator as Contains and the click on the '...' button to open the Select Items dialog.
- Select user Action from the column on the left and click the right arrow to add it to the filter. Click OK when finished.
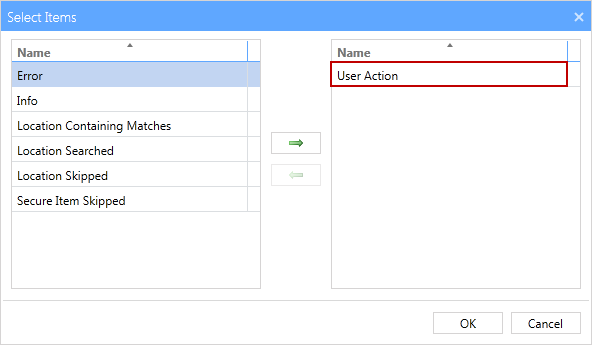
- If we leave the filter the way it is, it would show only those logs which are part of the Science Department tag and that have a message type of User Action. But as we want to add additional qualifiers to this filter, click the plus button to the right of the And operator.
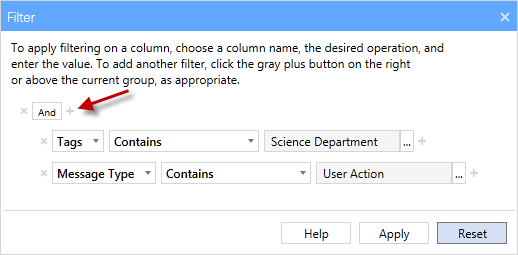
- This adds a third filter.
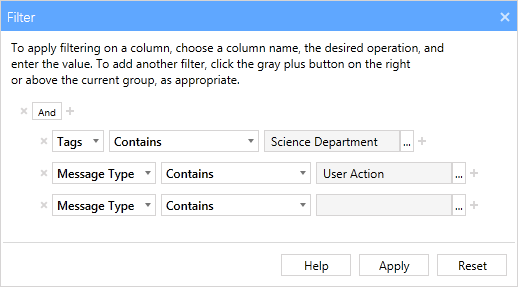
- Click on the filter type and select Date/Time from the drop-down, change the Operator to On and click on the calendar button.
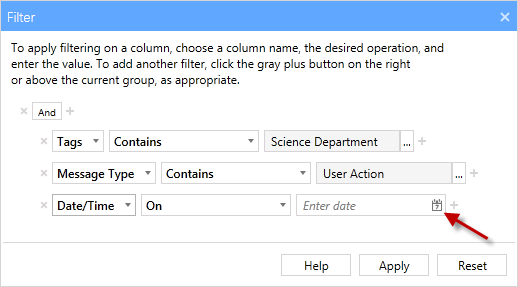
- Select the desired date on which to filter and that date populates the value field.
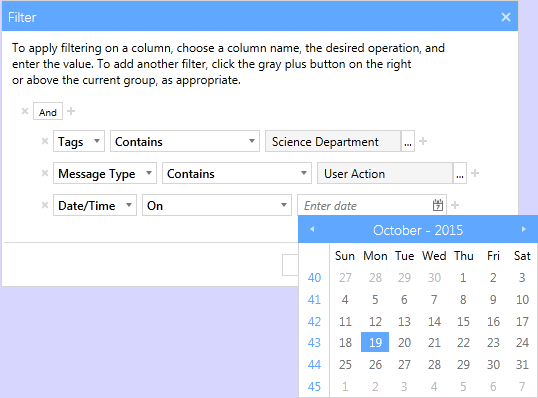
- We still need to add an additional date on which to filter. To do this click on the plus button to the right of the bottom filter.
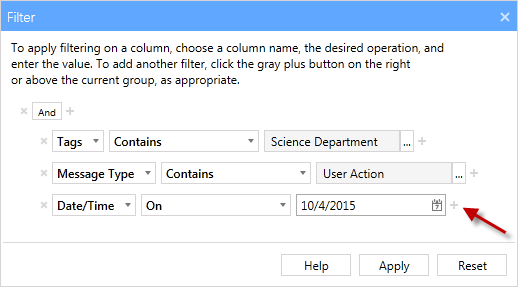
- The new filter displays directly beneath the previous one. You see that there is now an additional And operator, but as we want the filter to only be required to match one of the two dates, not both, click on the And operator and it changes to an Or.
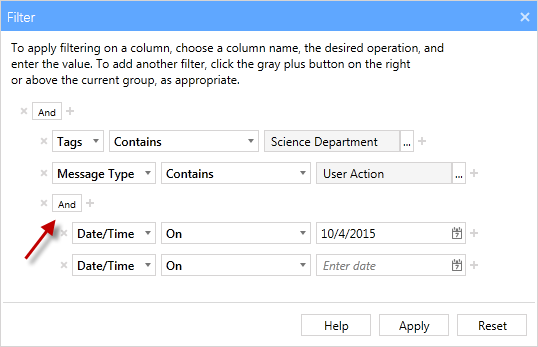
- For this second Date/Time filter, change the operator to On and select another date . The filter is now complete and displays only the logs from 10/04/2015 OR 10/05/2015 AND which have a Message Type of User Action AND are part of the Science Department tag.
