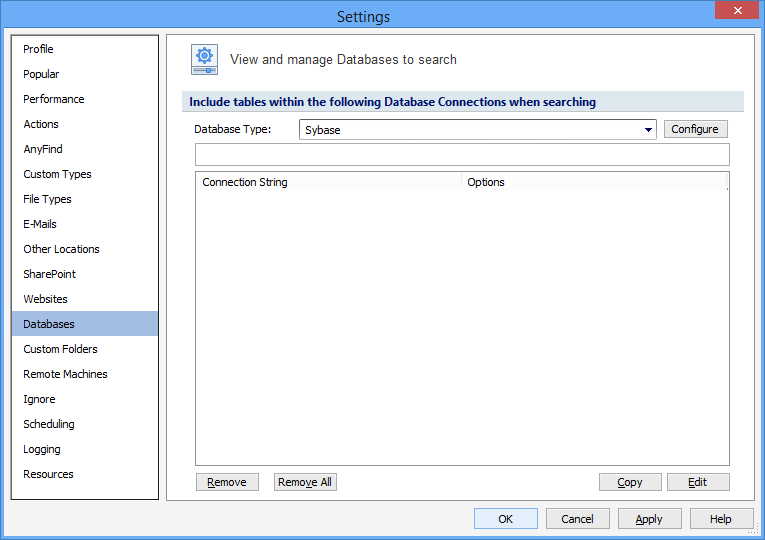
Adding Sybase Databases to Include When Searching for Personally Identifiable Information
To add a Sybase Database Connection String first select Sybase from the Database Type dropdown by clicking on the down arrow next to the Database Type field, then click the Configure button and enter your database connection information.
Enter the Server Name, Database Name, User Name and Password. You may optionally configure the following:
Establish the fields below to configure a connection with a Sybase database:
| Name | Description |
|---|---|
|
Server Name |
|
| Database Name | |
|
User Name |
|
|
Password |
|
Additional Options: When entering multiple entries, use a semicolon as the delimiter between entries.
You may optionally configure the following:
| Name | Description |
|---|---|
|
APPNAME |
Specify the application name to use when connecting to the database. For more information, please refer to your Sybase documentation. The default value is: APPNAME=Sensitive Data Manager; |
| HostName | Declares the name of the host machine used when logging into a server. For more information, please refer to your Sybase documentation. The syntax is: HostName=server; (where server is the name of the host machine). |
|
TimeoutSec |
Specify the number of seconds to wait before returning to the application. Valid values are the timeout value in seconds. The syntax is: TimeoutSec=n; (where n is the number of seconds). e.g. to specify a timeout of 5 minutes you would enter: TimeoutSec=300; |
| PreFetchRows | Forces the application to fetch rows in bulk rather than retrieving records one by one (which is the default). The syntax is: PreFetchRows=n (where n is the number of rows). e.g. to fetch 5 rows at a time you would enter: PreFetchRows=5; The default value is 1. |
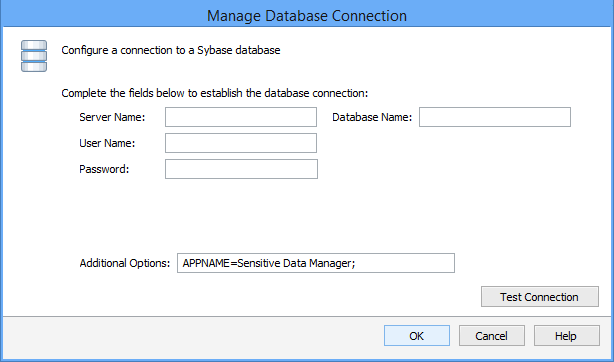
Press Test Connection. If successful, press OK and you will be taken back to the View and Manage Databases to search screen. Press Add to add the database connection string.
Note: The application requires Open agent version 10.0 or higher to be installed on the Endpoint that will be performing the database search.
Additional Information
To view or modify this setting, click the Configuration ribbon, then the Settings button then the Databases page. For additional settings please refer to View and Manage Databases to Search or Settings to Customize Your Experience.