Adding MySQL Databases to Include When Searching for Personally Identifiable Information
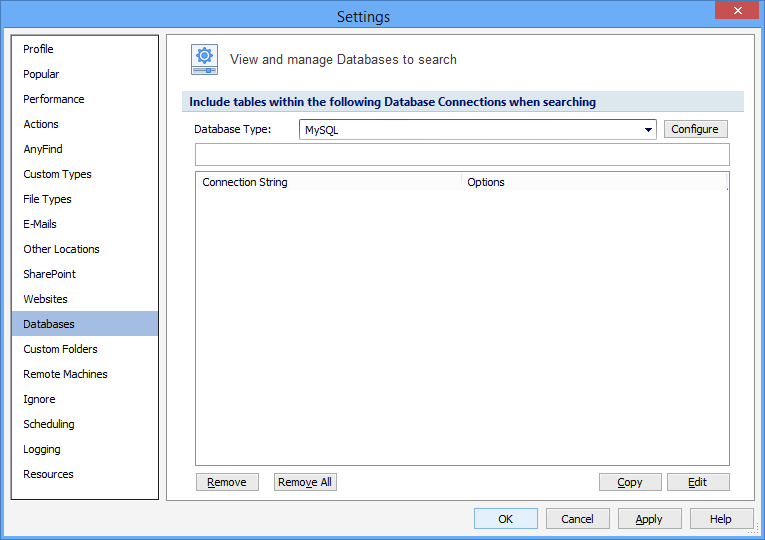
To add a MySQL Database Connection String first select MySQL from the Database Type dropdown by clicking on the down arrow next to the Database Type field, then click the Configure button and enter your database connection information.
Establish the fields below to configure a connection with a MySQL database:
| Name | Description |
|---|---|
|
Server Name |
|
|
Database Name |
Database Name examples:
|
| User Name | |
|
Password |
|
| Database Name | |
|
Host Name |
|
Additional Options:
When entering multiple entries, use a semicolon as the delimiter between entries.
|
ReadTimeoutMillisec |
ReadTimeoutMillisec: Specify the timeout in milliseconds for each attempt to read from the server. The application will perform two retries if necessary, so the total effective timeout value is three times the specified value. There does not exist a default ReadTimeoutMillisec value with MySQL, however there exists a TCP/IP Close_Wait_Timeout of 10 minutes. You can set the ReadTimeOutMillisec value so that a lost connection can be detected earlier than the TCP/IP Close_Wait_Timeout default of 10 minutes. The syntax is: ReadTimeoutMillisec=n (where n is the number of milliseconds). e.g. to specify a timeout of 3 minutes (which is a total effective timeout of 9 minutes) you would enter ReadTimeOutMillisec=180000; Please refer to your MySQL documentation for more information on how this option affects the underlying connection behavior. |
| ConnectTimeoutMillisec | ConnectTimeoutMillisec: Specify the timeout in milliseconds for each attempt to connect to the server. The application will perform two retries if necessary, so the total effective timeout value is three times the specified value. There is no default ConnectTimeoutMillisec value. The syntax is: ConnectTimeoutMillisec=n (where n is the number of milliseconds). e.g. to specify a timeout of 3 minutes (which is a total effective timeout of 9 minutes) you would enter ConnectTimeoutMillisec=180000; Please refer to your MySQL documentation for more information on how this option affects the underlying connection behavior. |
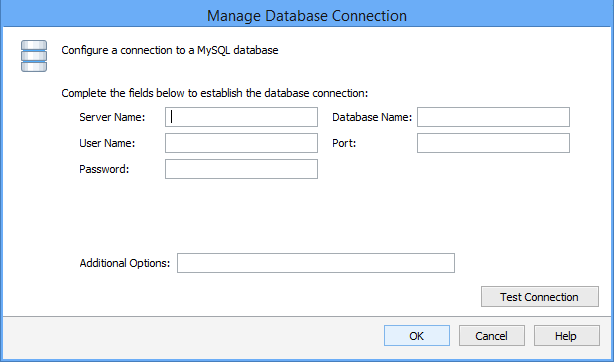
Press Test Connection. If successful, press OK and you will be taken back to the View and Manage Databases to search screen. Press Add to add the database connection string.
Note: The application requires MySQL C API version 3.23.x or higher to be installed on the Endpoint that will be performing the database search. This can be found in the MySQL connector for C. https://dev.mysql.com/downloads/connector/c/.
Syntax: server,port@database
Issue: Connection test fails. Errors in log when searching.
ERROR - Error opening database for DB Type : test@192.168.1.4,3306 and exception is : libmySQL.dll: The specified module could not be found. DBMS API Library loading fails This library is a part of DBMS agent installation, not SQLAPI++ Make sure DBMS agent is installed and this required library is available for dynamic loading.
By default Windows does not seem to add the path to the libmysql.dll to the PATH environment variable. Search for the 32bit libmysql.dll and copy the path to the Path System variable. After pasting in the path to the dll the Endpoint for Windows must be closed and reopened.
There is an UNDOCUMENTED requirement for the 32-bit Connector/C 6.1.11 libmysql.dll driver to have vcruntime140.dll available. This is part of the Microsoft Visual C++ 2015 Redistributable Update 3 RC x86 package. The Microsoft package can be found here: https://www.microsoft.com/en-us/download/details.aspx?id=52685
Additional Information
To view or modify this setting, click the Configuration ribbon, then the Settings button then the Databases page. For additional settings please refer to View and Manage Databases to Search or Settings to Customize Your Experience.