Sensitive Data Types Group
|
In this article |
Add Button
To add a new Sensitive Data Type entry, click the Add button.
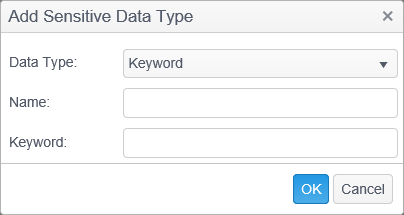
The Add Sensitive Data Type dialog will display.

The available Sensitive Data Types are:
Keyword
Spirion looks for any exact matches to your keywords without regard to context. For example, if you added the keyword "to" (without the quotes), you would receive results matching the "to" in; for example, to, town, into, and altogether. If you want to ensure that there are, for example, spaces before and after the keyword, you can include those spaces by typing " to " (without the quotes) but you will have much greater control by using Regular Expressions.
- Name: Enter the name for the Keyword in the Name field. The Sensitive Data Type / Name combination must be unique. The name entered in this field displays in the Sensitive Data Type Name column on the Results Grid. If a search has been completed and results imported into the Console and the Name is subsequently changed, the original name is still displayed in the Sensitive Data Type Name column for any results that were previously imported into the Console even if they are searched again. The new name is used for new results matches only. This field is required.
- Keyword: Enter your keyword here.
Note: Keywords are case sensitive. If you would like to search for a case insensitive keyword (for example to match "to", "To", "TO", and "tO" in the example above), you can add "to" (without the quotes) as a Regular Expression.
Regular Expression
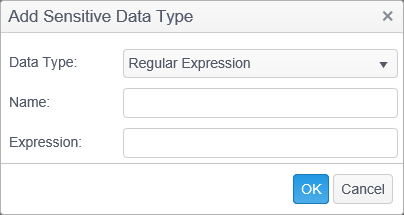
Regular Expressions allows you to specify any regular expressions (RegEx) to include in the search. Regular expressions allow you to search for patterns such as a sequence of digits, a word surrounded by white space, and even complex formatted strings. Spirion uses the Perl regular expression syntax from the boost Libraries. Regular expressions are case insensitive. If you would like to search for a case sensitive keyword (for example to match "to" but not "To", "TO", or "tO"), you can add "to" (without the quotes) as a Keyword.
For example, to search for 2 digits followed by a dash followed by 4 digits, you could add the RegEx: \d{2}-\d{4} (note, this is just an example and may not meet your specific needs).
This would match 43-5343 and 56-2313 but would also match within 35435-324322 and return the result 35-3243. To not match the latter case, you could enhance the expression to require leading and trailing white space: \s\d{2}-\d{4}\s
- Name: Enter the name for the Regular Expression in the Name field. The Data Type / Name combination must be unique. The name entered in this field will display in the Sensitive Data Type Name column on the Results Grid. If a search has been completed and results imported into the Console and the Name is subsequently changed, the original name will still be displayed in the Sensitive Data Type Name column for any results that were previously imported into the Console even if they are searched again. The new name will be used for new results matches only. This field is required.
- Expression: Enter your RegEx here.
Dictionary
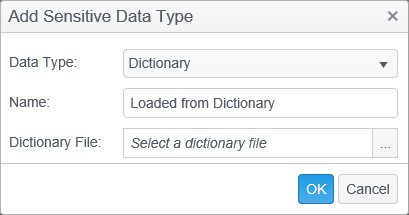
Using a dictionary allows Spirion to search for words that are present within the dictionary that you specify. Detailed information on the structure of a dictionary is available in the client User Guide.
- Name: The name is read from the dictionary file itself on import and cannot be edited and must be present in the dictionary file. The Data Type / Name combination must be unique. The name in this field displays in the Sensitive Data Type Name column on the Results Grid. If a search has been completed and results imported into the Console and the Name is subsequently changed, the original name is still displayed in the Sensitive Data Type Name column for any results that were previously imported into the Console even if they are searched again. The new name is used for new results matches only.
- Dictionary File: To add a dictionary, click the browse button (the ...) next to the Dictionary File field and navigate to the desired dictionary. When you choose a file on disk, it is added to the Sensitive Data types content. If you later change that file on disk it does not change the file that is part of the Sensitive Data Types content - The dictionary needs to be removed from the Sensitive Data Types content view and re-added.
A Dictionary can also include phrases and can be configured using the following policy settings in a policy applied to the endpoint:
- Settings\Identities\CustomDictionary\PhraseIgnoreCharacters: Characters to ignore in source text when searching for phrases.
- Settings\Identities\CustomDictionary\PhraseWordDelimiterCharacters: The characters that separate words in a phrase or dictionary or in source text.
Sensitive Data Definition
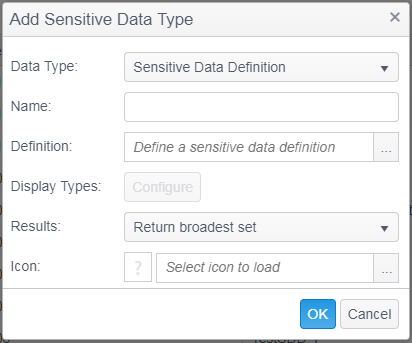
A Sensitive Data Definition allows Spirion to search for data types using criteria that you specify with a declarative Sensitive Data Definition.
- Data Type: When you create or edit a Sensitive Data Definition type, select the appropriate option from the operator drop-down, Near, Near with Distance, Near Before , Near Before with Distance, Near After, Near After with Distance, Far, Far with Distance, Far Before, Far Before with Distance, Far After, Far After with Distance, Before, After, or Equals.
- Name: Enter the name for the Sensitive Data Definition in the Name field. The Data Type / Name combination must be unique. The name entered in this field will display in the Sensitive Data Type Name column on the Results Grid. If a search has been completed and results imported into the Console and the Name is subsequently changed, the original name will still be displayed in the Sensitive Data Type Name column for any results that were previously imported into the Console even if they are searched again. The new name will be used for new results matches only. This field is required.
- Definition: To add a Sensitive Data Definition, click the browse button (the ...) next to the Definition field and the Edit Sensitive Data Definition dialog will open. Create your sensitive data definition and click OK when completed.
- Display Types: The Configure button should only be enabled when a Sensitive Data Definition has been defined and should display all used types in the Sensitive Data Definition.
- Results: New and existing Sensitive Data Definitions default to Return broadest set. You can also select Return most restrictive set. When using the restrictive option, any Sensitive Data Definitions used in the Definition must also be restrictive. When using the broadest option, any parent Sensitive Data Definition (any Sensitive Data Definition that uses the Sensitive Data Definition you are editing in its definition) cannot be restrictive.
- Icon: Select an icon to load to represent the Sensitive Data type (icons greater than 5120 bytes will not be displayed) by browsing to an icon on disk. (Beginning with version 9.1 of the Console, there is a set of icons included that you may use. For version 9.1 and Consoles that were upgraded from 9.1 to 10.0 or greater, the icons are located in the following location: C:\Program Files\Identity Finder Console\wwwroot\Console\Images\Custom. For new installations of version 10.0 or greater the icons will be in the following location: C:\Program Files\Spirion Console\wwwroot\Console\Content\Images\Custom) The icon will display in the Sensitive Data Type column on the Results view for results matching this Sensitive Data Type. If you do not select an icon it will use the default Sensitive Data Definition icon. To remove an icon once uploaded, click on the icon and a dialog will display confirming that you would like to clear the existing icon.
For detailed information on constructing a sensitive data definition and related policy settings, please refer to Sensitive Data Definitions.
Search API
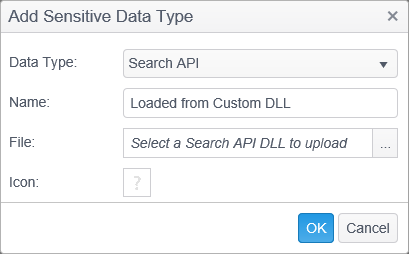
Search API is used to select the Sensitive Data types that allow a client to search for data unique to your environment. The Sensitive Data Type is in the form of a Dynamic Link Library (DLL) that you provide. For results of this type to appear in the Console, the Sensitive Data Type DLL must also exist on every Windows endpoint performing a search for results of this type. The following settings in a policy applied to an endpoint must be configured.
- Initialization\Plugins\Enable
- Initialization\Plugins\Path
Spirion has an Application Programming Interface (API) that allows developers to create their own rules and definitions for finding personal information and sensitive data. For example, you can easily create logic to find a pattern of numbers or characters to hone in on the particular sensitive information you want to discover and clean. If you are an enterprise customer, please contact the Spirion Team to obtain access to our API.
- Name: The name is read from the DLL file itself on import and cannot be edited and must be present in the DLL file. The Sensitive Data Type / Name combination must be unique. The name in this field displays in the Sensitive Data Type Name column on the Results Grid. If a search has been completed and results imported into the Console and the Name is subsequently changed, the original name is still displayed in the Sensitive Data Type Name column for any results that were previously imported into the Console even if they are searched again. The new name is used for new results matches only.
- File: Select the Search API file by clicking the browse button (the ...) next to the File field to browse for one. Search API files must first be created using the Search API.
- Icon: The icon which displays in the Identity Type column of the results grid. This field will be automatically populated with information from your Sensitive Data Type DLL. If the client finds a match based on the Sensitive Data Type DLL, it assigns the icon and the icon displays in the Identity Type column of the results grid.
Exact Match
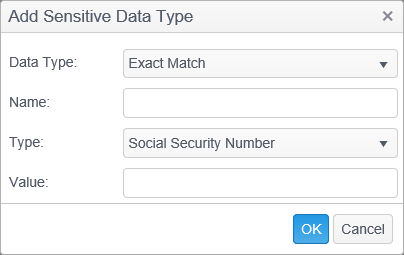
Exact Match allows you to search for specific information on the endpoint. This is most useful to find data unique to your environment such as a specific Social Security Number or Date of Birth. The Console does not provide any validation that the Personal Information you have entered is valid for the specified Identity Type.
- Name: Enter the name for the Exact Match in the Name field. The Data Type / Name combination must be unique. The name entered in this field will display in the Sensitive Data Type Name column on the Results Grid. If a search has been completed and results imported into the Console and the Name is subsequently changed, the original name will still be displayed in the Sensitive Data Type Name column for any results that were previously imported into the Console even if they are searched again. The new name will be used for new results matches only. This field is required.
- Type: The following Data Types are available:
- Social Security Number
- Credit Card Number
- Password
- Bank Account Number
- Drivers License
- Date of Birth
- Telephone Number
- E-Mail Address
- Personal Address
- Passport Number
- Mother's Maiden Name
- Canada: SIN
- United Kingdom: NINO
- United Kingdom: NHS
- Australia: TFN
- Value: The Value Field specifies the value used to qualify the data. This field is required.
Note: See the Exact Match Validation section of the Sensitive Data Types Content.
Note: Search API DLLs must be built with Visual Studio 2015.
Note: Any of the Sensitive Data Types data that you enter here will not be displayed on the Custom Types page in the client UI.
Note: A Sensitive Data Type will not have any effect on searches unless it is assigned to a policy. For detailed information, please refer to the Sensitive Data Types section of the Policies.
Note: The following names are reserved and cannot be used: SSN, CCN, PASS, ACCT, DL, DOB, PHONE, EMAIL, ADDRESS, PASSPORT, MAIDEN, CANADASIN, UKNINO, UKNHS, AUTFN, CUSTOMREGEX, CUSTOMKEYWORD, CUSTOMDICTIONARY, CUSTOMNAME, NPINUMBER, DEANUMBER, HEALTHINFO, FILEHASH.
View/Edit Button
To modify an existing Sensitive Data Type, click the entry you wish to modify and select the Edit button. The Edit dialog opens allowing you to make any desired changes. Click OK to accept the changes. Clicking the Cancel button discards any changes.
Remove Button
To delete a Sensitive Data Type, click the entry you wish to delete and select the Remove button. The Remove button permanently deletes the selected entry and cannot be reversed.
A prompt displays to confirm that you would like to delete the selected entry.

Import Button
Import a properly formatted XML Sensitive Data Type from a file. The Import button allows you to add the specified file to the Sensitive Data Types content. Select Import and then use the file selection dialog to locate the Sensitive Data Types XML file on disk.
Export Button
Export the selected Sensitive Data Types in an XML format. The Export button allows you to save a Sensitive Data Type to a file for offline viewing, distribution, or for importing and processing by another application. When saved in XML format, any sensitive information in the file is stored as clear text and the file itself should be treated as sensitive information.
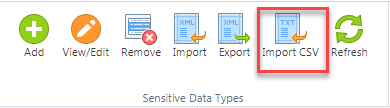
Import CSV Button
The CSV Import allows the creation of multiple Sensitive Data Types (SDTs) and Sensitive Data Definitions (SDDs). Each column in the CSV creates one SDT. Each row in the CSV creates one SDD referencing all the SDTs created from that row.
To import the CSV:
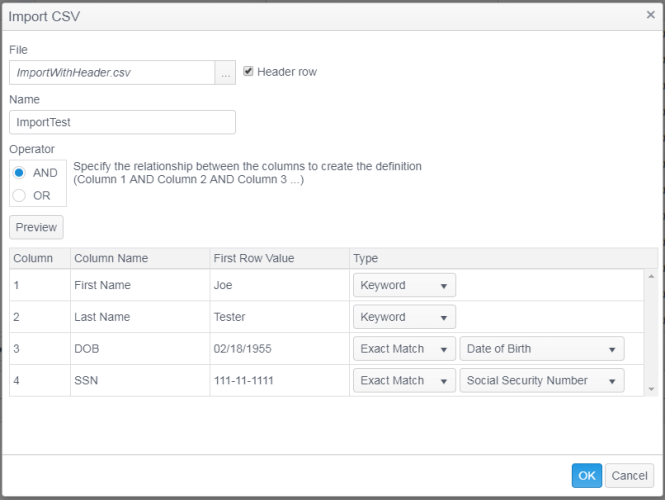
- Click the Import CSV button to open the Import CSV dialog box.
- Select a CSV file. The File Name text box is read-only and is set to the name of the selected file. It cannot be changed. The Name defaults to the file name without the extension. It can be edited, but selecting a new file overwrites any file name entered. The Preview button is enabled when the file is selected. If necessary, clear the current preview if one was previously loaded (including the UI warning message noted below).
- Manually select the Header row check box based on the file selected.
Note: The presence of a header row cannot be auto-detected. - Changing the value of the check box clears the preview data including the UI warning message that may display.
- Press the Preview button to process the contents of the selected file and load the preview area. This can be done multiple times.

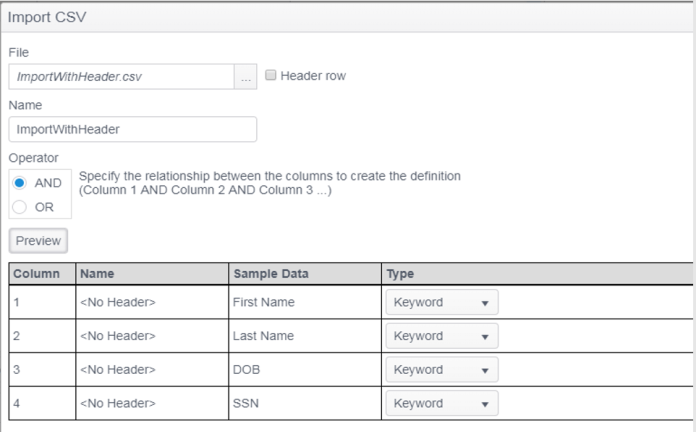
Example: Import file with a header is selected and Preview is pressed without checking the header row box. As shown, the header information is loaded into the sample data.
To correct the preview data:
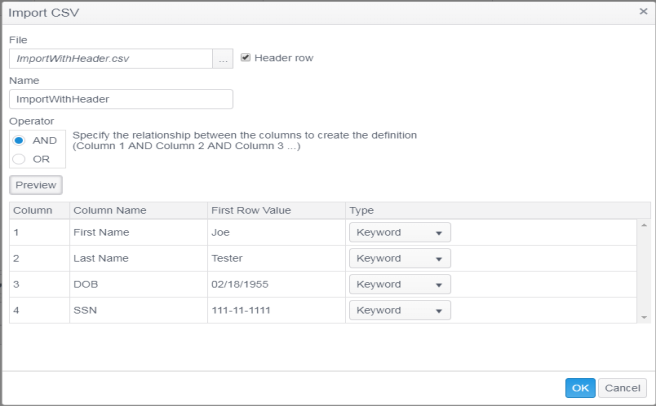
- Check the header row box and press Preview again. There is no need to select the file. The header information loads into the Name column and the sample data from the first data row in the import file properly displays.
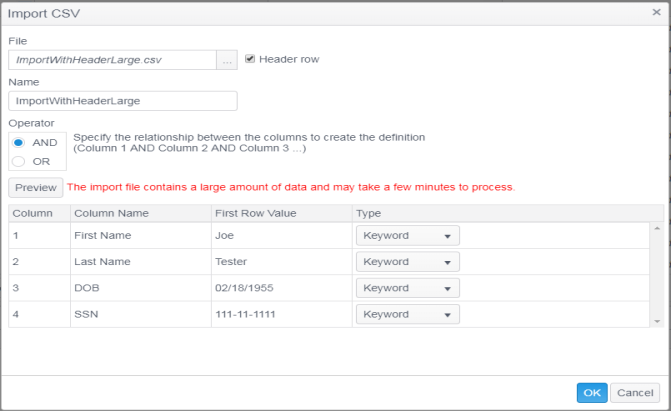
If the import file contains data that results in more than 100 custom types being created, a warning displays next to the Preview button (see image below).
The total count of types to be created is determined as follows:
Each column that has data creates one SDT. Each row creates one SDD. If a file has five columns and two rows, it creates 10 SDTs and two SDDs for a total of 12.
Once the preview loads, the Type for each column can be modified. There are two available options.
- Keyword (default)
- Exact Match
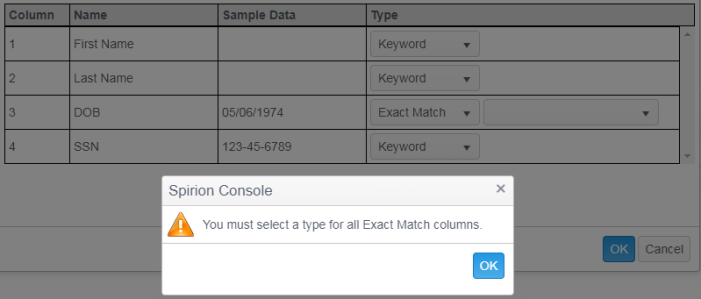
When exact match is selected you must also select the exact match type. A secondary drop-down displays as shown below.
Exact match types:
- Social Security Number
- Credit Card Number
- Password
- Bank Account Number
- Drivers License
- Date of Birth
- Telephone Number
- Email Address
- Personal Address
- Passport Number
- Mother's Maiden Name
- Canada: SIN
- United Kingdom: NINO
- United Kingdom: NHS
- Australia:TFN
Exact match types are validated using the same validation applied if you create a single Exact Match type outside of the import. If you select Exact Match | Social Security Number for a column, then all data for this column in the CSV must be a properly formatted SSN (xxx-xx-xxxx) or the import displays an error. Error scenarios and messages are noted at the end of this section.
- After making your type selections, press OK to complete the import.
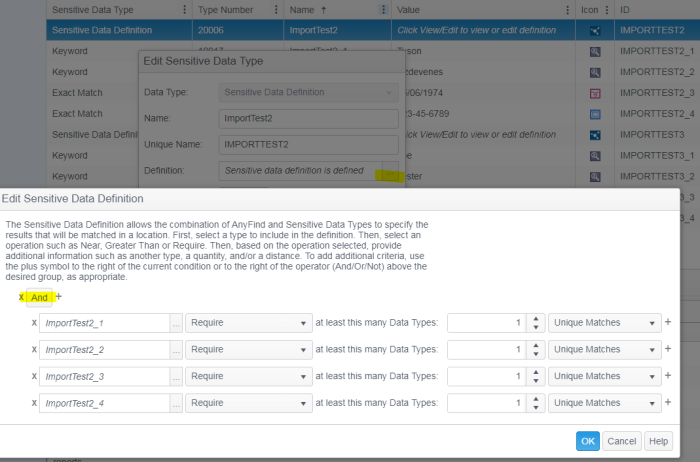
All the SDTs created have the name entered on the dialog with row column appended. The SDDs just have the name and row. Note: this is the actual row number in the CSV so if you have a header row (which is row 1) then the first SDD/SDTs created is row 2 (E.g. Name2_1; Name 2_2; etc.) as shown in the example below.

Final Selections on the Import Dialog
The “Operator” determines the logical operator used for the created SDDs across the entire row as shown in the images below.

Note the “And” highlighted. If OR is selected on the import dialog this would be “Or.”
Expected Errors
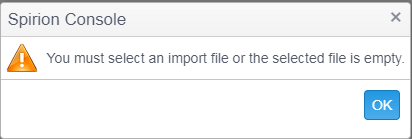
Empty File
This error occurs when selecting a file “…” if the file is completely empty (for example, not a single character or space is in the file.)
The error message displays when pressing the Preview button if, for example, the file only contains line feeds and spaces, or if a header row is checked and the file only contains a header row with no other data.
Duplicate Name
This error occurs if a name is entered on the import dialog previously used with another import.
Exact Match Validation
Example file with invalid SSN. If exact match SSN is selected for column four in the preview data, the following error displays.
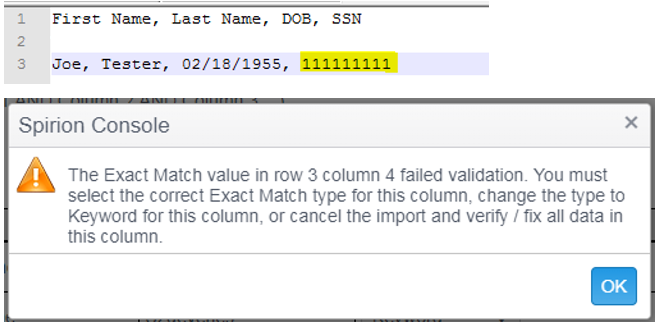
The error dialog only references the row and column of the first error found. If there are more rows in the import with invalid values, they should be corrected. All data must be entered properly to pass validation and complete the import.
Other Error Messages
Import With No File Selected
Import With No Name Entered
Import Exceeding Maximum Name Length
Import When Data Has Not Been Previewed
Import When Exact match Subtype Is Not Selected
Refresh Button
Click the Refresh button to update the Sensitive Data Types to reflect any changes since the last logon or refresh.