Policy List Group
|
In this article |
Policy Button
The Policy button provides the ability to create, duplicate or delete a policy.

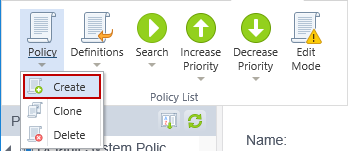
Create
Create a new system, user default or scheduled task policy to specify settings and/or search criteria for specified tags or endpoint(s). Scheduled Task is set as the default. Clicking Create displays the Policy Wizard set to the Policy tab.
Note: The policy type cannot be changed after it is created, but the Clone function can be used to assist with that task.
Clone
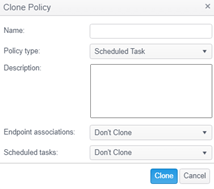
Make a copy of the selected policy and specify the new policy and policy type.
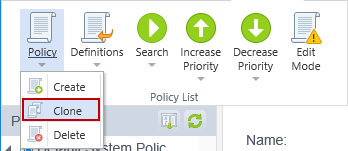
The cloned policy includes the Settings and Search Locations of the original policy. To clone a policy, you must first select the policy that you want to duplicate by left clicking on the policy name, then click the Policy button and select Clone.
| Field | Description |
|---|---|
| Name | Enter the name of the new policy that is created from the selected policy. This is the name that displays in the policy list. |
| Policy type |
When cloning a policy, the type of policy can be set as System, User Default, or Scheduled task. The type of a policy cannot be changed after it is created.
|
|
A System Policy applies to all users and all searches on an endpoint. Users of the Agent software are not able to modify a setting if that setting is defined in this policy. A setting defined in a System policy overrides the value of a setting in any other policy type. For example, if a setting is defined in a User Default policy and the same setting is defined in System policy with a different value, the System policy value is used as it is authoritative. A System policy is the only policy type that allows Global Ignore Lists to be assigned. |
|
A User Default Policy Applies only the first time the Agent software is run on each endpoint (unless specific settings are configured in a System policy). The user is able to modify their configuration for any setting defined in this policy. These policies are most commonly used to specify settings that are different than the internal application defaults, but that still allow the user to change those settings. User Default policies do not support the use of Global Ignore Lists or Scheduled Tasks. |
|
A Scheduled Task policy applies only to the scheduled tasks defined within the policy itself. The policy is only effective during those scheduled searches that are part of this policy. If there is a System policy applied to the same endpoints as this policy, the System settings takes precedence. Scheduled Task policies do not support the use of Global Ignore Lists. |
| Description | Use this field to enter a description of the policy. |
| Endpoint associations | Select Clone to include the list of endpoints to which the selected policy is applied. Select Don't Clone and the list of endpoints are not included on the cloned policy. |
| Scheduled Tasks | This defaults to Don't Clone. Don't Clone does not include the list of scheduled tasks on the cloned policy. Clone does include all the scheduled tasks from the policy being cloned. |
Delete
Use Delete to permanently delete the selected policy.

To delete a policy, first select the policy to delete , then click the Policy button and select Delete. A confirmation dialog prompts you to delete the selected policy. If an endpoint has already downloaded a policy for which you have selected Initiate Search, deleting the policy will not cancel that Search.
Definitions Button
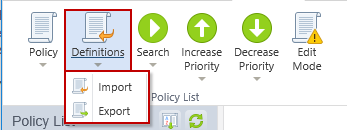
The Definitions button allows you to import or export the definition of a policy in xml format. A policy definition contains the settings and search locations of the selected policy. A policy can be exported as an xml file to be imported into another Console server. The most common scenario for exporting and importing policies is when moving policies from a staging/test Console to production.
Import
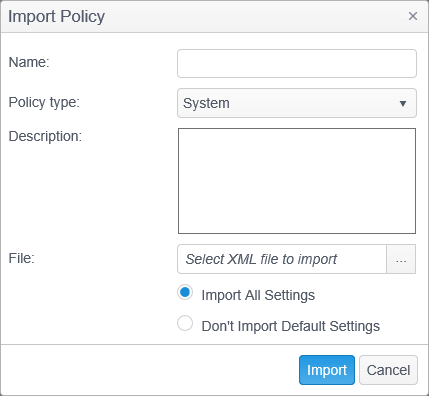
To import policy definitions from an XML file and add to the Policy List, select Import to display the Import Policy dialog.
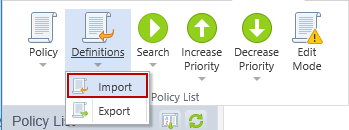
Then use the file selection dialog to locate the policy definitions xml file on disk.
| Field | Description |
|---|---|
| Name | Enter the name of the new policy that is be created from the imported XML file. This is the name that displays in the policy list. |
| Policy type | When importing a policy, the type of policy can be set as System, User Default, or Scheduled task. |
|
A System Policy applies to all users and all searches on an endpoint. Users of the Agent software are not able to modify a setting if that setting is defined in this policy. A setting defined in a System policy overrides the value of a setting in any other policy type. For example, if a setting is defined in a User Default policy and the same setting is defined in System policy with a different value, the System policy value is used as it is authoritative. A System policy is the only policy type that allows Global Ignore Lists to be assigned. |
|
A User Default Policy Applies only the first time the Agent software is run on each endpoint (unless specific settings are configured in a System policy). The user is able to modify their configuration for any setting defined in this policy. These policies are most commonly used to specify settings that are different than the internal application defaults, but that still allow the user to change those settings. User Default policies do not support the use of Global Ignore Lists or Scheduled Tasks. |
|
A Scheduled Task policy applies only to the scheduled tasks defined within the policy itself. The policy is only effective during those scheduled searches that are part of this policy. If there is a System policy applied to the same endpoints as this policy, the System settings take precedence. Scheduled Task policies do not support the use of Global Ignore Lists. |
| Description | Use this field to enter a description of the policy. |
| File | Select the XML file to import using the file selection dialog. |
| Import All Settings | Any settings that exist in the policy definition should be explicitly set in the imported policy. |
| Don't Import Default Settings | Only those settings that are different from the default values for the setting should be set in the imported policy. |
Note: When importing a policy definition which contains Cloud Storage Site entries, if the cloud storage provider has not been authenticated for the Console you are importing the definition into, the cloud storage site entries in the import file are ignored.
Export
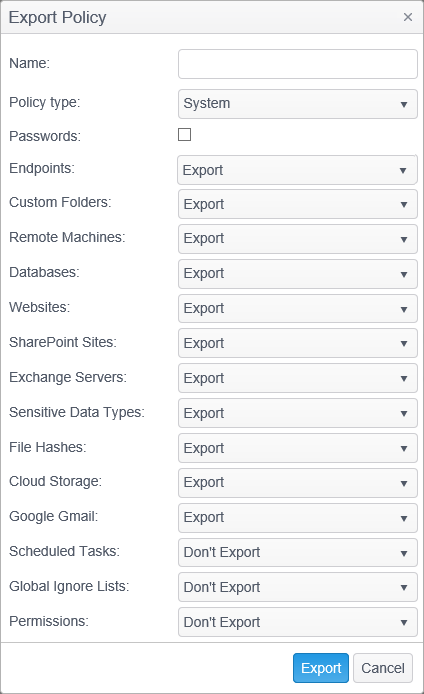
To export policy definitions to an XML file, select Export to display the Export Policy dialog.

To export a policy, the policy name and other policy details, click Export, then Then select the filename and click OK. A policy can be exported as an xml file to be imported into another Console server.
| Field | Description |
|---|---|
| Name | Enter the name to use when exporting the policy. This is the filename of the exported XML file that is created. |
| Policy Type | When exporting a policy, the type of policy can be set as System, User Default, Scheduled task or Local File. |
|
A System Policy applies to all users and all searches on an endpoint. Users of the endpoint software cannot modify a setting if that setting is defined in this policy. A setting defined in a System policy overrides the value of a setting in any other policy type. For example, if a setting is defined in a User Default policy and the same setting is defined in System policy with a different value, the System policy value is used as it is authoritative. A System policy is the only policy type that allows Global Ignore Lists to be assigned. |
|
A User Default Policy Applies only the first time the Agent software is run on each endpoint (unless specific settings are configured in a System policy). The user can modify their configuration for any setting defined in this policy. These policies are most commonly used to specify settings that are different than the internal application defaults, but that allow the user to change those settings. User Default policies do not support the use of Global Ignore Lists or Scheduled Tasks. |
|
A Scheduled Task policy applies only to the scheduled tasks defined within the policy itself. The policy is only effective during those scheduled searches that are part of this policy. If there is a System policy applied to the same endpoints as this policy, the System settings take precedence. Scheduled Task policies do not support the use of Global Ignore Lists. |
|
A Local File policy is intended for local usage on the Spirion Enterprise Endpoint. The Spirion Enterprise Endpoint uses the Policy XML format for importing and exporting its configuration. The endpoint's exported Policy XML is marked as Local File, though this XML file can be imported and targeted to a different policy type. Additionally, a policy in the Console can be exported for use as a configuration file specified on the command line at the Spirion Enterprise Endpoint. |
| Passwords | To include passwords that you have entered in the selected policy for remote machines, databases, websites and SharePoint sites, place a checkmark in the box. The XML file is plain text and an unsecured file. Files saved in this format must be kept secure. If the box is left unchecked, passwords are not included in the XML file. |
| Endpoints | Select Export to include the list of endpoints to which the selected policy is applied. Select Don't Export and the list of endpoints is not exported. |
| Custom Folders | Select Export and any Custom Folders you have defined in the selected policy are included in the XML file. Select Don't Export and the Custom Folders are not exported. |
| Remote Machines | Select Export and any Remote Machines you have configured in the selected policy are included in the XML file. Select Don't Export and the Remote Machines are not exported. |
| Databases | Select Export and any Databases you have defined in the selected policy are included in the XML file. Select Don't Export and the Databases are not exported. |
| Websites | Select Export and any Websites you have defined in the selected policy are included in the XML file. Select Don't Export and the Websites are not exported. |
| SharePoint Sites | Select Export and any SharePoint Sites you have defined in the selected policy are included in the XML file. Select Don't Export and the SharePoint Sites are not exported. |
| Exchange Servers | Select Export and any Exchange Servers you have defined in the selected policy are included in the XML file. Select Don't Export and the Exchange Servers are not exported. |
| Sensitive Data Types | Select Export and any Sensitive Data Types (Keyword, Regular Expression, Dictionary, Search API, Sensitive Data Definition) you have applied to the selected policy are included in the XML file. Select Don't Export and the Sensitive Data Types are not exported. |
| File Hashes | Select Export and any File Hashes you have defined in the selected policy are included in the XML file. Select Don't Export and the File Hashes are not exported. |
| Cloud Storage | Select Export and any Cloud Storage Site entries that you have defined in the selected policy are included in the XML file. Note: The cloud authentication information that you entered in the Cloud Authentication page is not exported. Select Don't Export and the Clouds Storage Sites are not exported. |
| Google Gmail | Select Export and any Google Gmail accounts you have defined. |
| Scheduled Tasks | Select Export and any Scheduled Tasks you have configured in the selected policy are included in the XML file. Select Don't Export and the Scheduled Tasks are not exported. |
| Global Ignore Lists | Select Export and any Global Ignore Lists you have applied to the selected policy are included in the XML file. Select Don't Export and the Global Ignore Lists are not exported. |
| Permissions | Select Export and any Permissions you have assigned to the selected policy are included in the XML file. Select Don't Export and the Permissions are not exported. |
Search Button
You can directly initiate a search on all tags and endpoints to which the selected policy has been applied via the Search button. The Search button is enabled for System and Scheduled Task type policies only.

Initiate Search
When initiating a search via the Search button, the Console will automatically create a policy with a task scheduled to execute immediately after the endpoint applies the policy. The endpoint will not start the search until it successfully downloads and applies the policy.
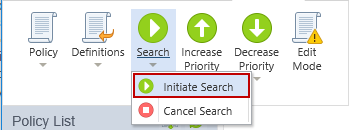
After selecting Initiate Search, the Search Now dialog displays.

Within this dialog, you can specify the following information:
- Run this search as this user: Specify the user context under which to run the task
- Local System Account: Specify that the search should be run as system or root. No graphical user interface will be available to the end user and the endpoint will run silently in the background. If Run task as soon as possible after a scheduled start is missed is configured when using the Local System Account, the next time the computer is powered on, it will execute the search. Because no user credentials are available, certain locations (such as Browser Data and some E-Mail) cannot be searched.
Using the Local System/Root account allows access to all local files, but will not allow access to E-Mails, Browsers, or remote files such as those on networked drives as those locations require user-specific authentication tokens.
- Locally Logged on User (Interactive): Specify that the search should run with the credentials of the user that is logged in at the endpoint system. The graphical user interface of the endpoint software will be accessible to the user. Only locations to which the user has access (for example NTFS file permissions) can be searched. If no user is logged in at the scheduled start time, the task will not unless Run task as soon as possible or run with randomized start time is selected, in which case the very next time a user logs in, the task will run.
- Locally Logged on User (Background): Specify that the search should run with the credentials of the user that is logged in at the endpoint system. No graphical user interface will be available and the endpoint will run silently in the background. Only locations to which the user has access (for example NTFS file permissions) can be searched. If no user is logged in at the scheduled start time, the task will not unless Run task as soon as possible or run with randomized start time is selected, in which case the very next time a user logs in, the task will run.
Using the Locally Logged On User for a search applies only to the first user account logged on to the physical desktop of the system. It does not apply to any terminal services (RDP) sessions or any users logged on to multiple desktops that occur while the primary desktop session is still active.
- Local System Account: Specify that the search should be run as system or root. No graphical user interface will be available to the end user and the endpoint will run silently in the background. If Run task as soon as possible after a scheduled start is missed is configured when using the Local System Account, the next time the computer is powered on, it will execute the search. Because no user credentials are available, certain locations (such as Browser Data and some E-Mail) cannot be searched.
- If Spirion is already running when this task begins, this task will: Only a single instance of the endpoint can run at a time and therefore, if the endpoint software is running when it is time for the task to execute, one of the following will occur:
- not stop any instances of Spirion: This option will cause the endpoint service on the endpoint (which executes the tasks) to wait for any already running instance of Spirion to finish before executing this task. While this wait occurs, no other scheduled tasks will be processed on the endpoint.
- stop all instances of Spirion and run this search: The endpoint service on the endpoint (which executes the tasks) will stop the current search and run this task. If a user is currently interacting with the application, using this option will cause the endpoint service to stop that search and close the application without prompting the user.
- When task missed: If the task could not be executed at its scheduled time (for example if the system was off or another task was waiting to be launched and the current task was not evaluated before its start time),
- do not run: The task will not be executed. If this task was scheduled to only run once, it will never execute. Otherwise it will execute the next time it is scheduled to do so.
- run as soon as possible: The task will be executed as soon as possible after the reason for it being missed is resolved. For example, if the task is a user task and no user was logged on, it will execute as soon as the user logs on. If the task was system task and the system was off, it will execute as soon as it is powered back on.
- run with randomized start time After (min.): [Minutes] Before (min.): [Minutes]: The task will be executed after a random delay after the reason for it being missed is resolved. For example, if this option is enabled and set to run after 5 minutes and before 30 minutes, and it is a user task but no user was logged on, the task will execute somewhere between 5 and 30 minutes after the user logs on.
- Always Run: Select this option to have the task launch as soon as the Endpoint receives and processes it. This option is only available when choosing run as soon as possible or run with randomized start time.
- Skip if this many hours have passed: Select an expiration time in hours for the task. (i.e. If set to 4 hours, that means that if 4 hours have passed since the scheduled start time, the task will not start.) This option is only available when choosing run as soon as possible or run with randomized start time.
- Skip if not executed on same day as scheduled: Select this option to skip the task if it does not execute on the same day that it was scheduled. (i.e. If the search was scheduled to run on Monday but the endpoint did not receive the task until Tuesday, then the search will not run.) This option is only available when choosing run as soon as possible or run with randomized start time.
- Expire this task (never run after): [Date and Time]: If the task was unable to start between its scheduled time and this time, cancel the task and do not execute it.
- Synchronize across time zones: Specifies that the Start Date/Time is GMT time. When this option is enabled, the time entered is universal across all time zones. This means that three endpoints in three different time zones will all start the task at the same time, regardless of time zone. For example if the time is 12:00 PM and this option is selected, the endpoints will all execute the task simultaneously at noon in London, 7AM (EST) in New York and 4AM (PST) in San Francisco.
The status of the task can be viewed on the Status tab.
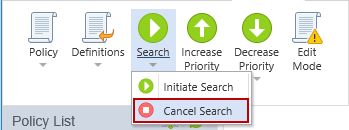
Cancel Search
Cancel Search will not stop a search that is currently running. Cancel Search will remove any pending searches created by using the Initiate Search option. If the endpoint has already downloaded a policy that included the request to perform a search, you cannot cancel the search from the Console. Canceling a search that was initiated on a policy will also cancel a search that was initiated on an endpoint. Likewise, canceling a search that was initiated on an endpoint will also cancel a search that was initiated on a policy.
Increase Priority Button
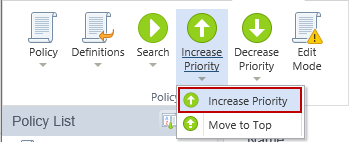
Change the priority of the selected policy to be higher than the policy above it in the Policy List. The policy at the top of the list has the highest priority and the policy at the bottom of the list has the lowest priority. For any conflicting settings in policies that apply to the same endpoint, the setting from the policy with the higher priority is used. Note: The Increase Priority button is disabled when policies are sorted by name.

Increase Priority
Increases the priority of the selected policy to be higher than the policy currently above it in the policy list.
Move to Top
Moves the selected policy to the top of the policy list and makes it the highest priority policy.

If another user has already changed the priority of the same policy, the following message displays: "The priority has not been changed because the list has been re-ordered in the meantime by another user." Please Refresh the Policy List to see the changes that the other user has made and then make your changes.
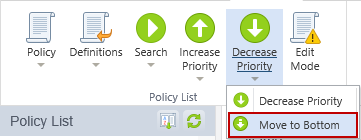
Decrease Priority Button
Changes the priority of the selected policy to be lower than the policy below it in the Policy List. The policy at the top of the list has the highest priority and the policy at the bottom of the list has the lowest priority. For any conflicting settings in policies that apply to the same endpoint, the setting from the policy with the higher priority is used. Note: The Decrease Priority button is disabled when policies are sorted by name.
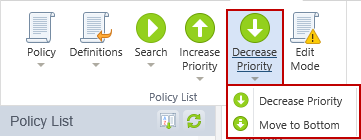
Decrease Priority
Decreases the priority of the selected policy to be lower than the policy currently below it in the policy list.
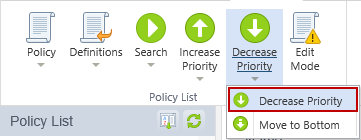
Move to Bottom
Moves the selected policy to the bottom of the policy list and make it the lowest priority policy.
If another user has already changed the priority of the same policy, the following message displays: "The priority has not been changed because the list has been re-ordered in the meantime by another user." Please Refresh the Policy List to see the changes that the other user has made and then make your changes.
Edit Mode Button
Changes the state of the selected policy to edit mode. When in edit mode, changes to the policy are not applied to the endpoints. When exiting edit mode, the option is presented to save or discard any changes. If the changes are saved, the endpoints receives those changes the next time they poll.
